
This article explains how to change the video frame rate and video quality with gameplay captures in Windows 11.
When playing your favorite games on Windows, you can capture important and cool moments and save the video for later. To do that, press the Windows logo key + ALT + G to capture the moment.
The gameplay moments you capture are automatically saved in the Video folder of your home directory. However, Windows lets you change that default location to another drive or folder with more free space and set the max recording length for video clips.
The video frame rate and quality can also be critical when capturing gameplay moments. Changing the video frame rate and quality can be important when capturing gameplay moments because it affects the smoothness and overall look of the video.
A higher frame rate can make the video look smoother and more fluid, while a lower frame rate can result in choppiness and missing frames.
Similarly, a higher video quality can result in a sharper and more detailed video, while a lower quality can result in pixelation and blur.
Change video frame rate and video quality with gameplay capture
As mentioned above, choosing the best frame rate and quality can produce better video playback when capturing your gameplay moments.
Here’s how to change the video frame rate and quality with gameplay capture.
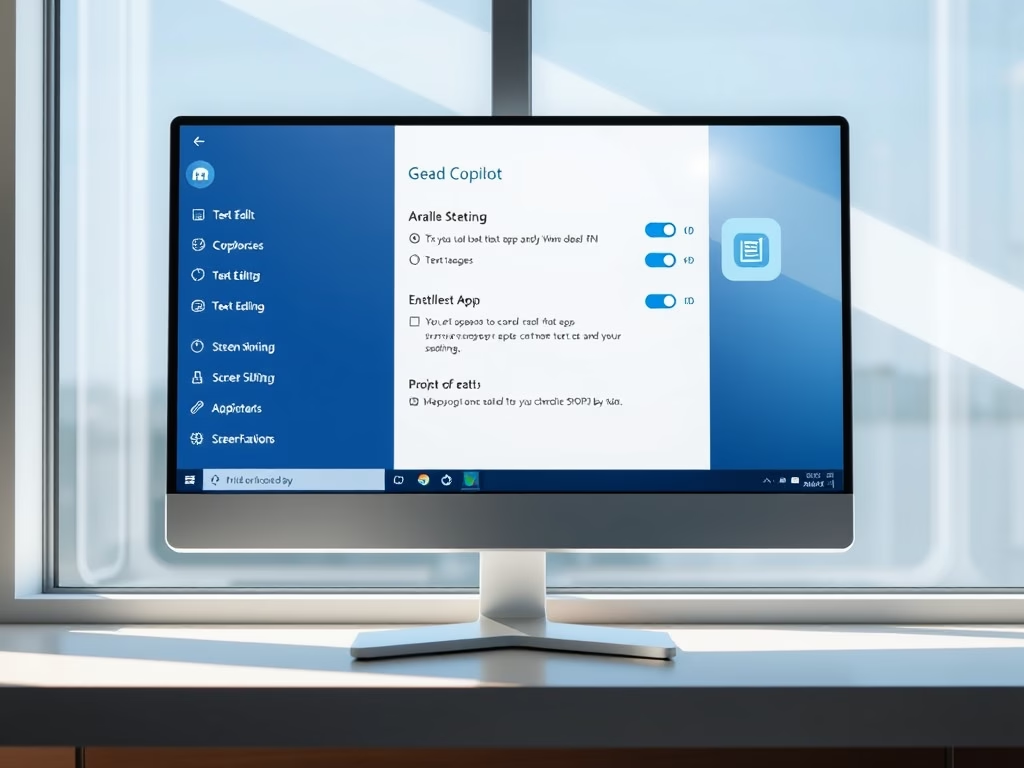
First, open the Windows Settings app.
You can do that by clicking on the Start menu and selecting Settings. Or press the keyboard shortcut (Windows key + I) to launch the Settings app.
When the Setting app opens, click the Gaming button on the left.

Select the Captures tile on the right to expand it.

On the Gaming -> Captures setting pane, select the “Video frame rate” and “Video quality” tiles.
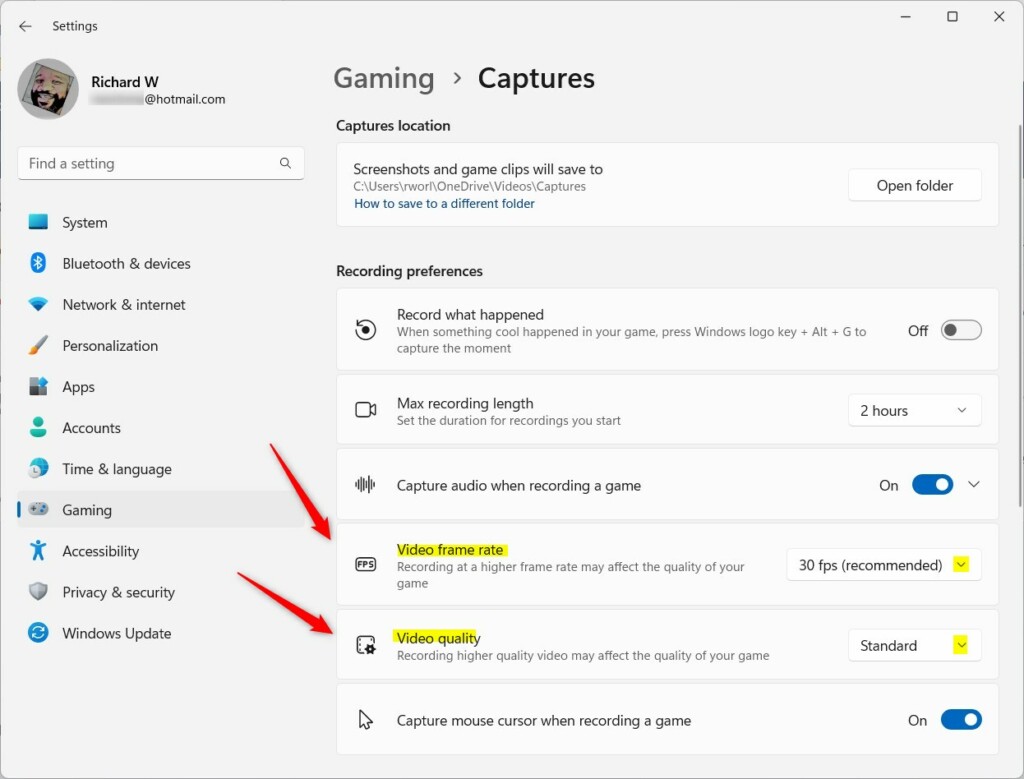
Expand additional hidden settings by clicking on the down-caret to the right of the tile to configure each setting.
By default, Windows will select the recommended frame rate designed for your device and standard video quality.
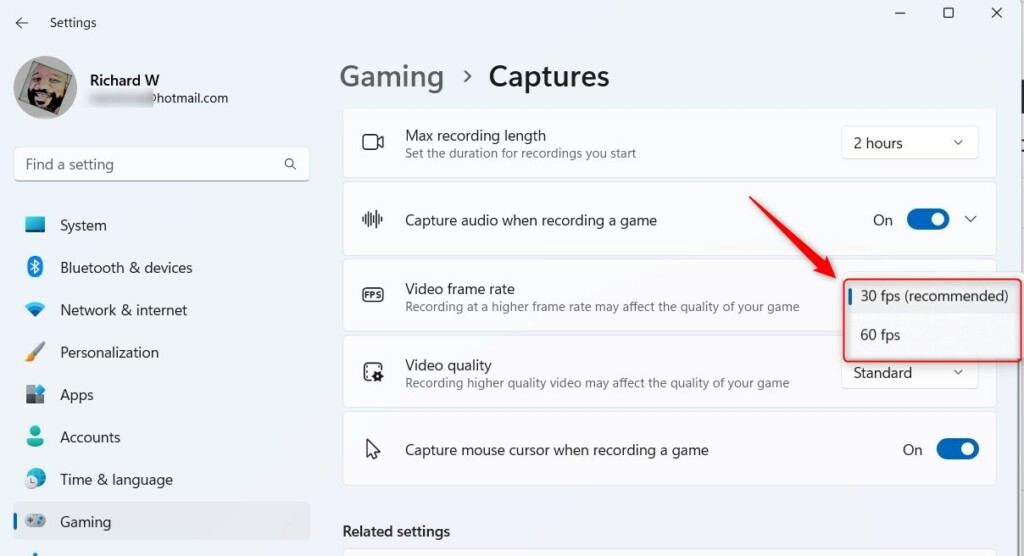
Based on your device’s hardware resources, you will see these frame rates to select from:
- 30 fps (recommended)
- 60 fps
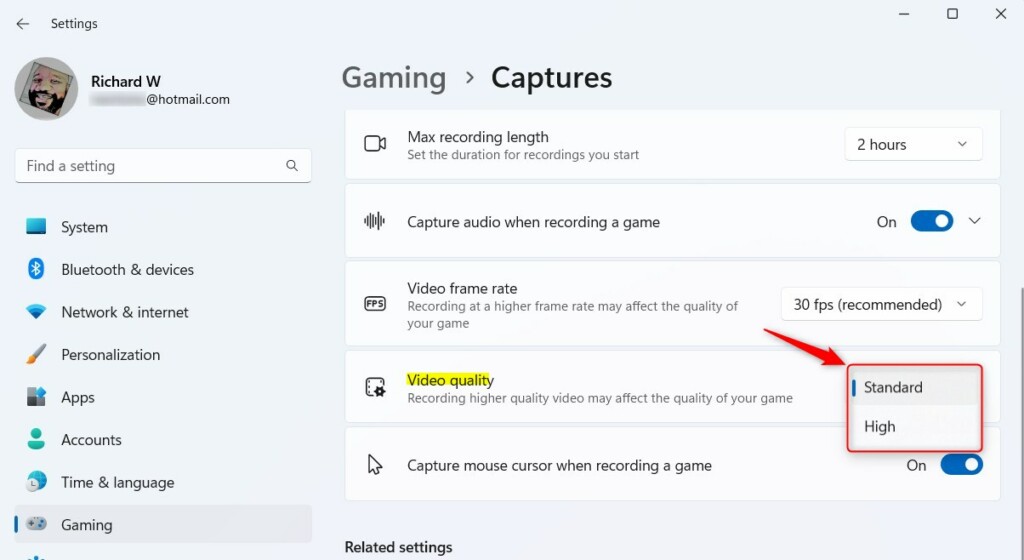
Video quality options are:
- Standard
- High
Close the Settings app when you are done.
That should do it!
Conclusion:
- Adjusting the video frame rate and quality can enhance gameplay captures’ smoothness and visual appeal.
- Windows 11 offers options to change the frame rate and video quality for capturing gameplay moments, allowing customization based on hardware resources and preferences.
- By following the steps outlined in this article, users can optimize their gameplay video captures for an improved viewing experience.
- Feel free to share feedback or additional insights through the comments section below.
Leave a Reply