How to Change Handwriting Font in Windows 11

Changing the handwriting font in Windows 11 lets you pick a different typeface for text converted from your handwritten notes.
The Windows 11 Handwriting Panel, a tool for converting what you write with a pen or finger into typed text, usually uses a standard font.
However, you can change this default font to something that better suits your style, making your digital notes look more personal.
You can change the handwriting font in Windows 11 through Settings or the Registry Editor. Navigate to Settings > Bluetooth & devices > Pen & Windows Ink, then select your font. Alternatively, use regedit to modify 🗝️HKEY_CURRENT_USER\Software\Microsoft\TabletTip\EmbeddedInkControl.
Why change your handwriting font?
Changing your font lets you personalize your experience. It can make your typed notes easier to read or simply match the style you prefer. It is a great way to make your Windows 11 personalization unique.
What happens when you are done?
Once you finish these steps, your handwriting will automatically convert to the new font style you selected every time you use the panel. Your system will render your scribbles using the specific typeface you chose.
Technical Limitations and Font Compatibility
Comparison Table: Font Compatibility
| Font Type | Compatibility |
|---|---|
| Standard (.ttf) | High |
| OpenType (.otf) | High |
| Decorative/Script | Low (May cause rendering errors) |
Change the font using Settings
You can change the handwriting font in Windows 11 using the Settings app, making it easy to pick a new style for your digital writing. Simply go to Bluetooth & devices, then select Pen & Windows Ink to find the option to adjust your handwriting settings.
- Open the Settings app by pressing Windows key + I.
- Click Bluetooth & devices on the left menu.
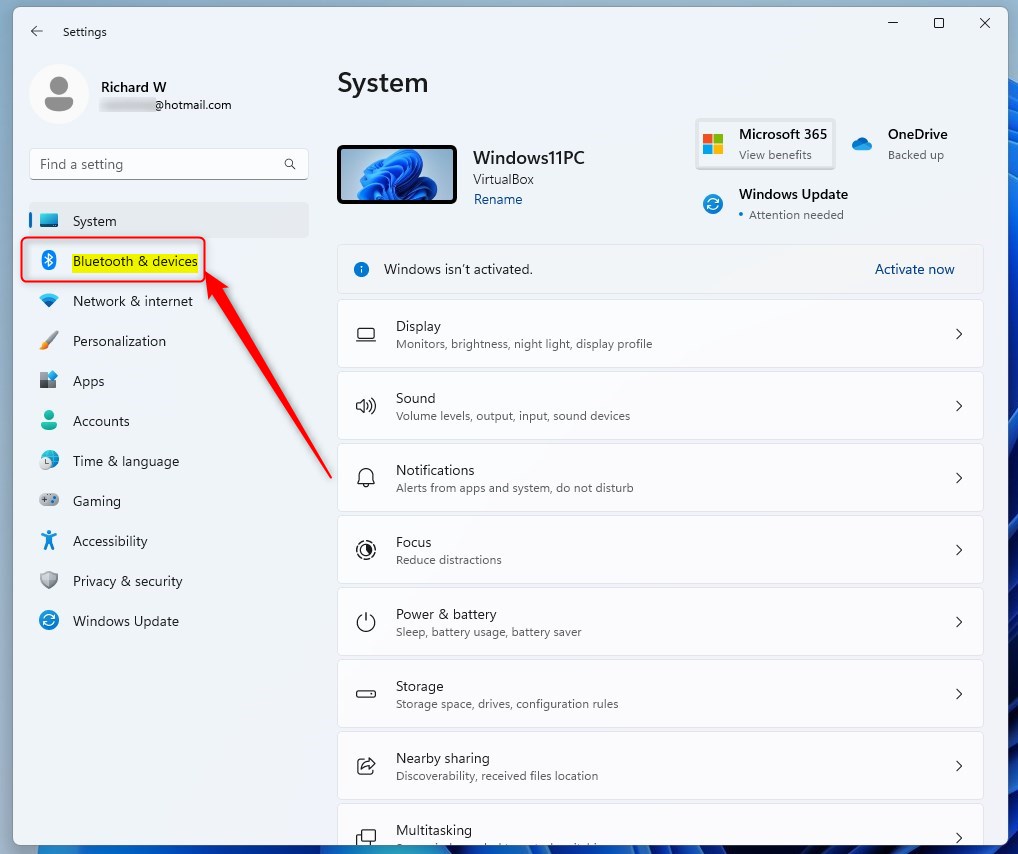
windows 11 bluetooth and devices - Select the Pen & Windows Ink tile on the right.
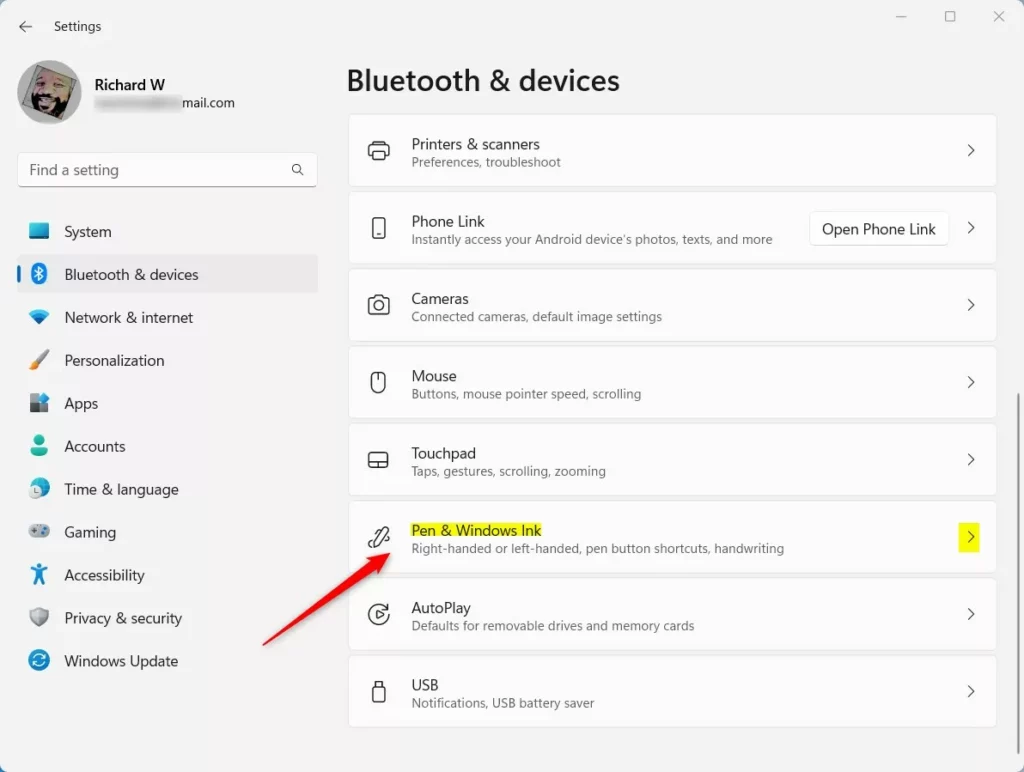
Windows pen and windows ink tile - Under the Handwriting section, click to expand the Use your handwriting to enter text tile.
- Choose your preferred font from the list.
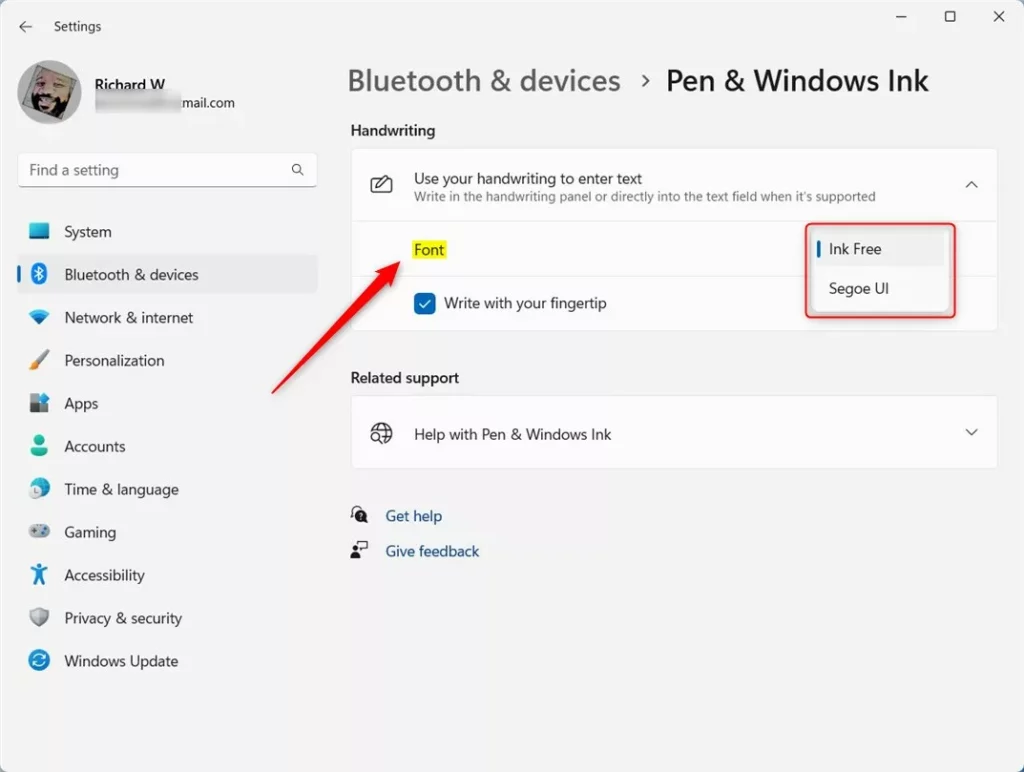
Settings menu for changing the handwriting panel font in Windows 11 - Close the Settings app.
Change the font using the Registry Editor
Changing the handwriting font in Windows 11 can also be done using the Registry Editor, a tool for advanced settings. You’ll need to open regedit and carefully navigate to a specific folder called TabletTip to make these changes.
- Press Windows key + R, type regedit, and press Enter.
- Go to this path:
HKEY_CURRENT_USER\Software\Microsoft\TabletTip\EmbeddedInkControl - If you do not see the EmbeddedInkControl folder, right-click on the TabletTip folder, select New, then Key and name it
EmbeddedInkControl. 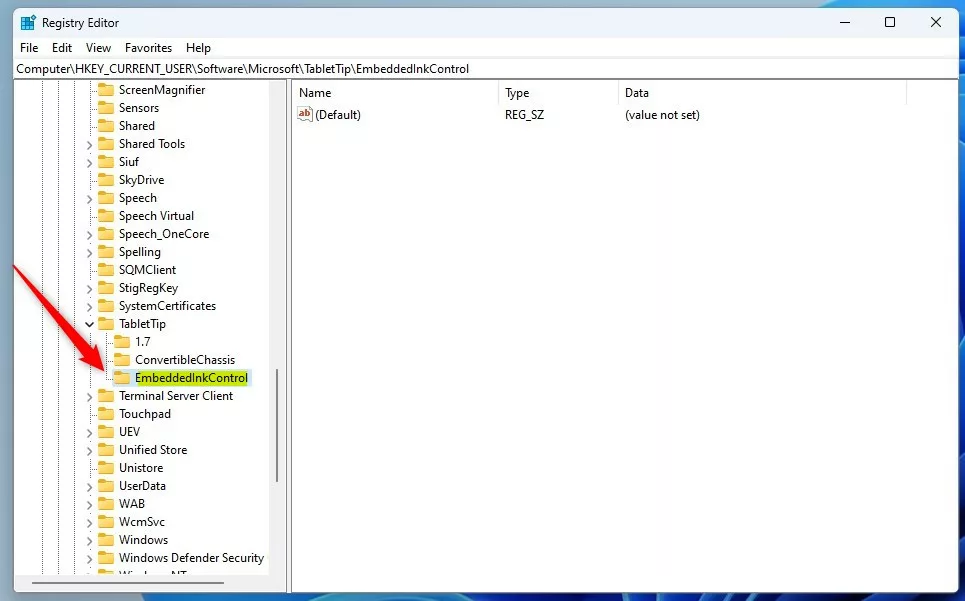
Windows enable or disable writing with fingertip registry - Right-click in the empty space on the right side, select New, then String Value. Name it
LatinFontName. - Double-click
LatinFontNameand type the exact name of the font you want to use. You can find installed fonts inC:\Windows\Fonts. 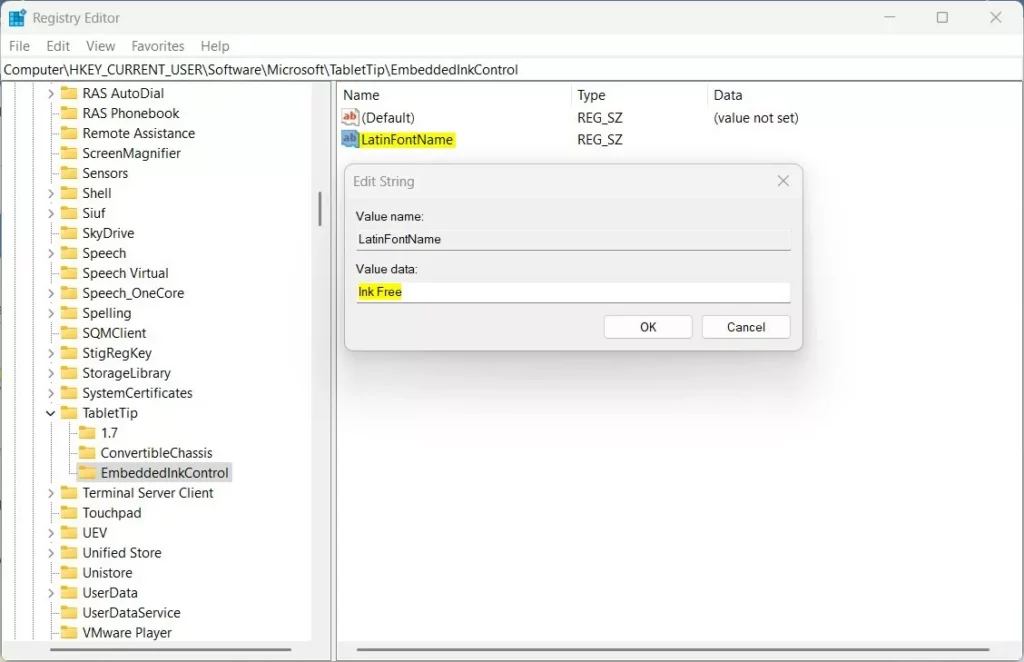
Change the handwriting penel font via Windows Registry - Save your changes and restart your computer.
Summary
You can change the handwriting font in Windows 11 using either the Settings app or the Registry Editor.
Does changing the system font affect the handwriting panel?
No, changing your system-wide font settings, such as the default Segoe UI, does not automatically change the handwriting panel font. The handwriting panel uses its own specific configuration settings within the Windows Registry or the Pen & Windows Ink menu to determine which font to use for text conversion.
Why does my custom font not appear in the handwriting panel?
Your custom font might not show up in the Windows 11 handwriting panel if it’s not installed correctly in the Fonts folder or if it’s an unsupported file type.
Was this guide helpful?

About the Author
Richard
Tech Writer, IT Professional
Richard, a writer for Geek Rewind, is a tech enthusiast who loves breaking down complex IT topics into simple, easy-to-understand ideas. With years of hands-on experience in system administration and enterprise IT operations, he’s developed a knack for offering practical tips and solutions. Richard aims to make technology more accessible and actionable. He's deeply committed to the Geek Rewind community, always ready to answer questions and engage in discussions.


[…] fingertip on the handwriting panel, the text you entered will automatically be converted to Ink Free font type with medium […]