How to Enable Automatic Page File Size in Windows 11

Automatic page file size in Windows 11 lets your computer handle virtual memory on its own. This prevents your PC from running into problems if you manually set it incorrectly.
The page file, which is usually a file named pagefile.sys on your C: drive, acts like extra RAM. It holds data your computer isn’t using often when your main memory is full.
When Windows 11 automatically adjusts this page file, your PC can perform better based on what it’s doing at that moment. This is important for stopping crashes and making sure your system can save important error information if something goes wrong.
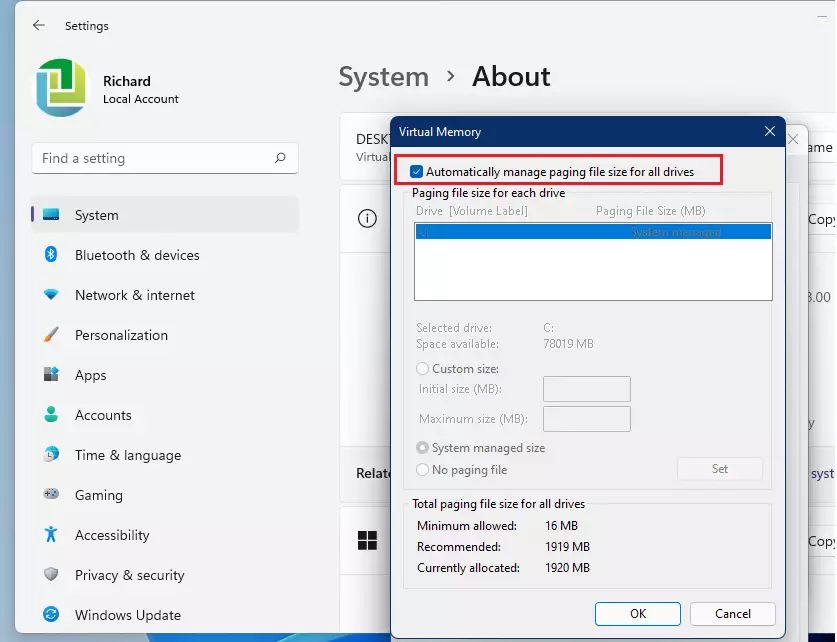
Check the box Automatically manage paging file size for all drives in the Virtual memory settings. Access this through Settings System About Advanced system settings Performance Settings Advanced tab > Virtual memory Change. Restart your computer to apply the changes.
How to Enable Automatic Page File Size in 🪟 Windows 11
Turning on the automatic page file size in Windows 11 lets your PC handle memory better by itself. This setting helps Windows decide the best size for your page file, which is like extra hard drive space used as temporary memory, without you needing to figure it out.
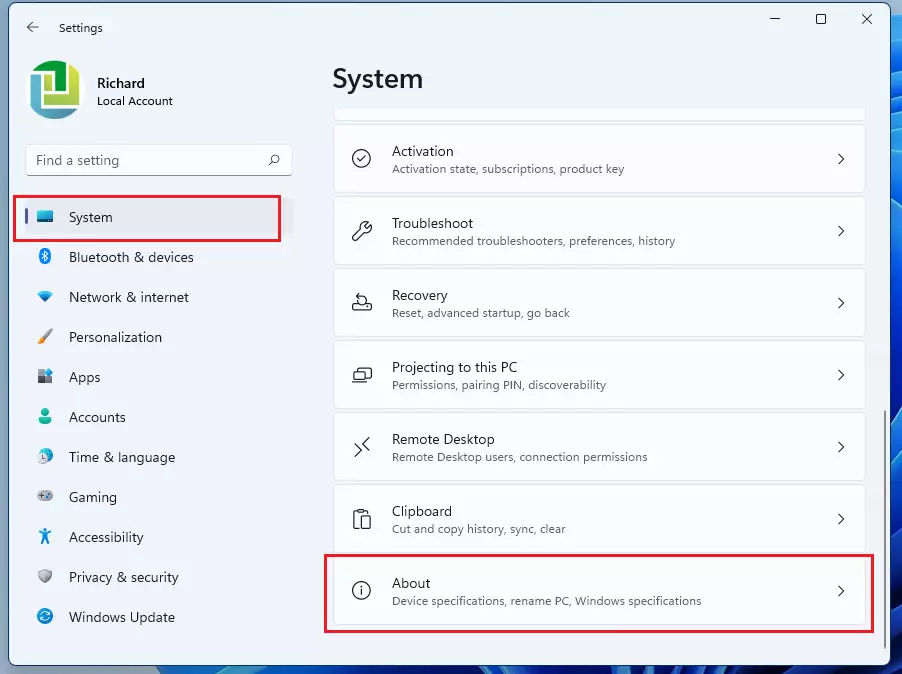
1. Press Windows key + I to open Settings.

2. Click System, then scroll down and select About.
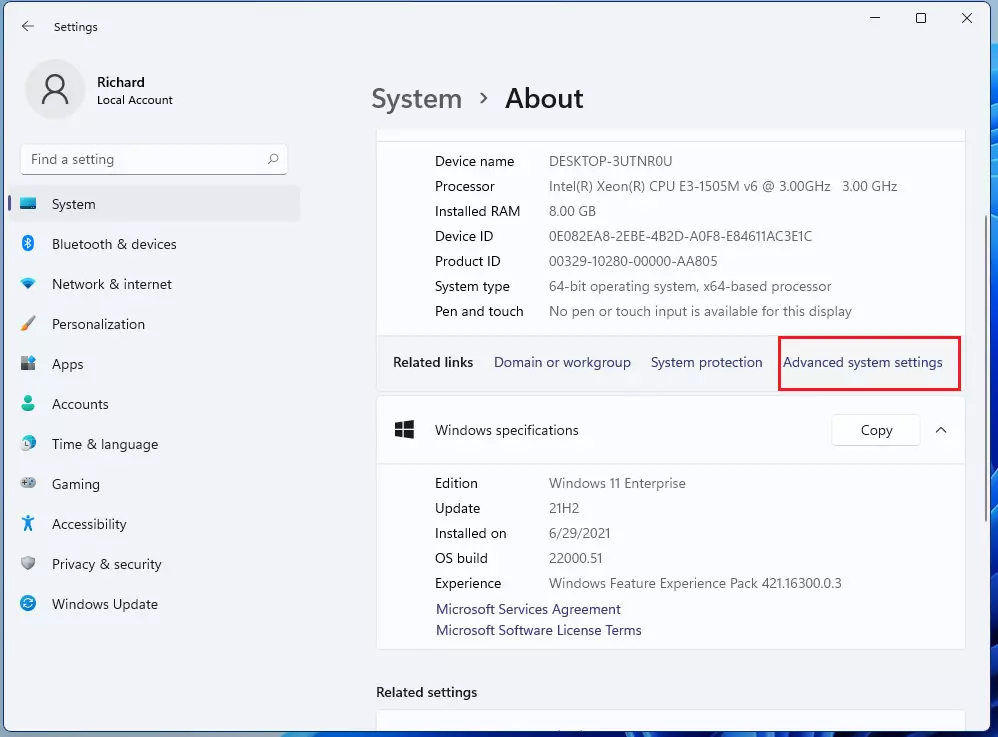
3. Click Advanced system settings.
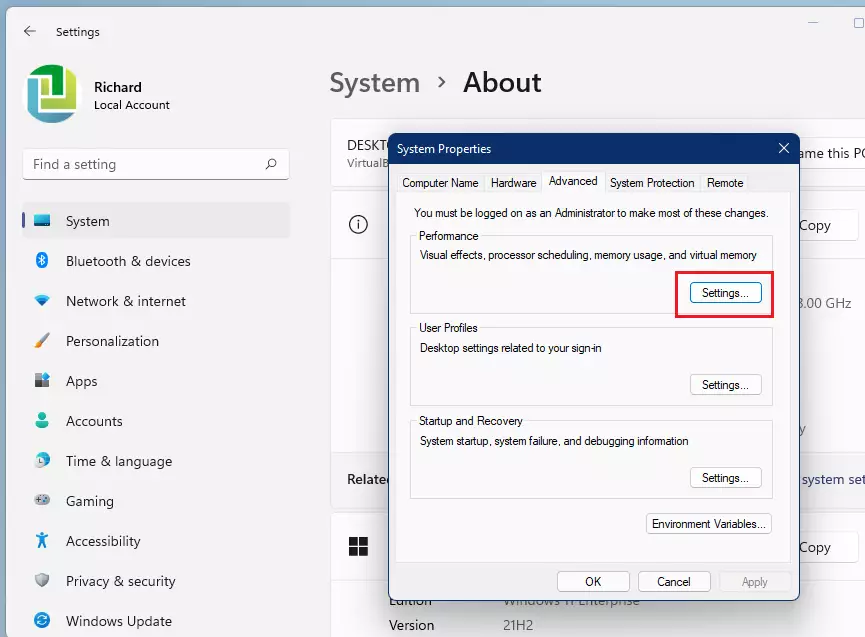
4. Under the Advanced tab, click Settings in the Performance section.
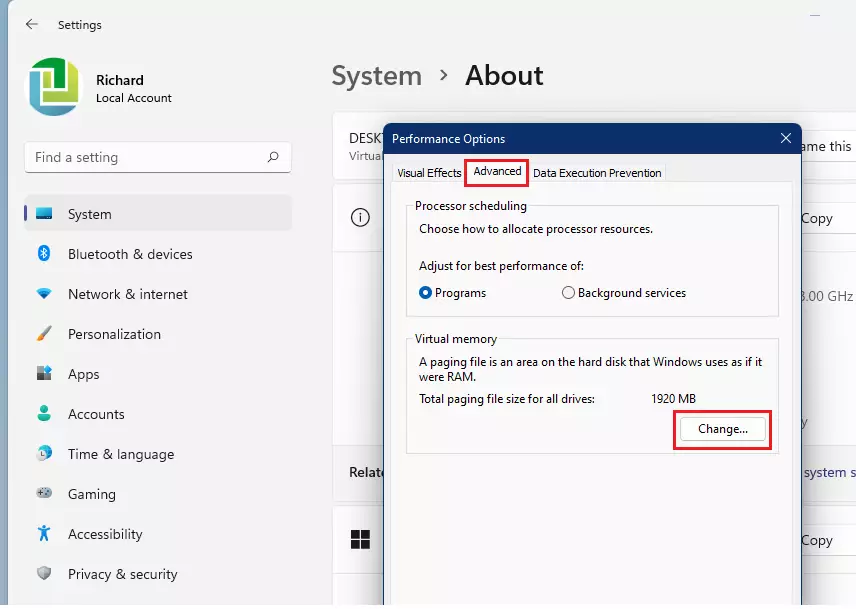
5. Click the Advanced tab and select Change under Virtual memory.
6. Check the box Automatically manage paging file size for all drives.
7. Restart your computer to apply changes.
How to Enable Automatic Page File Size in 🪟 Windows 10
The process is similar in Windows 10. Right-click This PC on your desktop, select Properties, then click Advanced system settings. Follow the same steps listed above to reach the Virtual memory menu.
Performance and Troubleshooting
Even with ample RAM, such as 32GB or more, keeping the automatic page file size enabled is generally recommended.
For those interested in a deeper technical dive, Microsoft’s official documentation on paging files offers more comprehensive details.
Summary
Enabling the automatic page file size is the best way to ensure your Windows system manages virtual memory effectively. This feature prevents crashes, supports system diagnostics, and optimizes performance without requiring manual adjustments. Always keep this setting enabled unless you have a specific technical reason to change it.
Does an automatic page file size slow down my PC?
No, it does not slow down your PC. In fact, it improves performance by allowing Windows to manage memory efficiently. If the file is too small, your system may experience slowdowns or errors. Automatic management ensures the system has exactly what it needs to run smoothly.
Can I move the page file to a different drive to improve speed?
Yes, you can move the page file to a different drive. If you have a faster SSD, moving the page file there can improve system responsiveness. However, for most users, keeping it on the primary 📁C:\ drive is sufficient and less prone to configuration errors.
Was this guide helpful?

About the Author
Richard
Tech Writer, IT Professional
Richard, a writer for Geek Rewind, is a tech enthusiast who loves breaking down complex IT topics into simple, easy-to-understand ideas. With years of hands-on experience in system administration and enterprise IT operations, he’s developed a knack for offering practical tips and solutions. Richard aims to make technology more accessible and actionable. He's deeply committed to the Geek Rewind community, always ready to answer questions and engage in discussions.


No comments yet — be the first to share your thoughts!