How to Manage Background Apps in Windows 11
You manage background apps in Windows 11 by controlling which applications can run processes even when you’re not actively using them.
These background processes consume system resources, impacting both performance and battery life.
For example, disabling unnecessary background apps can boost your laptop’s battery life by up to 15%.
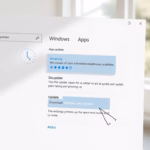
Windows 11 offers three primary settings: “Always,” “Power optimized,” and “Never,” allowing you to fine-tune app activity.
By adjusting these settings, you prevent your PC from slowing down and conserve valuable battery power.
Was this guide helpful?

About the Author
Richard
Tech Writer, IT Professional
Richard, a writer for Geek Rewind, is a tech enthusiast who loves breaking down complex IT topics into simple, easy-to-understand ideas. With years of hands-on experience in system administration and enterprise IT operations, he’s developed a knack for offering practical tips and solutions. Richard aims to make technology more accessible and actionable. He's deeply committed to the Geek Rewind community, always ready to answer questions and engage in discussions.


No comments yet — be the first to share your thoughts!