How to Repair Apps in Windows 11
Sometimes, your apps in Windows 11 might freeze or stop working right. This guide shows you how to use built-in tools to fix them.
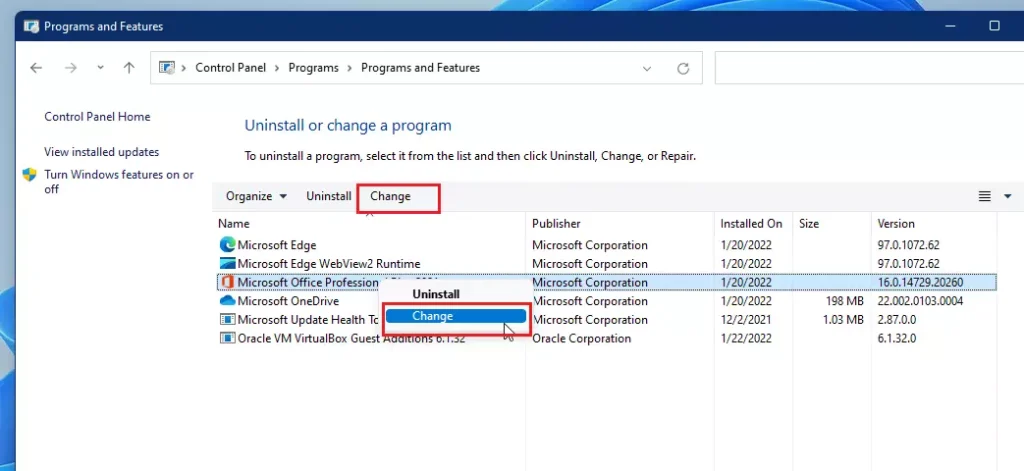
Go to Settings > Apps > Installed apps, click the three dots next to the app, select Advanced options, and click Repair. For older programs, open Control Panel > Programs > Programs and Features, right-click the program, and select Repair or Change.
Why repair your apps?
An app might stop working correctly because its files or settings have become corrupted. Repairing the app refreshes its internal data without you having to uninstall and reinstall it entirely. This saves you time and keeps your personal preferences intact.
What happens when you are done?
Once the repair is done, Windows will have refreshed the app’s core files. In most cases, your data remains safe. However, some apps might reset to their original default settings, and you may need to sign in again.
Prerequisite: Check for Windows Updates
Before troubleshooting, ensure your system is up to date. Go to Settings > Windows Update and click Check for updates. Many app issues stem from outdated system components.
Repairing apps via Settings
Windows 11 lets you repair apps from the Microsoft Store right in the Settings app, which is a simple way to fix problems without having to uninstall and reinstall them.
- Click the Start button and open Settings.
- Select Apps, then click on Installed apps.
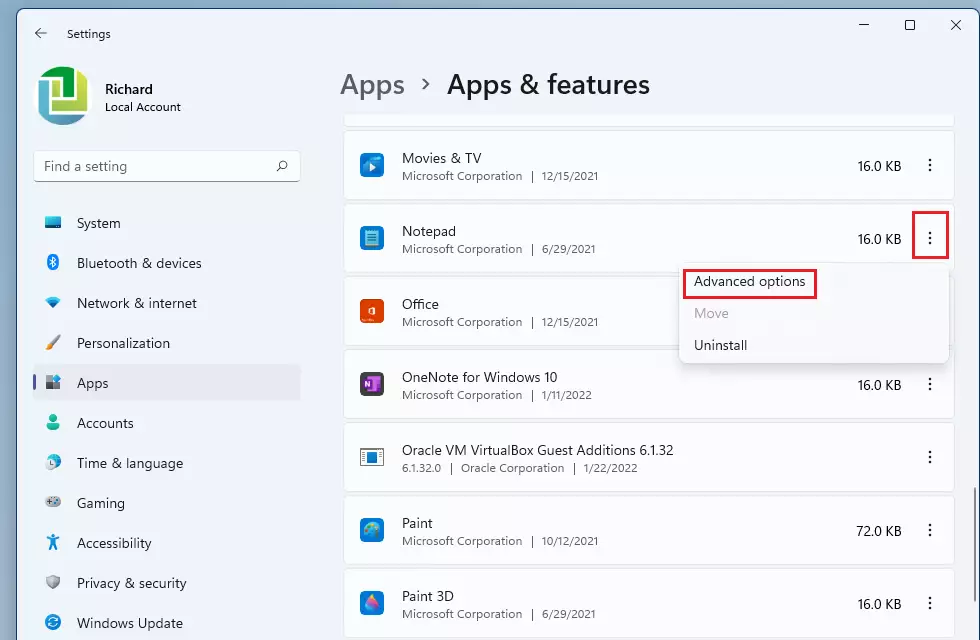
- Find the app you want to fix in the list.
- Click the More (three dots) icon next to the app.
- Select Advanced options. Note: If you do not see this link, the app does not support a repair through this menu.
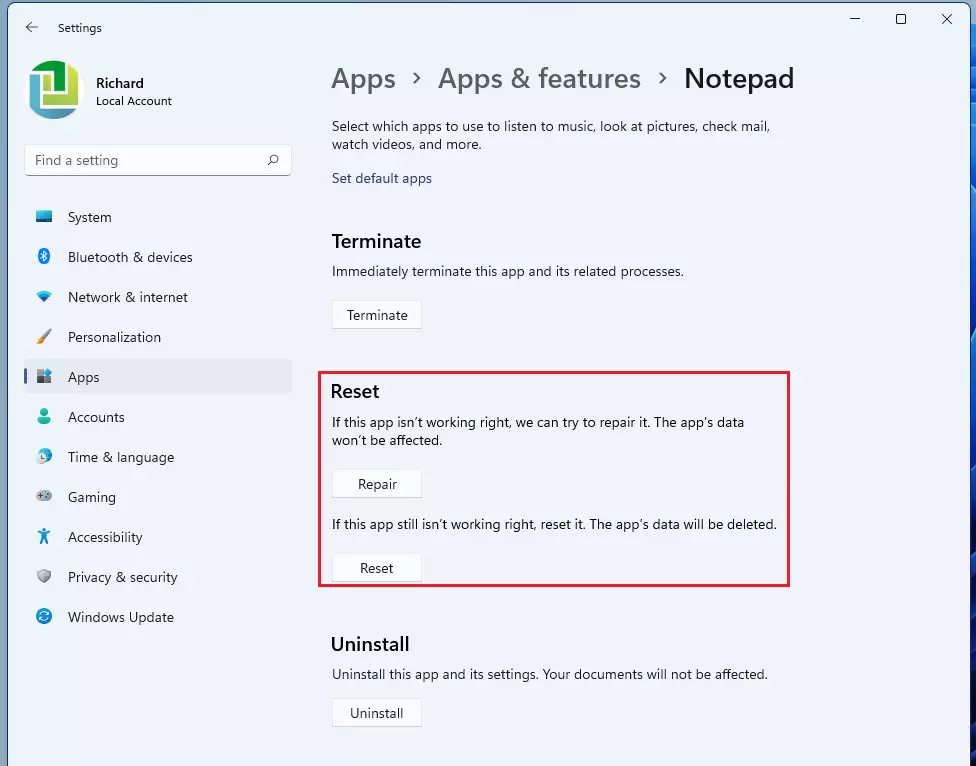
- Click the Repair button if it is available. If the app still does not work, you can click Reset to start fresh.
Repairing programs via Control Panel
If a desktop program you installed on your Windows 11 PC isn’t working right, you can often repair it using the Control Panel, which can fix issues without needing a full reinstall.
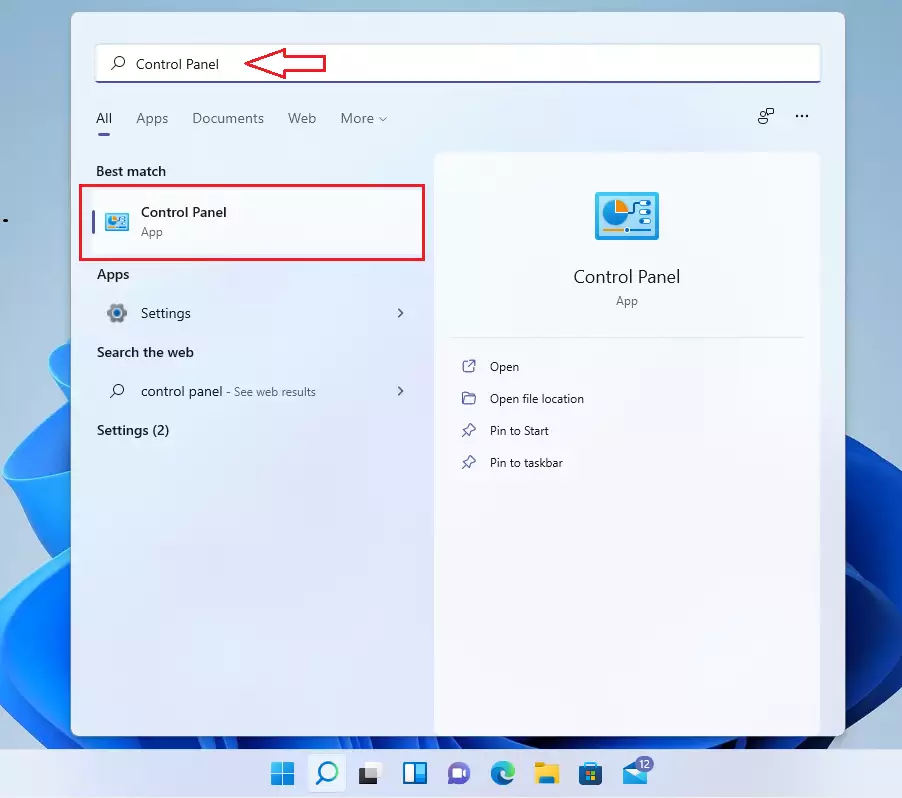
- Search for Control Panel in your taskbar and open it.
- Click Programs, then select Programs and Features.
- Find the program you want to fix in the list.
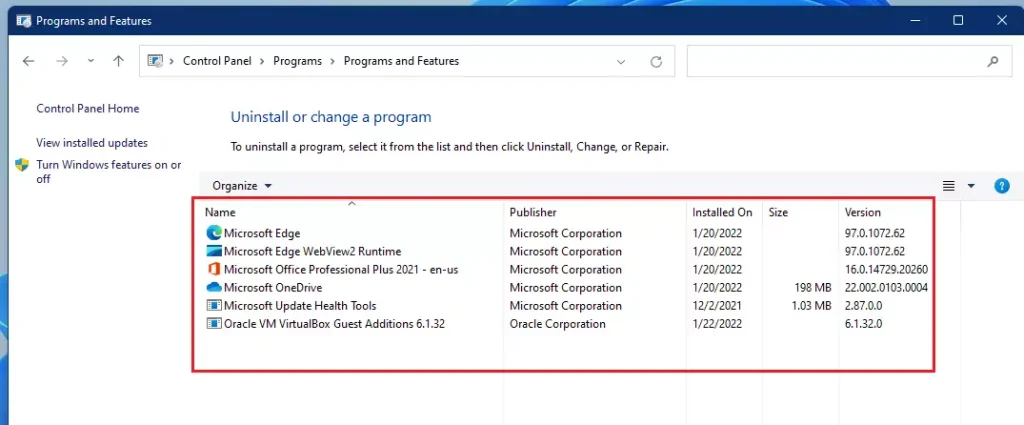
- Right-click the program name and select Repair. If that option is missing, select Change.
Advanced Repair via Command Prompt and PowerShell
If regular methods don’t fix your apps in Windows 11, you can try advanced repair using the Command Prompt or PowerShell to fix system file problems that might be causing deeper issues.
1. Open Terminal (Admin) by right-clicking the Start button.
2. Run the System File Checker (SFC) to fix corrupted system files: sfc /scannow
3. If issues persist, use the DISM tool: DISM /Online /Cleanup-Image /RestoreHealth
4. To reinstall a specific app via PowerShell, use: Get-AppxPackage *AppName* | Remove-AppxPackage followed by a reinstall from the Microsoft Store.
Fixing Microsoft Store Issues
If Store apps won’t open, clear the cache. Press ⊞ Win+R, type wsreset.exe (this command clears the Microsoft Store cache), and press Enter. This resets the Windows Store cache without deleting your apps.
Summary
Fixing apps in Windows 11 is a useful way to solve performance problems, with options ranging from simple Settings repairs for Store apps to Control Panel fixes for older programs and advanced command-line tools for deeper issues.
What should I do if the Repair button is greyed out?
If the Repair button is greyed out, the application does not support the built-in repair feature. In this case, your best option is to uninstall the app completely, restart your computer, and perform a fresh installation from the official source to ensure all files are correctly registered.
Does repairing an app delete my personal data?
Generally, the Repair function attempts to fix corrupted files while keeping your personal data and settings intact. However, if you choose the Reset option instead, it will clear the app’s data, cache, and preferences, essentially returning the application to its original, out-of-the-box state.
Was this guide helpful?

About the Author
Richard
Tech Writer, IT Professional
Richard, a writer for Geek Rewind, is a tech enthusiast who loves breaking down complex IT topics into simple, easy-to-understand ideas. With years of hands-on experience in system administration and enterprise IT operations, he’s developed a knack for offering practical tips and solutions. Richard aims to make technology more accessible and actionable. He's deeply committed to the Geek Rewind community, always ready to answer questions and engage in discussions.

No comments yet — be the first to share your thoughts!