This article explains how to install a printer in Windows 11.
Knowing how to add printers to Windows 11 is essential because it allows you to print and scan documents directly from your computer.
Understanding how a printer was installed helps set up a new computer or troubleshoot printer-related issues.
Install a local printer in Windows 11
Connecting a printer to a Windows computer is now very simple. Typically, all you need to do to set up a printer is to attach it to your computer.
Connect the USB cable from your printer to an available USB port on your computer, and then turn the printer on. Windows should automatically install the necessary printer drivers and configure them for use.
If that method doesn’t work, here’s an alternative way to do it manually.
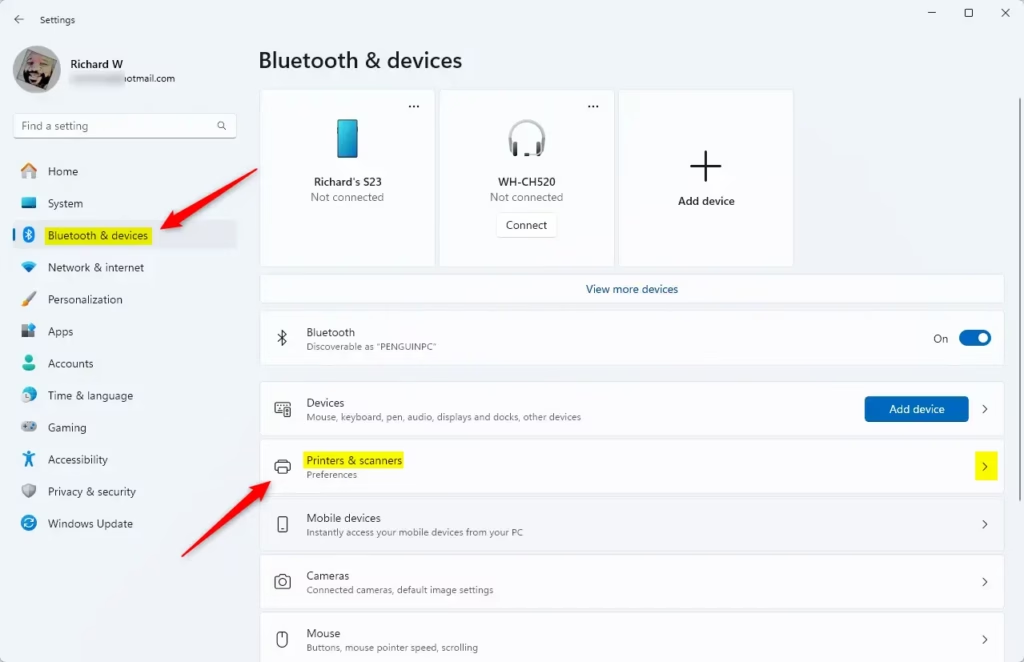
First, open the Windows Settings app.
You can do that by clicking on the Start menu and selecting Settings. Or press the keyboard shortcut (Windows key + I) to launch the Settings app.
When the Settings app opens, click the Bluetooth & devices button on the left. Then, select the Printers & scanners tile on the right to expand it.
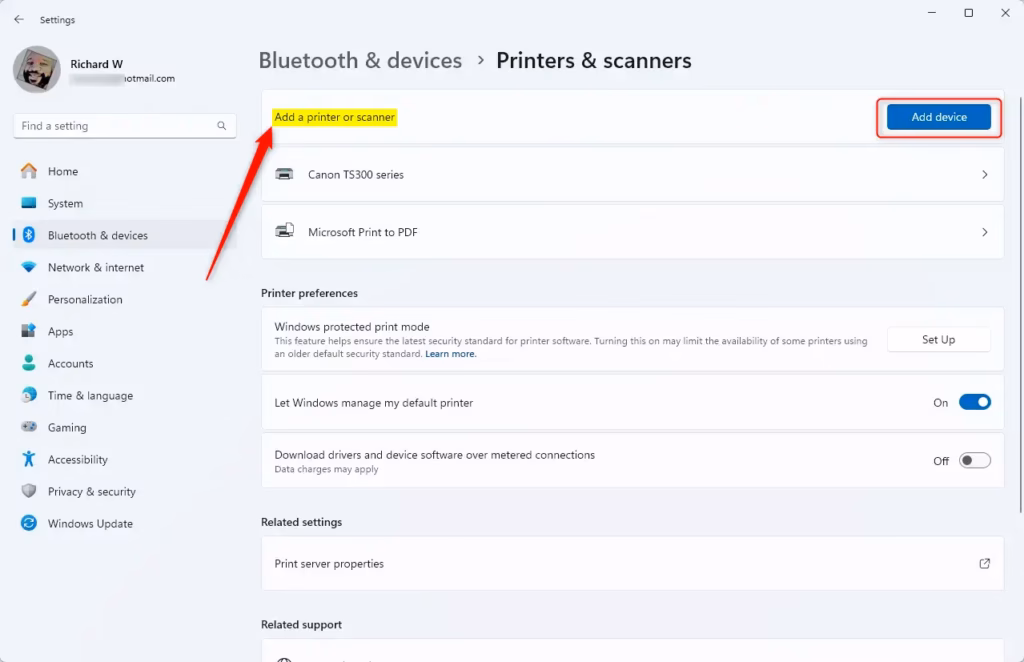
On the Printers & scanner settings page, click on the “Add device” button to begin installing a printer.
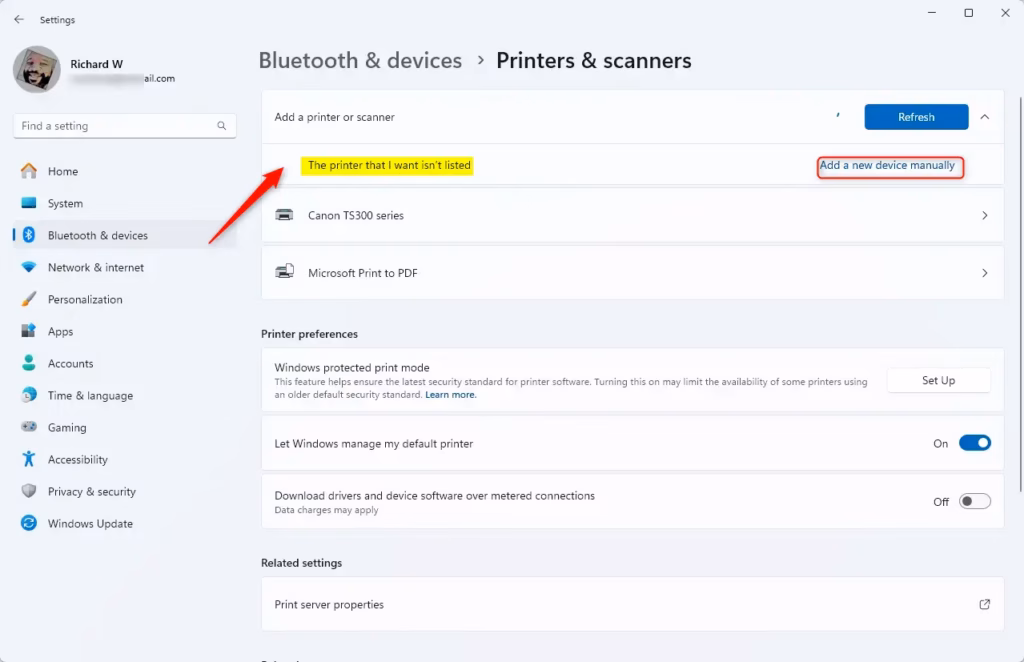
Wait for Windows 11 to detect nearby printers, select your desired one from the list, and click Add device.
If you get a message, “The printer that I want isn’t listed,” click Add manually.
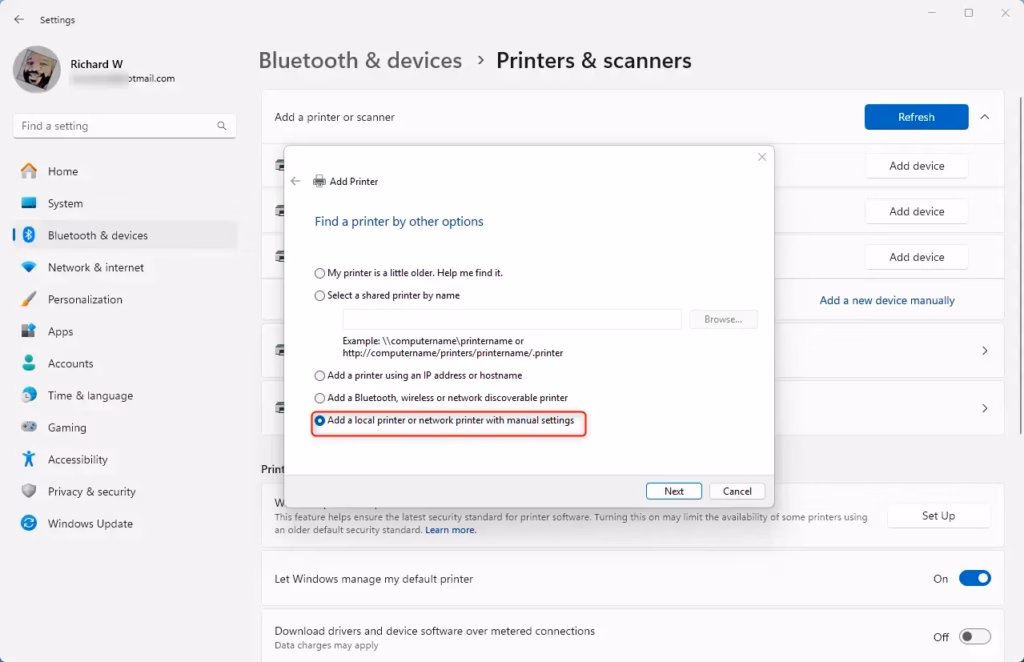
Choose “Add a local printer or network printer with manual settings” option when prompted.
Select “Use an existing post” and choose the port where the printer is connected, typically a USB port.

If you have a CD or a link to download the printer drivers, insert the CD or download them from the manufacturer’s website.
Next, proceed to install the printer driver. Click the “Have Disk” button to continue.
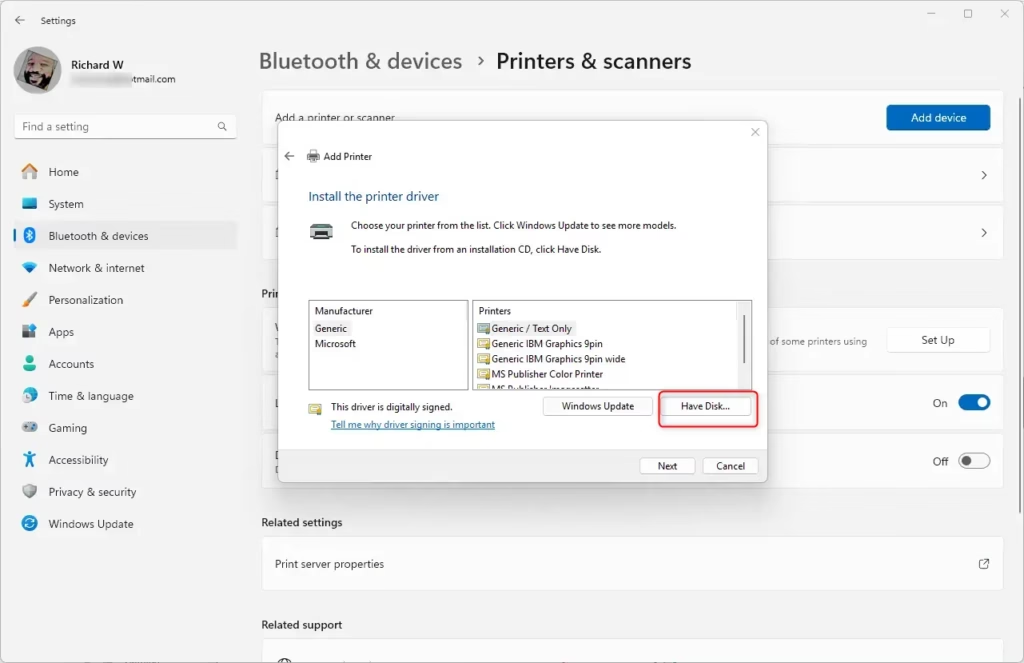
Next, navigate to the location where the driver is saved. Browse the driver’s folder and select it. Then, proceed to install the driver.
Finally, complete the printer setup and test it.

Add a Wireless printer.
Some printers are equipped with wireless capabilities and can connect via Wi-Fi. If your printer is linked to the network, either through a wired connection or wirelessly, and is powered on, Windows should automatically detect it.
Windows can detect all printers available on the network, including Bluetooth and wireless printers that are connected to another device and shared.
Here’s a way to do it manually.
- Select Start > Settings > Devices > Printers & Scanners, or use the following button.
- Select Add a printer or scanner. Please wait for it to find nearby scanners, then choose the one you want to use and select Add device.
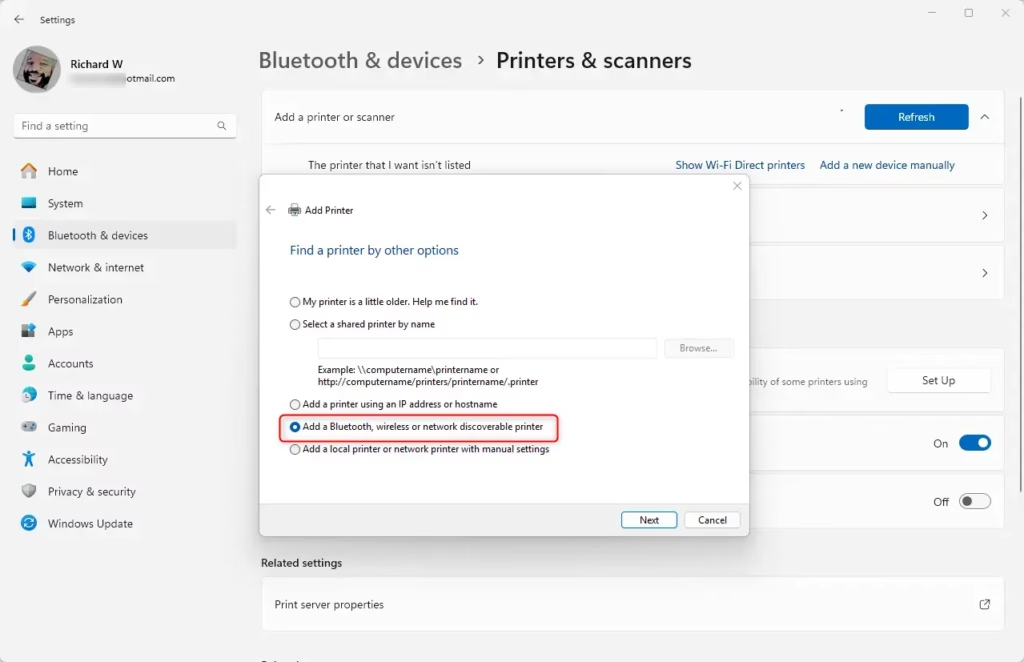
If your printer isn’t on the list, select The printer I want isn’t listed, and then follow the instructions to add it manually.
You should be able to find a wireless or network printer when you follow the wizard above.
If the wireless printer hasn’t been added to your home network, try reading the manual with the printer to find help installing it in Windows.
It should include a driver CD or a link to download the drivers from the manufacturer’s website.
Conclusion:
- Adding a printer in Windows 11 is a straightforward process, whether it’s a local or wireless printer.
- For local printers, direct USB connections can simplify the installation process, often allowing automatic detection and driver installation.
- In cases where automatic installation fails, the manual installation method provides a reliable alternative.
- Wireless printers require connection to the network, and Windows 11 can generally detect them if they are properly set up.
- If issues arise during installation, consulting the printer’s manual or the manufacturer’s website can provide essential guidance.
- Familiarity with printer setup in Windows 11 enhances productivity and ensures a seamless printing experience.

Leave a Reply to How to Share a Printer in Windows 11 - Geek Rewind Cancel reply