How to Rename a Printer in Windows 11
This guide will show you how to change the name of a printer on your Windows 11 computer. Sometimes, Windows gives printers long or confusing names. Renaming your printer makes it easier to find the right one when you want to print.
When you add a new printer in Windows, it usually names it using the brand and model. But you can give it a simpler or more meaningful name.
Steps to Rename Your Printer in Windows 11
Follow these easy steps to rename your printer:
- Open Settings: Click the Start menu (the Windows icon at the bottom-left corner) and then select Settings. Or press the Windows key + I on your keyboard to open Settings quickly.
- Go to Printers & Scanners: In the Settings window, click Bluetooth & devices on the left side. Then click Printers & scanners on the right.
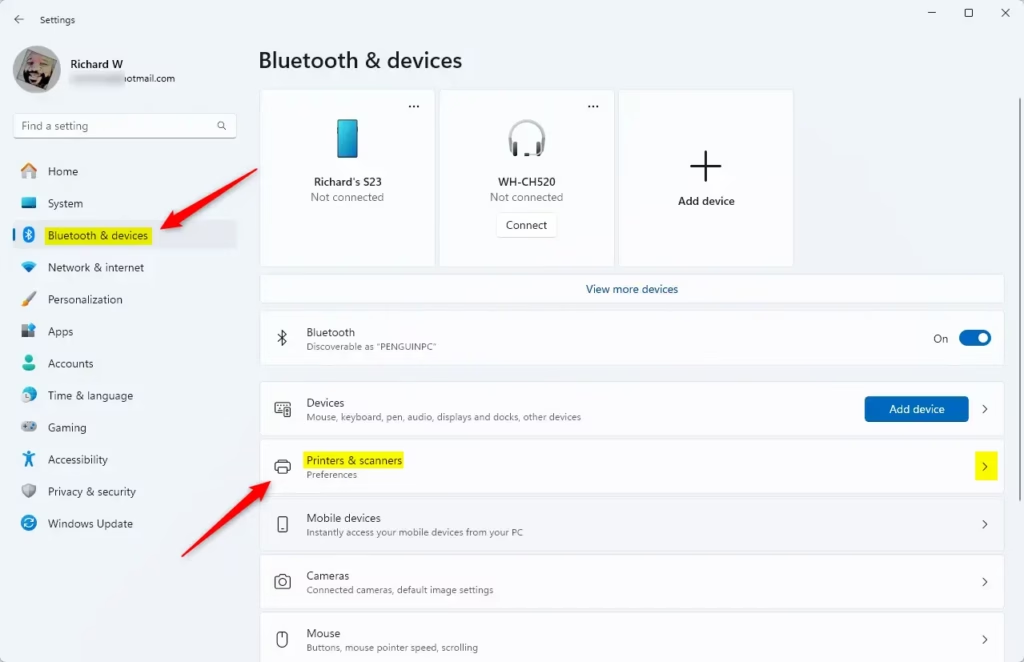
- Select your printer: Click the printer you want to rename. This will open its details.

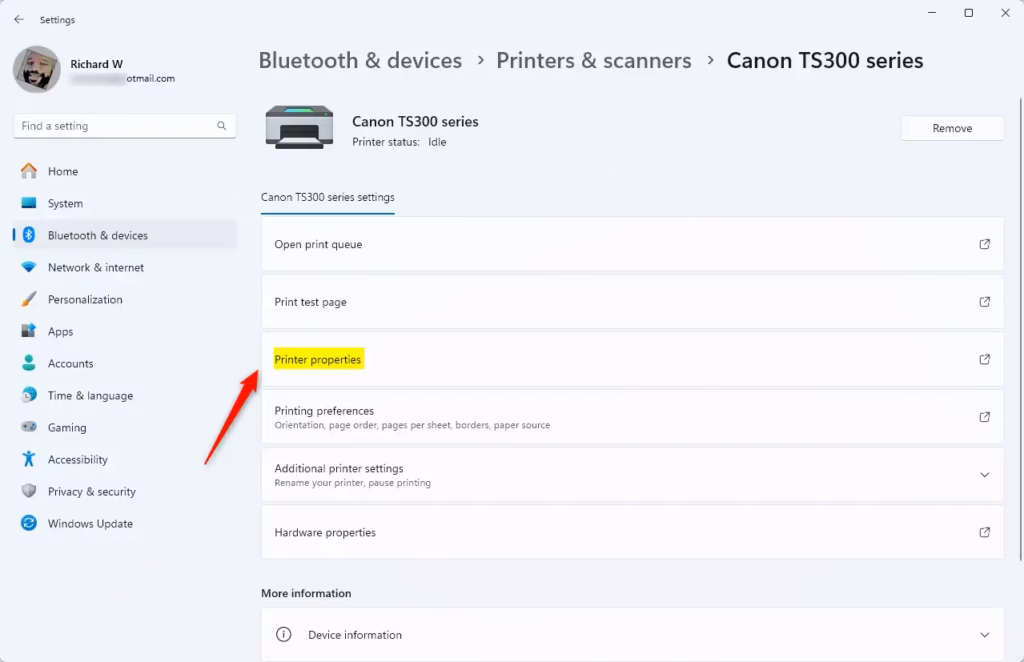
- Open Printer Properties: In the printer details, click on Printer properties.
- Rename the printer: In the window that appears, make sure you are on the General tab. Then, click inside the box at the top where the printer’s name is shown. Delete the old name and type the new name you want.
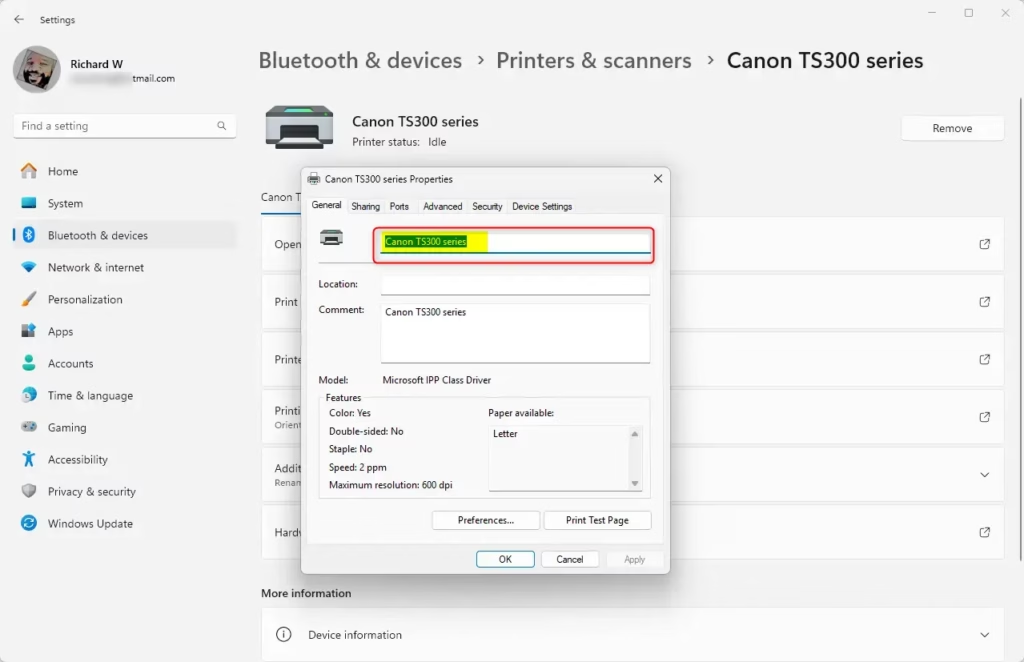
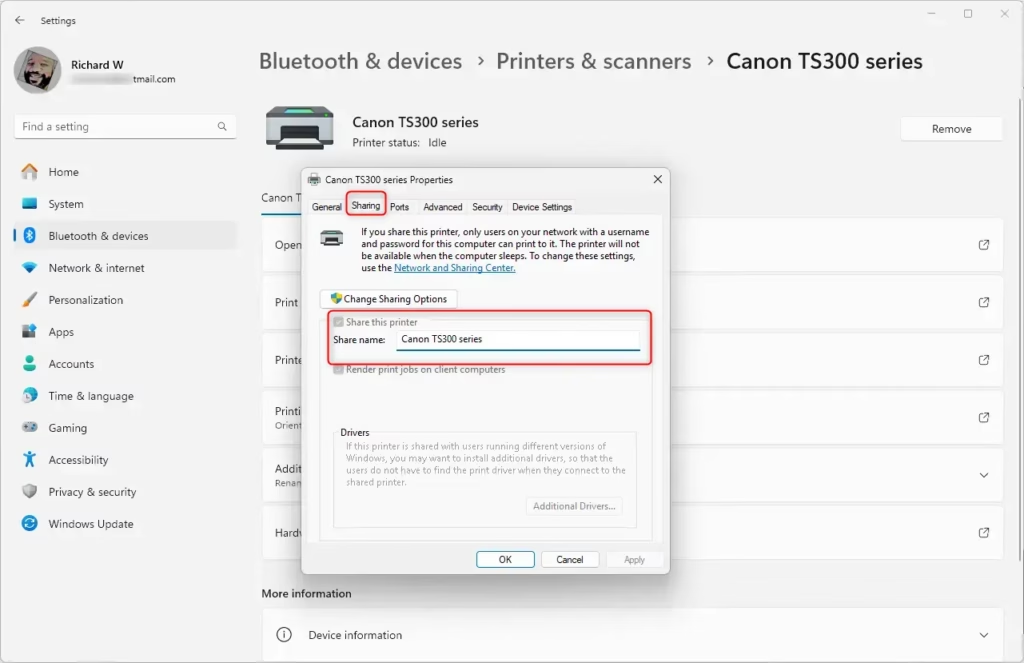
⚠️ Admin Privileges Required: You may need administrator permissions to change the printer name. - If your printer is shared: If other people use this printer on your network, click the Sharing tab and change the shared name to match your new printer name. This helps others find the printer easily.
- When you’re done, click OK to save your new printer name and close the window.
Now, your printer will show up with the new name whenever you print or look for it in Windows.
Why Rename Your Printer?
- It makes it easier to find the right printer, especially if you have more than one.
- You can give it a name that makes sense to you, like “Office Printer” or “Color Printer.”
- If your printer is shared with others, a clear name helps everyone identify it quickly.
- It keeps your computer organized and saves time when printing.
Summary
Renaming your printer in Windows 11 is a simple way to keep your devices organized. Just open Settings, go to Printers & Scanners, select your printer, and change the name in Printer Properties. If your printer is shared with others on your network, update the shared name too. This takes just a few clicks and makes it much easier to find the right printer when you need to print something.
Was this guide helpful?


Leave a Reply