How to Turn On or Off Let Windows Manage Default Printer in Windows 11
This tutorial will show you how to turn on or off letting Windows manage your default printer in Windows 11.
Windows automatically sets your default printer to the last one you used. This helps make sure the right printer is already picked in print dialogs.
Reference:
Set a default printer in Windows – Microsoft Support
You can use the Settings app to either pick a default printer yourself or let Windows choose it for you.
If you turn off Let Windows manage my default printer, you can pick your default printer manually.
Option One
Turn On or Off Let Windows Manage Default Printer in Settings
- Open Settings (Win+I).
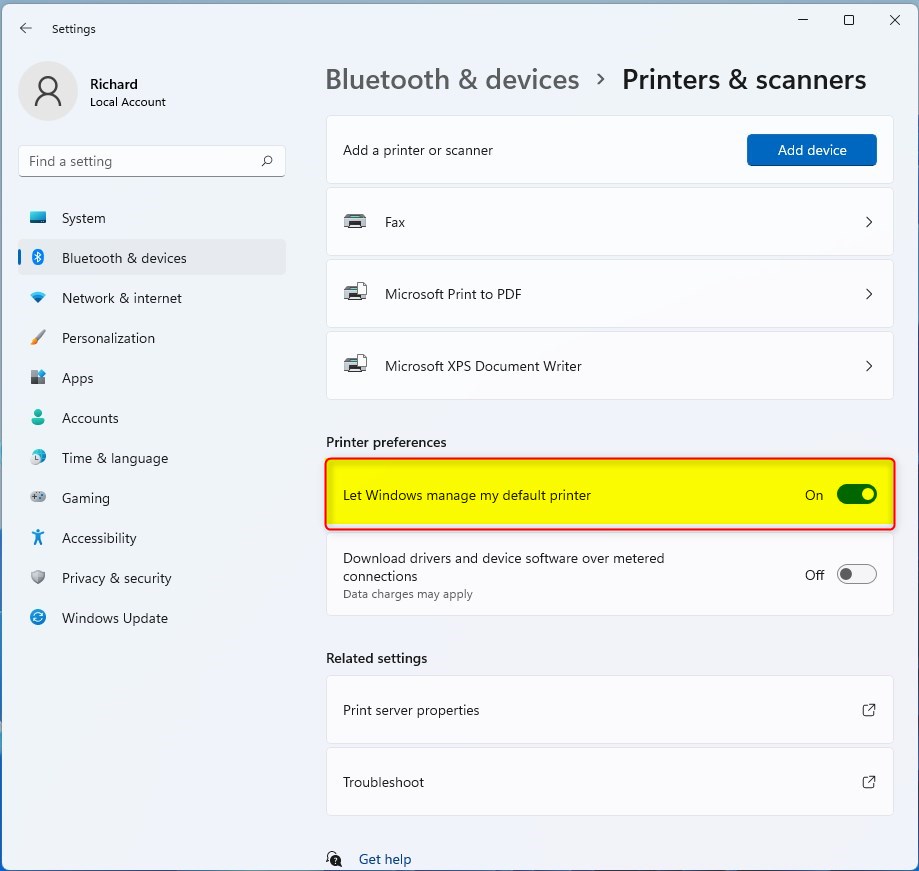
- Click on Bluetooth & devices on the left side. Then click on Printers & scanners on the right side.
Open Printers & scanners settings
- Turn On (default) or Off the Let Windows manage my default printer option. Choose what you want.
- You can now close Settings if you like.
Option Two
Turn On or Off Let Windows Manage Default Printer Using Registry
⚠️ Admin privileges required for this method
Turn On Let Windows Manage Default Printer
This is the default setting.
reg add "HKEY_CURRENT_USER\Software\Microsoft\Windows NT\CurrentVersion\Windows" /v LegacyDefaultPrinterMode /t REG_DWORD /d 0 /f
Turn Off Let Windows Manage Default Printer
reg add "HKEY_CURRENT_USER\Software\Microsoft\Windows NT\CurrentVersion\Windows" /v LegacyDefaultPrinterMode /t REG_DWORD /d 0 /f
Summary
You now know how to turn on or off the Let Windows manage my default printer setting in Windows 11. You can do this through Settings or through the Registry. The Settings method is easier for most users. Turning this on means Windows picks your last used printer. Turning it off lets you manually choose your default printer.
Was this guide helpful?

Leave a Reply