Change Windows 11 External Drive Removal Policy


The Windows 11 external drive removal policy controls how USB flash drives and external hard disks disconnect from your computer. There are two modes, and the choice is a trade-off between data safety and file transfer speed.
Quick Removal is the default. Windows writes data to the drive straight away, so you can unplug it at any time without clicking the taskbar icon. Better Performance speeds up file transfers by caching writes temporarily in memory. With it, you must use the “Safely Remove Hardware” option before unplugging the drive. If you don’t, data still in the cache may never reach the drive, and files can be lost or corrupted.
Windows 11 external drive removal policy has two settings: Quick Removal (the default), which lets you unplug a USB drive at any time, and Better Performance, which speeds up file transfers but needs Safely Remove Hardware first. To change it, open Settings , go to System Storage Advanced storage settings Disks & volumes, then click Properties for your drive.
Change disk removal policy in Windows
The setting applies to the drive you select, not to every USB device on the PC. You need to be signed in with an administrator account, and the drive must be plugged in. A drive that is not connected won’t show up in the list.
The first method uses the Settings app. Start with these steps.
- Press Win+I to open the Settings app.
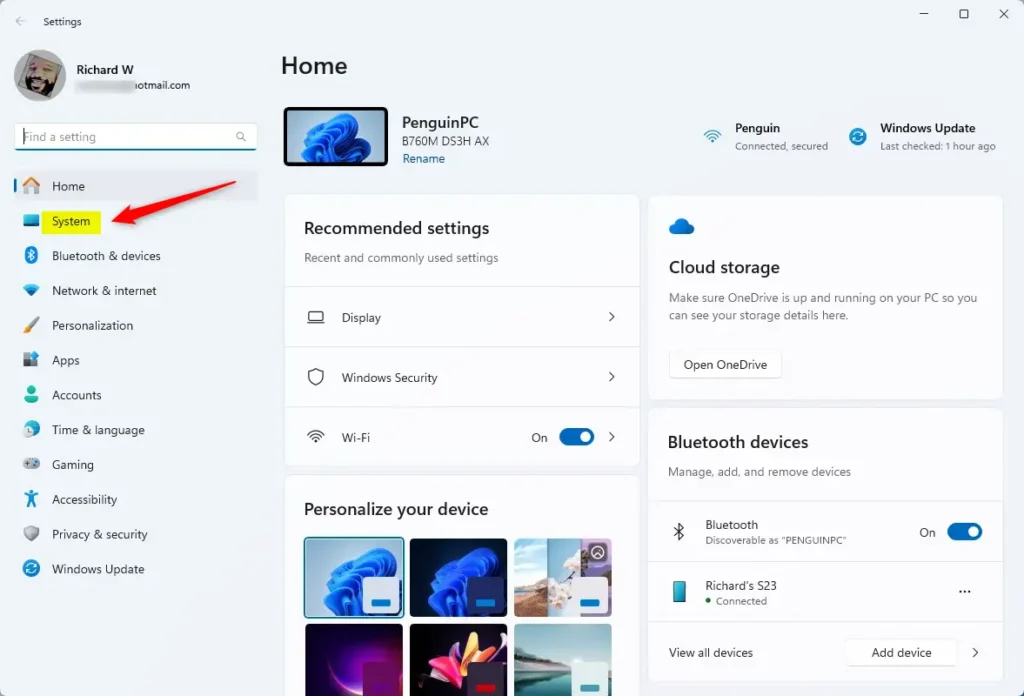
- Click System in the left pane.
The System settings page opens on the right.
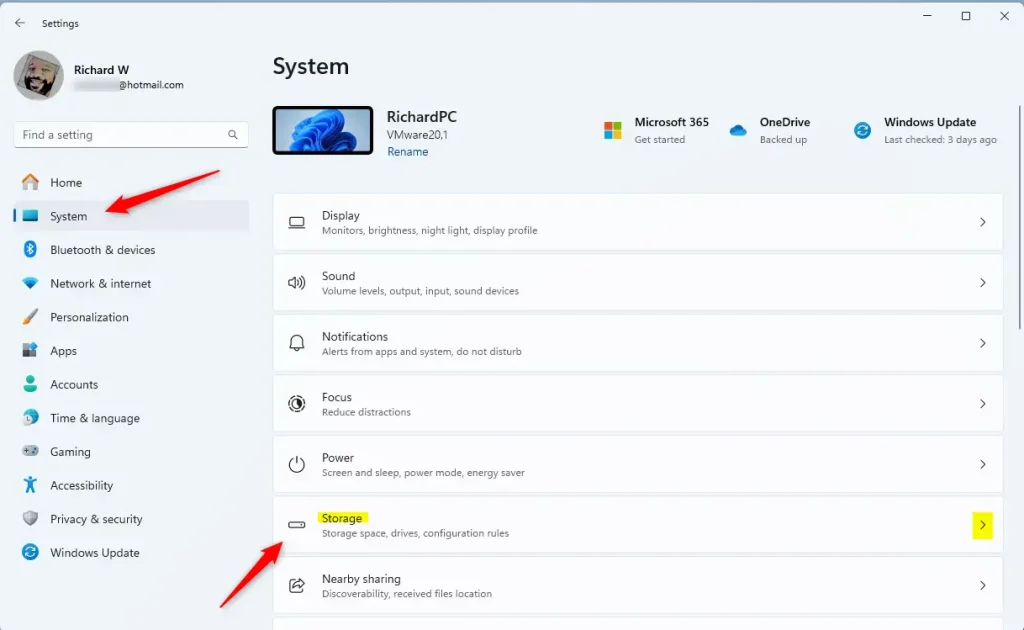
- Select the Storage tile on the right.
The Storage page opens, showing your drives and a list of storage options.
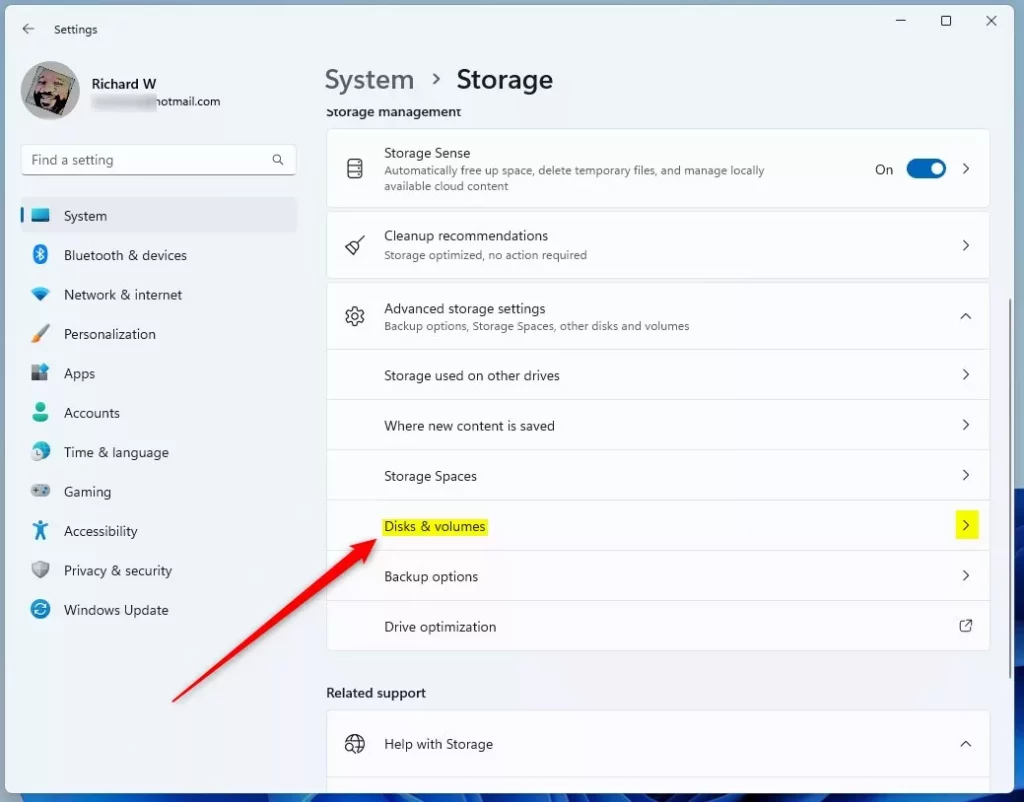
- Expand Advanced storage settings on the System Storage page
- Click the Disks & volumes tile.
You should now see a list of every disk connected to the PC, including your internal drives and any USB drives.
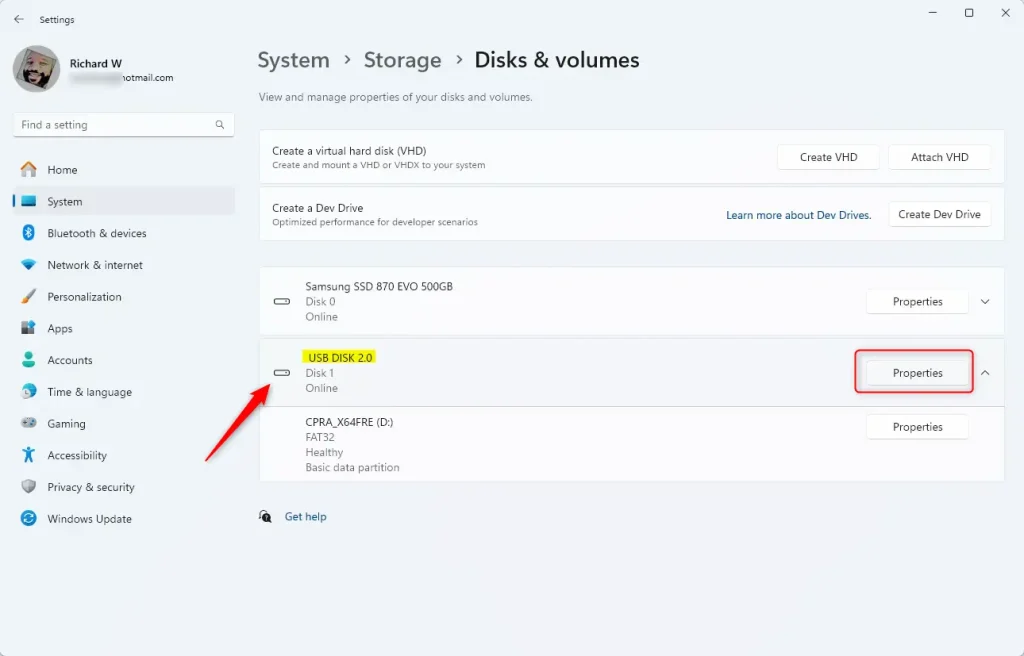
- Find your external drive in the list. Check the name and size to be sure it is the right one, and don't pick your system drive.
- Click Properties next to that drive.
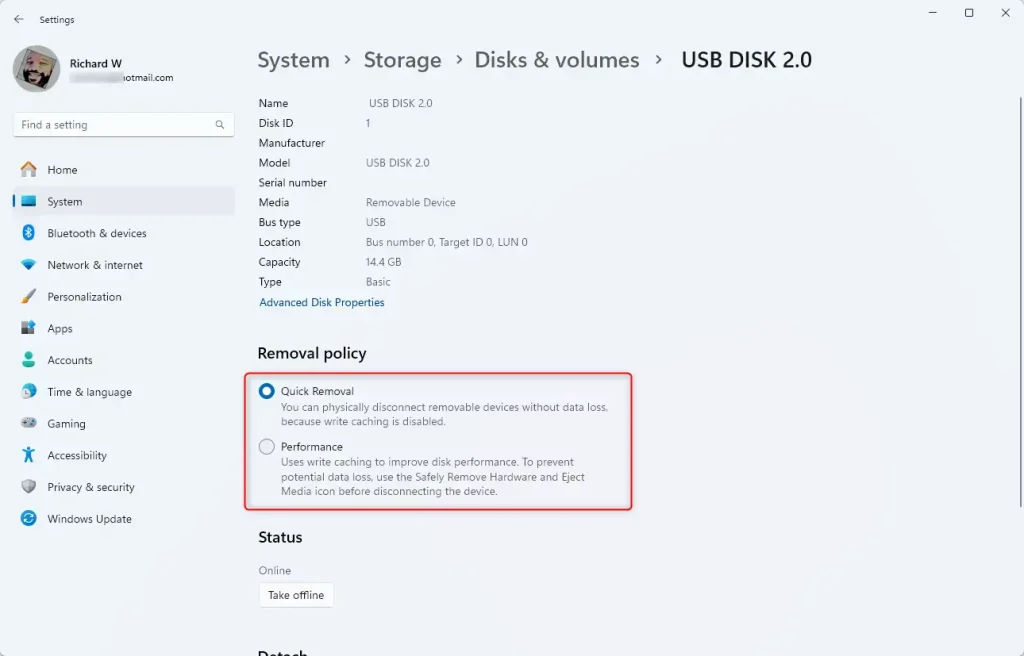
The properties page for that drive opens, with the removal policy under it.
- Under the Removal policy section, choose either Quick Removal (the default) or Performance.
The choice is saved as soon as you make it, so there is no Apply or OK button to click. You don't need to restart the PC. If you want to be certain the new policy is in use, safely eject the drive, unplug it and plug it back in.
- Close the Settings app.
If you choose Performance, get into the habit of using "Safely Remove Hardware" every time you unplug the drive.
The Device Manager app provides an alternative method for making this change. It is useful if the Disks & volumes page doesn't list your drive or if you prefer the older interface.
- Launch the Device Manager.
- Expand the disk drives list and find your external device.
- Right-click the external device and select Properties.
- Open the Policies tab. Some guides call it the Policy tab.
- Choose one of the two options:
- Quick removal (default): you can unplug the drive at any time.
- Better performance: faster writes, but you must safely eject the drive first.
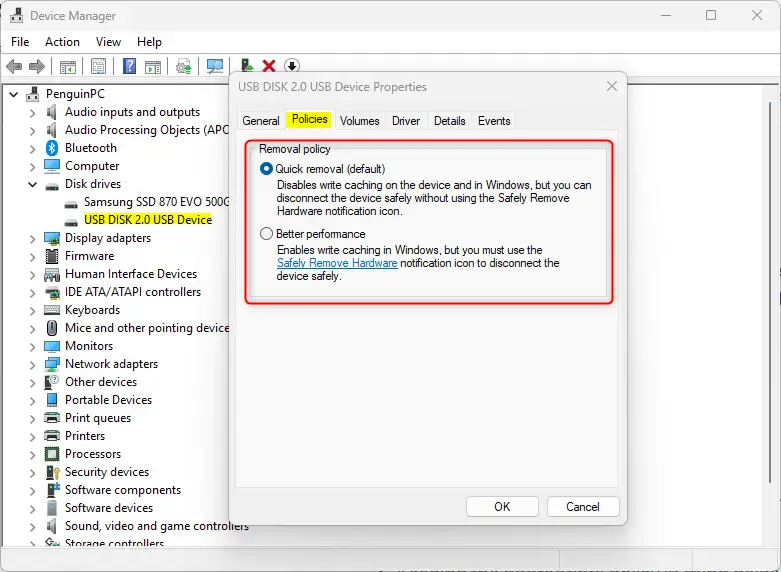
Click OK to save the change if the window shows that button. The configuration is now complete.
Conclusion:
Adjusting this policy helps protect data without slowing down your workflow. Pick the mode that matches how you use the drive.
- Quick Removal allows for immediate unplugging without data loss, making it ideal for everyday use.
- Performance mode boosts writing efficiency but requires the use of the "Safely Remove Hardware" option to avoid risks.
- Adjusting the removal policy is straightforward through the Settings app, offering flexibility based on your needs.
- Keeping the appropriate policy in mind helps prevent data corruption and ensures smooth operation of external drives.
Choosing the correct policy optimizes external storage performance. If you are unsure, leave the drive on Quick Removal. The speed gain from Performance is usually small for ordinary file copies, and the risk of lost data is real.
Was this guide helpful?

About the Author
Richard
Tech Writer, IT Professional
Richard is a writer at Geek Rewind who turns complex IT tasks into clear, step-by-step guides. He draws on years of hands-on experience in system administration and enterprise IT operations, focusing on Windows, Linux and WordPress: the problems people actually run into, and the fixes that work. His server and WordPress guides come from systems he runs himself. Richard builds and maintains the platform behind Geek Rewind, from its Ubuntu servers and Nginx configuration to its custom WordPress plugins. Many new tutorials start with readers' questions, and he's always glad to answer them in the comments.



No comments yet — be the first to share your thoughts!