Back Up Your Folders with Google Drive Sync and Backup in Windows 11

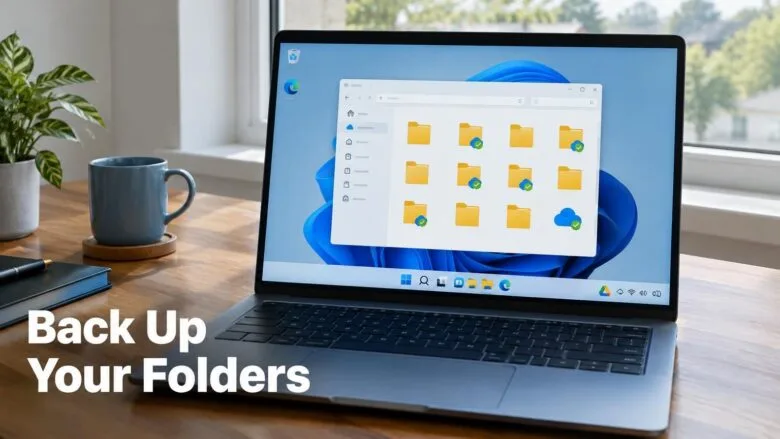
Google Drive for desktop is the free app that keeps copies of your folders safe in Google Drive. In Windows 11, you install it , sign in, and pick the folders to back up under Folders from your computer. It replaced the older Backup and Sync app, so this is the current way to do the same job.
You need a Google account. A free account gives you 15 GB of storage, and Google Drive, Gmail and Google Photos all share that space. The steps work the same on Windows 11 Home and Windows 11 Pro.
To back up folders with sync and backup in Windows 11, install Google Drive for desktop, which replaced the retired Backup and Sync app. Sign in with your Google account, then add folders under Folders from your computer in the app’s settings. Deleted files move to the Drive Trash for 30 days, so this guards against hardware failure, not accidental deletion.
How Google Drive sync and backup works now
Google retired Backup and Sync and moved its features into Google Drive for desktop. If you still have Backup and Sync installed, it no longer receives updates. Install Google Drive for desktop and move your folders over (see the note at the end of the install section).
Google Drive for desktop treats folders you add as a sync: the app keeps the folder on your PC and the copy in Drive identical. That has one consequence you need to know before you start. If you delete or change a file on your PC, the same change reaches Drive. A deleted file moves to the Drive Trash, where it stays for 30 days before Google deletes it permanently. This protects you against a broken hard drive, a lost laptop or a failed upgrade. It does not protect you from deleting a file by mistake and then emptying the Trash.
Your backed-up folders appear on the Google Drive website under Computers, separate from My Drive. Each PC you add appears there under its own name.
Before you start
Check these four things first. They cause most of the problems people run into later.
- Storage. Add up the size of the folders you plan to back up. If they are larger than your free space, uploads stop when Drive fills up. To check, open drive.google.com, then look at the storage figure at the bottom of the left-hand menu. If you need more space, you can buy a Google One plan (Google's paid storage tiers).
- Which account. Use a personal Google account for personal files. If you sign in with a work or school account, your administrator controls what the app can do (see the troubleshooting section below).
- OneDrive. Windows 11 often backs up Desktop, Documents and Pictures to OneDrive by default. If that is on, those folders may live under a path such as C:\Users\USERNAME\OneDrive\Documents. Pointing two sync apps at the same folder can cause duplicate files and conflicts. Pick one service per folder.
- Time. The first upload can take hours or days, depending on how much data you have and how fast your upload speed is. Start it when you can leave the PC on.
Install Google Drive for desktop
This step installs the app and signs it in to your Google account. Administrator privileges may be required: if you use a standard account, Windows asks for an administrator's password during installation.
- Open your browser and search for Google Drive for desktop. Open the official download page on the Google domain.
- Select Download Drive for desktop under the Windows option. The browser saves a file named GoogleDriveSetup.exe.
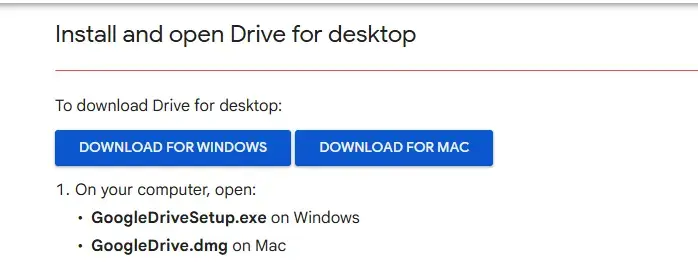
- Open the downloaded file. If User Account Control asks whether to allow the app to make changes, select Yes.
- Follow the installer prompts. When it finishes, you see a sign-in screen.
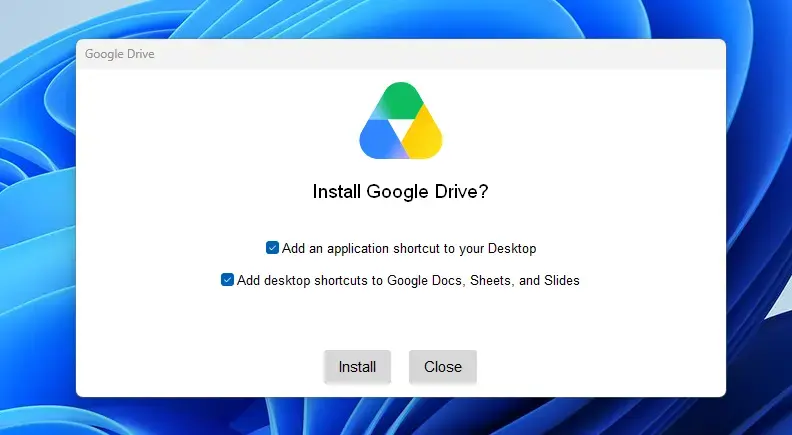
- Select Sign in with browser. Your default browser opens a Google sign-in page.
- Choose your Google account, enter your password, and confirm the permission request. The browser confirms that you are signed in. The Drive icon then appears in the notification area, at the right of the taskbar.
If you do not see the icon, select the up arrow (Show hidden icons) next to the clock. Windows 11 hides new tray icons there. You can drag the Drive icon onto the taskbar to keep it visible.
Depending on the app version, a first-run prompt may offer to back up your Desktop, Documents and Downloads folders straight away. You can accept it or skip it. The next section shows how to choose folders yourself, and that route works either way.
If you are replacing Backup and Sync, do not uninstall it until Drive for desktop has finished uploading the same folders. Then remove the old app from Settings Apps Installed apps
Choose the folders to back up
This step tells Drive which folders on your PC to upload and keep in sync. You can add any folder, not only the standard Desktop, Documents and Pictures folders.
- Select the Google Drive icon in the notification area. A small window opens.
- Select the Settings gear icon in that window, then select Preferences. A new window opens with a list of settings on the left.
- Select Folders from your computer in the left-hand list. If you added folders earlier, they appear here.
- Select Add folder. A Windows folder picker opens.
- Browse to the folder you want to back up, select it, and select Select Folder.
- Choose how Drive treats the folder. Select Sync with Google Drive to upload every file type and keep the folder in sync. If the folder holds only photos and videos, you can select Back up to Google Photos instead. For general files such as documents and spreadsheets, choose the Drive option.
- Select Done. The folder is now listed under Folders from your computer.
- Repeat steps 4 to 7 for each extra folder you want to protect.
- Select Save at the bottom right of the Preferences window. The upload begins.
If Save is greyed out, no change has been made yet. Add or remove a folder first.
Choose folders by value, not by size. Documents, Desktop and any folder with project files or photos are good candidates. Skip folders that hold installers, game libraries or other data you can download again. They use up your 15 GB and add nothing to your protection.
Check that the backup is working
The upload runs in the background, so confirm it is progressing and that your files arrive in Drive.
- Select the Google Drive icon in the notification area. The window shows the sync status. While files upload, it shows how many are left. When the upload is complete, it reports that everything is up to date.
- Open drive.google.com in your browser and sign in with the same account.
- Select Computers in the left-hand menu. If you do not see it, look under My Drive or scroll the left-hand menu.
- Select the entry named after your PC. Your backed-up folders are listed inside it. Open one and confirm that recent files are there.
If a folder is empty or missing, the upload is probably still running. Wait for the status in the tray window to finish, then refresh the page.
If the tray window reports an error for a particular file, it usually means the file is open in another program, the file name is not allowed, or you are out of storage. Close the program that has the file open, rename the file, or free up space in Drive. Drive retries on its own once the problem is fixed.
Keep the PC awake while it uploads
Uploads stop when Windows goes to sleep. For the first upload, change the sleep timer so the PC stays awake while it is plugged in.
- Open Settings and go to System Power & battery
- Select Screen, sleep, & hibernate timeouts to expand it.
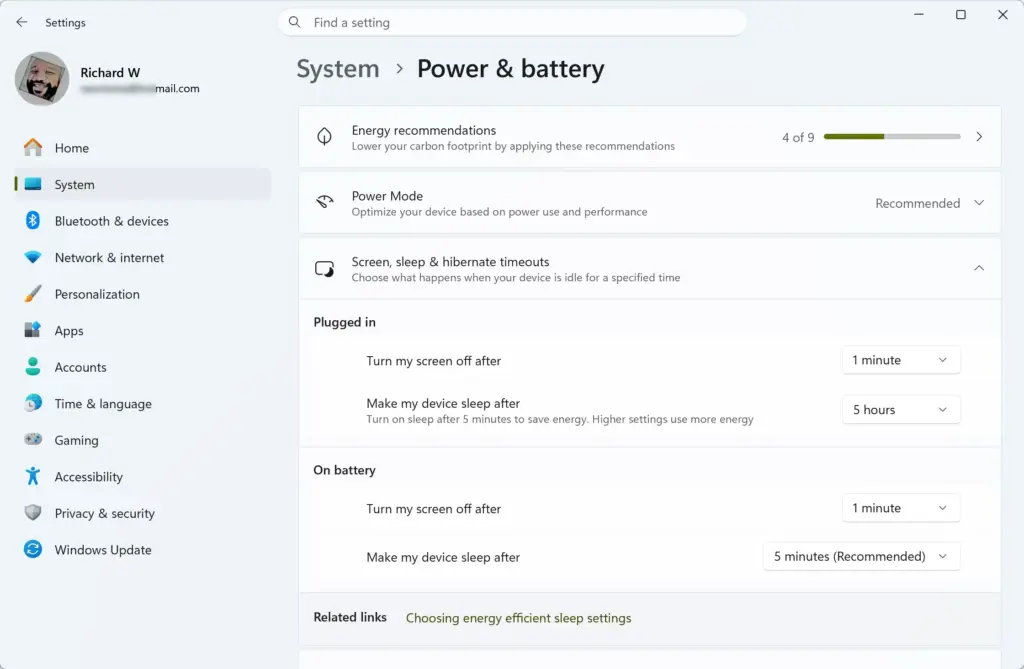
- Set When plugged in, put my device to sleep after to a longer time, or to Never until the first upload finishes.
Set the timer back afterwards so the PC does not stay awake all the time. Drive only needs the PC to be awake when files change.
Drive for desktop starts when you sign in to Windows. It then syncs new and changed files without you opening it. To check, open Task Manager (right-click the Start button and select Task Manager), then select Startup apps. Look for Google Drive in the list. Its status should read Enabled. If you disable it, backups pause until you open the app by hand.
Find and restore your files
Your backed-up folders are also on your PC. You restore files when you lose them, such as after a disk failure, a reset, or an accidental delete. The restore steps depend on what happened.
Restore a file you deleted
- Open drive.google.com and select Trash in the left-hand menu.
- Find the file. Use the search box if the list is long.
- Right-click the file and select Restore. The file returns to its original place in Drive.
- Wait a moment for Drive for desktop to sync. The file reappears in the original folder on your PC.
If the file is not in Trash, Google has already deleted it permanently (after 30 days) or someone emptied the Trash. Drive cannot recover it after that.
Get your files onto a new or reset PC
- Install Google Drive for desktop on the new PC and sign in with the same Google account.
- Open drive.google.com and select Computers, then the name of your old PC.
- Right-click a folder and select Download. Google packs the folder into a .zip file and downloads it.
- Open the downloaded .zip file in File Explorer, select Extract all, and choose where to put the files.
Large folders are split into several .zip files. Download them all before you extract. To keep the folder syncing from the new PC, add it again under Folders from your computer, as in the steps above.
If Folders from your computer is missing or won't save
These are the common reasons the option does not behave as expected.
- You signed in with a work or school account. If you use a work or school Google account (part of Google Workspace, the business version of Google's apps), an administrator can limit folder backups. If the option is missing or Drive rejects the folder, ask your IT administrator. Signing in with a personal account on a work PC may also be against your organization's rules.
- You are out of storage. Uploads stop when your Google storage is full, and Gmail and Google Photos use the same pool. Free space or buy more, and the upload continues.
- The app is out of date. Menu names change between versions. Select the Drive icon, then the gear, and look for an update prompt. If none appears, download the latest installer and run it over the top. Your settings are kept.
- The folder is already inside another synced location. If a folder sits inside your OneDrive folder or inside the Google Drive folder itself, Drive may not let you add it, or the files may sync twice. Choose a folder outside other sync locations.
- Nothing happens after sign-in. If the browser sign-in does not complete, make sure your default browser is not blocking pop-ups, then select Sign in with browser again.
Change or stop the backup
You can remove a folder from the backup or pause everything at any time. Neither action deletes your original files on the PC.
Pause syncing temporarily
- Select the Google Drive icon in the notification area.
- Select the Settings gear, then select Pause syncing.
To resume, open the same menu and select Resume syncing. Pause before you do bulk deletions or move large folders, so changes do not upload mid-way.
Stop backing up one folder
- Open the gear menu and select Preferences.
- Select Folders from your computer.
- Find the folder in the list and open its menu (the three-dot icon, where shown).
- Choose the option to stop syncing or backing up that folder, and follow the prompt. The wording differs between versions, and Drive may ask whether to keep the existing copy in Drive.
- Select Save.
The copy already in Drive stays under Computers until you delete it on the website. This keeps an archive, but it keeps using your storage.
Remove the app completely
Open Settings and go to Apps Installed apps. Find Google Drive, select the three-dot menu, then select Uninstall. Your files stay on the PC and in your Google account.
What to do next
Open one backed-up file on the Google Drive website and download it, so you know a restore works before you need one. Because Drive mirrors deletions, add a second, separate copy of your most important files on an external drive. Windows 11 also has its own backup tools in Settings Accounts Windows backup, which use OneDrive instead of Google Drive.
Was this guide helpful?

About the Author
Richard
Tech Writer, IT Professional
Richard is a writer at Geek Rewind who turns complex IT tasks into clear, step-by-step guides. He draws on years of hands-on experience in system administration and enterprise IT operations, focusing on Windows, Linux and WordPress: the problems people actually run into, and the fixes that work. His server and WordPress guides come from systems he runs himself. Richard builds and maintains the platform behind Geek Rewind, from its Ubuntu servers and Nginx configuration to its custom WordPress plugins. Many new tutorials start with readers' questions, and he's always glad to answer them in the comments.




No comments yet — be the first to share your thoughts!