How to Delete Diagnostic Data in Windows 11
You can delete diagnostic data in Windows 11 directly from your PC’s Settings app.
Diagnostic data is information your Windows device sends to Microsoft about its performance, settings, and how you use it. This helps them troubleshoot issues and improve Windows 11.
For instance, Windows 11 collects telemetry data to enhance the operating system. You can manage and clear this information to take control of your privacy and potentially free up a small amount of disk space.
This guide shows you exactly how to access and delete diagnostic data in Windows 11, ensuring you understand what’s being collected and how to remove it.
Open Settings, go to Privacy & security, then Diagnostics & feedback, and click Del diagnostic data. This clears your local diagnostic history.
Why Remove 🪟 Windows 11 Diagnostic Data?
Why do this? You might want to stop Microsoft from tracking your habits. You might also want to ensure no sensitive system information remains on their servers. What happens when done? Your local and cloud-based diagnostic history is cleared, giving you a cleaner privacy profile.
Required vs. Optional Diagnostic Data
Windows 11 collects two kinds of diagnostic data: required and optional.
How to Delete Diagnostic Data via Settings
This is the easiest way to clear your history.
- Open Settings.
- Go to Privacy & security.
- Click Diagnostics & feedback.
Windows 11 Diagnostics & Feedback settings tile location - Select Delete diagnostic data.
- Click the Delete button.
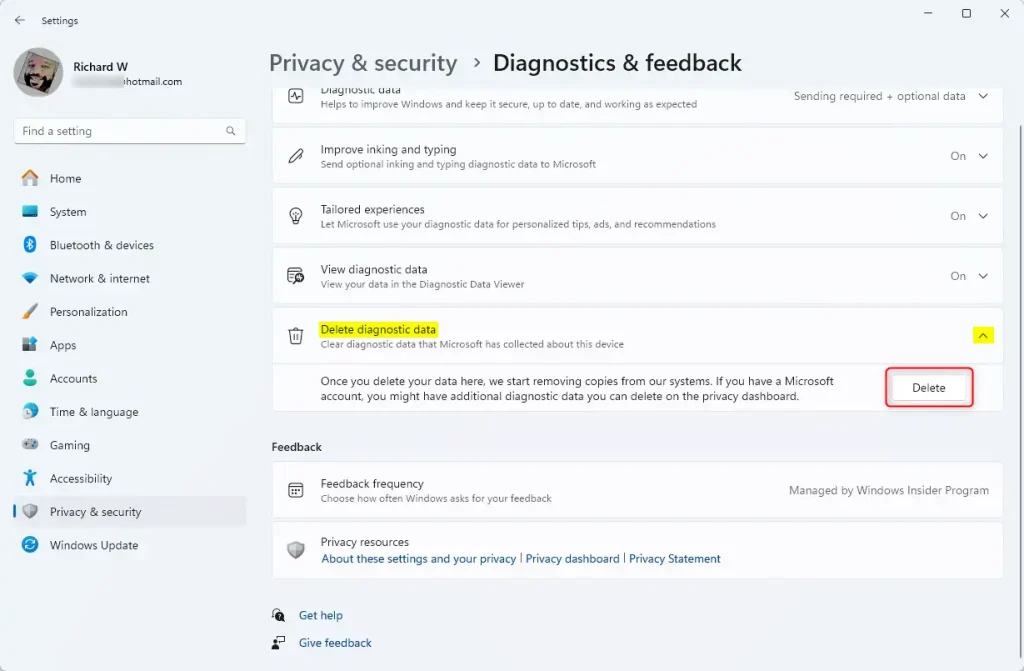
Delete diagnostic data in Windows 11
Advanced Telemetry Disabling
For power users, you can stop the telemetry service entirely. Note: This requires admin privileges.
- Press ⊞ Win+R, type services.msc, and hit Enter.
- Find Connected User Experiences and Telemetry.
- Right-click it and select Properties.
- Set Startup type to Disabled and click Stop.
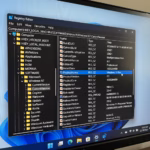
Using the Registry Editor
Note: This requires admin privileges. You can disable telemetry via the registry. Be careful, as incorrect changes can cause system issues.
HKEY_LOCAL_MACHINE\SOFTWARE\Policies\Microsoft\Windows\DataCollection
Create a new DWORD (32-bit) Value named AllowTelemetry and set it to 0.
Using Group Policy Editor
You can remove Windows 11 diagnostic data using the Group Policy Editor if you have Windows 11 Pro and admin rights.
- Press ⊞ Win+R, type gpedit.msc, and hit Enter.
- Navigate to Computer Configuration > Administrative Templates > Windows Components > Data Collection and Preview Builds.
- Double-click Allow Telemetry and set it to Disabled.
Pro-tip: If you are not comfortable editing the registry, use tools like O&O ShutUp10++ or Winaero Tweaker. These programs provide a simple interface to toggle privacy settings without manual configuration.
Summary
Removing Windows 11 diagnostic data helps you regain control over your privacy. By using the Settings app, you can clear existing data. For advanced users, the Registry or Group Policy Editor offers deeper control. Always remember to visit the Microsoft Privacy Dashboard to manage your cloud data as well.
Does disabling diagnostic data affect Windows updates?
No, disabling optional diagnostic data does not stop Windows updates. Your computer will continue to receive security patches and feature updates normally. However, keeping required diagnostic data enabled ensures Microsoft can identify specific hardware issues that might prevent your system from updating correctly in the future.
Is it safe to disable all telemetry in 🪟 Windows 11?
It is generally safe for home users to disable optional telemetry. However, disabling all telemetry services entirely can sometimes cause issues with specific Microsoft services or diagnostic tools. If you experience system instability, you may need to re-enable the Connected User Experiences and Telemetry service to restore full functionality.
Can I delete diagnostic data stored on Microsoft servers?
Yes, you can manage and delete the data Microsoft has already collected. Visit the official Microsoft Privacy Dashboard to view and clear your activity history, location data, and diagnostic information linked to your Microsoft account. This is the most effective way to remove cloud-stored data.
Was this guide helpful?

About the Author
Richard
Tech Writer, IT Professional
Richard, a writer for Geek Rewind, is a tech enthusiast who loves breaking down complex IT topics into simple, easy-to-understand ideas. With years of hands-on experience in system administration and enterprise IT operations, he’s developed a knack for offering practical tips and solutions. Richard aims to make technology more accessible and actionable. He's deeply committed to the Geek Rewind community, always ready to answer questions and engage in discussions.

No comments yet — be the first to share your thoughts!