How to Clear Windows Update History in Windows 11
You can clear your Windows Update history in Windows 11 to declutter your settings or as a troubleshooting step.
Your Windows Update history is a list of all the updates your PC has downloaded and installed, including security patches and feature updates like those from Windows 11, version 24H2.
Clearing this history removes the visible list within your settings menu. Your actual installed updates remain on your computer, ensuring your system stays protected and functional.
This process helps maintain a tidy settings interface and can be a useful step when diagnosing update-related problems.
Open Windows Terminal as administrator, paste the provided command, and press Enter. This action will clear your visible Windows Update history without uninstalling any installed updates.
How to clear your update history
- Click the Start button and type “Terminal.”
- Right-click on Terminal and select Run as administrator (requires admin privileges).
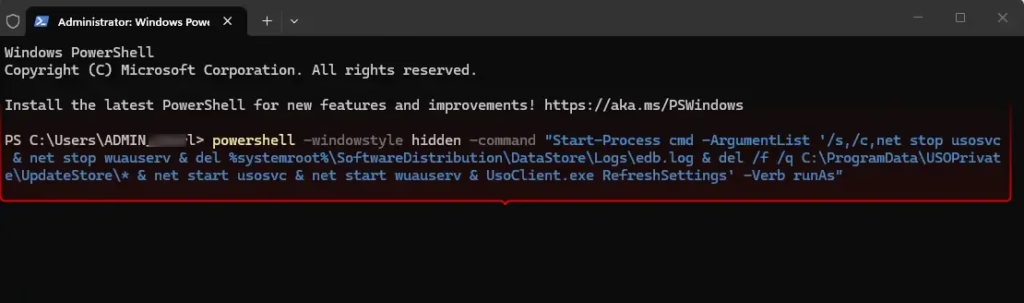
- Copy the following command and paste it into the window, then press Enter:
💻CodeCopy
powershell -windowstyle hidden -command "Start-Process cmd -ArgumentList '/s,/c,net stop usosvc & net stop wuauserv & del %systemroot%\SoftwareDistribution\DataStore\Logs\edb.log & del /f /q C:\ProgramData\USOPrivate\UpdateStore\* & net start usosvc & net start wuauserv & UsoClient.exe RefreshSettings' -Verb runAs"
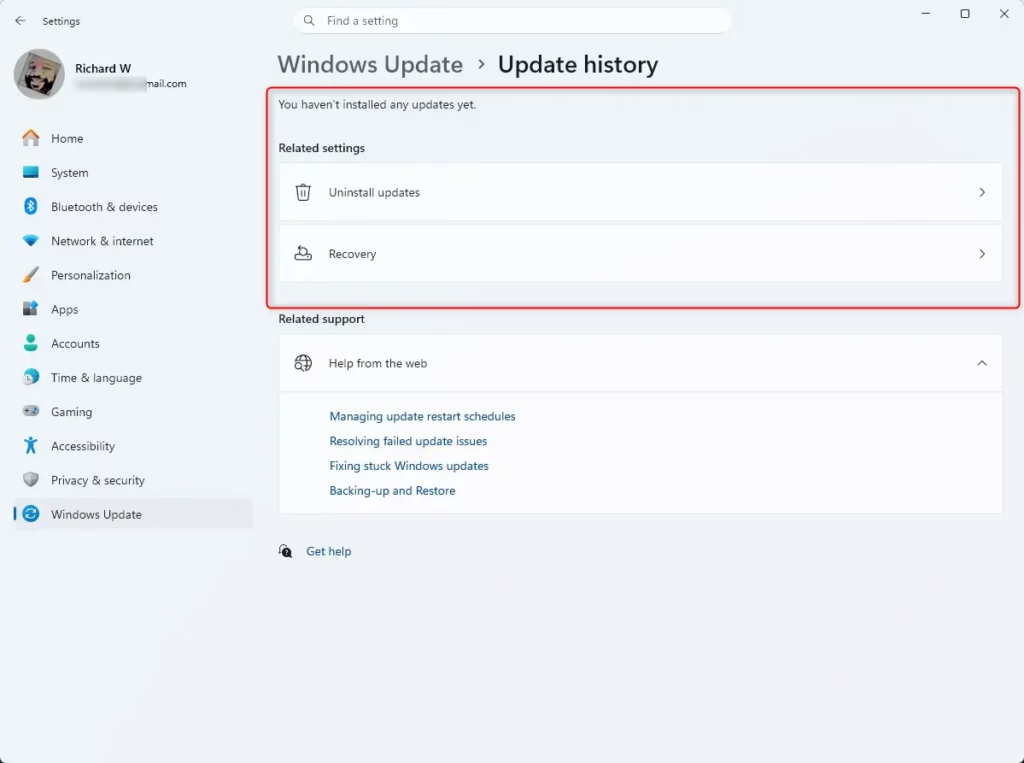
You’ll notice that Update history is cleared.
Summary
Clearing your Windows Update history is a quick way to reset your update logs. By using the command line as an administrator, you can wipe the history list instantly. This does not uninstall your updates; it simply clears the record of them from your view.
Was this guide helpful?

About the Author
Richard
Tech Writer, IT Professional
Richard, a writer for Geek Rewind, is a tech enthusiast who loves breaking down complex IT topics into simple, easy-to-understand ideas. With years of hands-on experience in system administration and enterprise IT operations, he’s developed a knack for offering practical tips and solutions. Richard aims to make technology more accessible and actionable. He's deeply committed to the Geek Rewind community, always ready to answer questions and engage in discussions.


No comments yet — be the first to share your thoughts!