Install Node.js and npm on Ubuntu: A Step-by-Step Guide
You install Node.js and npm on Ubuntu primarily through two methods: using the official NodeSource repositories or Ubuntu’s default package repositories.
Node.js is an open-source JavaScript runtime environment crucial for building server-side applications. npm, which comes bundled with Node.js, is the default package manager for the Node.js ecosystem, granting you access to a vast library of open-source code packages.
This guide focuses on helping you install the latest stable Node.js version, likely v20.x or newer, and its companion npm on your Ubuntu machine.
With Node.js and npm set up, you’ll be ready to tackle modern JavaScript development projects.
Install Node.js and npm from Ubuntu’s default repositories by running sudo apt update followed by sudo apt install nodejs npm. Alternatively, use Snap with sudo snap install node –classic or add the NodeSource repository and then run sudo apt install nodejs. Check the installation with node –version and npm –version.
How to install Node.js from Ubuntu repositories
You can install Node.js and npm directly from Ubuntu’s software sources using simple commands.
Run the following commands to update the package index and install Node.js and npm:
sudo apt update
sudo apt install nodejs npm
The command above will install several Node.js and npm packages, including the tools necessary to compile and install native addons from npm.
Once the installation is complete, run the commands below to check the version installed.
nodejs --version
That should output a similar line as shown below:
v10.19.0
As you can see, the latest version in Ubuntu is v10.19.0. However, newer v11, v12, v13, and v14 have also been released.
How to Install Node.js and npm from Snap
Installing Node.js and npm using Snap is a straightforward method that bundles everything needed.
Snaps are containerized software packages, meaning they’re built with all their dependencies. This allows them to run across many Linux distributions from a single build. They also handle updates automatically and can roll back gracefully if needed.
To install via Snap, run the commands below to install Snap.
sudo apt update
sudo apt install snapd
Once Snap is installed, run the commands below to get Node.js and npm installed via Snap. Choose the correct Node.js versions you want to install in Ubuntu.
For the Latest release (version 14),
sudo snap install node --channel=14/stable --classicFor version 13, run this:
sudo snap install node --channel=13/stable --classicFor the LTS (version 10)
sudo snap install node --channel=10/stable --classicHow to Install Node.js and npm from NodeSource
NodeSource offers a reliable way to install the latest Node.js versions on Ubuntu, keeping your development environment up-to-date.
You can use the NodeSource repository to install a specific version of Node.js. At the time of this writing, the repository contains Node.js versions 14, 14, 12, 11, 10, and 8.
To install Node.js from NodeSource, run the commands below to add the repository for your desired version.
Then for the Latest release (version 14), add this PPA.
curl -sL https://deb.nodesource.com/setup_14.x | sudo -E bash -For (version 12), run the commands below:
curl -sL https://deb.nodesource.com/setup_12.x | bash -To install the LTS release (version 10), use this PPA
curl -sL https://deb.nodesource.com/setup_10.x | bash -After adding the repository, you can now install the Node.js version you selected. If you add multiple repositories, your system will install the newest version of Node.js, not necessarily the Long Term Support (LTS) version.
Install Node.js and npm
After adding the NodeSource repositories, you can install Node.js and npm with a simple command, and then check their versions.
sudo apt install nodejs
After installing, both Node.js and npm modules should be ready to use.
You can use the commands below to view the version number installed.
node --version
npm --version
The commands will list the currently installed version:
v14.0.0
6.14.4
To test whether the web server is properly installed, run the commands below to create a test file called http_server.js in your home folder.
cd ~/
nano http_server.js
Then copy and paste the content below into the file and save it.
const http = require('http');

const hostname = '127.0.0.1';
const port = 3000;

const server = http.createServer((req, res) => {
  res.statusCode = 200;
  res.setHeader('Content-Type', 'text/plain');
  res.end('Hello Worldn');
});

server.listen(port, hostname, () => {
  console.log(`Server running at http://${hostname}:${port}/`);
});
After that, save the file and run the commands below to start the server.
node http_server.js
You should see an output that reads:
The server running at http://127.0.0.1:3000/
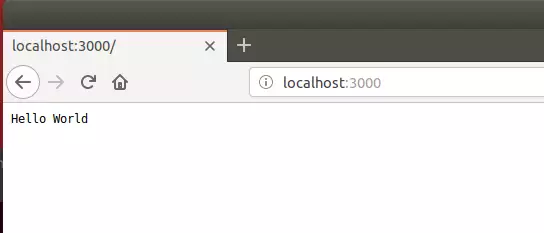
Now open your browser and browse to the server hostname or IP address followed by port 3000. You should see a default page with Hello World.
http://localhost:3000
That should do it!
Conclusion:
This post showed you how to install Node.js and npm on Ubuntu Linux. Please use the comment form below if you find any errors above or have something to add.
Was this guide helpful?

About the Author
Richard
Tech Writer, IT Professional
Richard, a writer for Geek Rewind, is a tech enthusiast who loves breaking down complex IT topics into simple, easy-to-understand ideas. With years of hands-on experience in system administration and enterprise IT operations, he’s developed a knack for offering practical tips and solutions. Richard aims to make technology more accessible and actionable. He's deeply committed to the Geek Rewind community, always ready to answer questions and engage in discussions.


No comments yet — be the first to share your thoughts!