How to Install Tomcat 11 on Ubuntu 24.04
You install Apache Tomcat 11 on Ubuntu 24.04 by downloading the binary distribution and configuring its environment variables.
Apache Tomcat is an open-source web server and servlet container. It’s critical for running Java web applications, including Servlets and JavaServer Pages (JSP).
This tutorial walks you through installing the latest Tomcat 11 release on your Ubuntu 24.04 system. You’ll set up your environment, ensuring it’s ready for your Java projects.
The core steps involve downloading the binary archive, defining essential environment variables like JAVA_HOME, and then starting the Tomcat service. Finally, you’ll confirm your installation by visiting Tomcat’s default page in your browser.
Install Tomcat 11 on Ubuntu 24.04 by downloading the binary distribution, creating a system user, setting up a systemd service file, and starting the Tomcat service. Access the web portal at your server’s IP address on port 8080.
Install Java Runtime Environment
Tomcat is a Java application that requires installing Java on the system. If you don’t already have Java installed, read the post below to install it.
Install Java Runtime Environment on Ubuntu
After installing Java on Ubuntu, continue to install Tomcat.
Download Tomcat packages
Now that Java Runtime Environment is installed, download Tomcat packages from its website.
Make sure the latest version and source from the download site.
Since we’re installing Tomcat version 11, download the 11 binary code using the command below.
curl -O https://dlcdn.apache.org/tomcat/tomcat-11/v11.0.4/bin/apache-tomcat-11.0.4.tar.gz
After downloading the file, extract the downloaded file.
tar zxvf apache-tomcat-11.0.4.tar.gz
Then, move downloaded file to the [/usr/libexec/tomcat11]. This will be the working directory of the Tomcat user we will create below.
sudo mv apache-tomcat-11.0.4 /usr/libexec/tomcat11
Create Tomcat user
When configuring Tomcat, create a dedicated system account. This account will be named [Tomcat].
Run the command below to create the Tomcat user with home directory of the extracted Tomcat packages.
The second command ensures the Tomcat user is the owner of the directory.
sudo useradd -M -d /usr/libexec/tomcat11 tomcat
sudo chown -R tomcat:tomcat /usr/libexec/tomcat11
Create system service
Now that Tomcat packages have been downloaded and the system account has been created, let’s create a system service account that will be used to start, enable, and stop Tomcat services.
Run the command below to create a system service file for Tomcat.
sudo nano /usr/lib/systemd/system/tomcat11.service
Then, copy and paste the content below into the file.
[Unit]
Description=Apache Tomcat 11
After=network.target

[Service]
Type=oneshot
ExecStart=/usr/libexec/tomcat11/bin/startup.sh
ExecStop=/usr/libexec/tomcat11/bin/shutdown.sh
RemainAfterExit=yes
User=tomcat
Group=tomcat

[Install]
WantedBy=multi-user.target
Save and exit the file.
Next, enable the service.
sudo systemctl enable --now tomcat11
sudo systemctl restart tomcat11
Access Tomcat web portal
Tomcat is configured and ready.
You can access its portal using the server IP address or hostname followed by port 8080.
http://srv1.example.com:8080
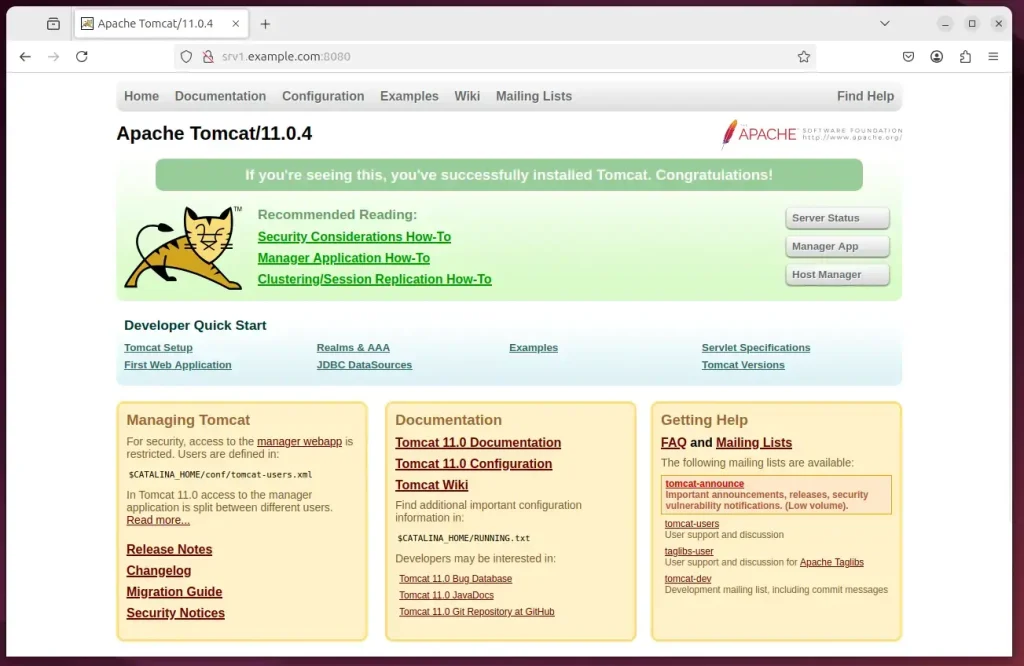
Tomcat is installed and ready.
To access the server manager, you will need an account and password.
You can create one by opening the configuration file below.
sudo nano /usr/libexec/tomcat11/conf/tomcat-users.xml
Then, copy and paste the code below in the file, just before the </tomcat-users>.
<role rolename="manager-gui"/>
<role rolename="admin-gui"/>
<user username="admin" password="type_new_password_here" roles="manager-gui,admin-gui"/>
</tomcat-users>
Save the file and exit.
To access the Tomcat server remotely, you’ll want to allow the remote IP address to be allowed. To change the IP address restrictions on these, open the appropriate context.xml files.
Server Manager app:
sudo nano /usr/libexec/tomcat11/webapps/manager/META-INF/context.xml
Host Manager app:
sudo nano /usr/libexec/tomcat11/webapps/host-manager/META-INF/context.xml
Add the IP address you want to access remotely in the highlighted area.
<Context antiResourceLocking="false" privileged="true" >
  <!--<Valve className="org.apache.catalina.valves.RemoteAddrValve"
         allow="127.d+.d+.d+|::1|0:0:0:0:0:0:0:1|new_public_ip_address_here" />-->
</Context>
Save and close the files, and you’re done!
That should do it!
Conclusion:
In summary, installing Apache Tomcat 11 on Ubuntu 24.04 is a straightforward process that involves several key steps:
- Java Requirement: Ensure the Java Runtime Environment is installed before setting up Tomcat.
- Downloading Tomcat: Obtain the latest Tomcat 11 binary package from the official Apache website.
- User Creation: Create a dedicated system user for Tomcat to enhance security and manageability.
- System Service Setup: Configure Tomcat as a system service for easy management and automated start on boot.
- Accessing the Portal: Use the server’s IP address to access the Tomcat web portal at port 8080.
- Security Configuration: Set up user roles and permissions for the Tomcat server to manage access effectively.
Following these steps, you can successfully install and configure Tomcat 11, making it ready to deploy your Java web applications.
How to run Tomcat 11?
Okay so by default the Apache 11 server is running next in order to test this go to the browser. And in a new tab just type localhost. And then port 8000 hit Enter.
Was this guide helpful?

About the Author
Richard
Tech Writer, IT Professional
Richard, a writer for Geek Rewind, is a tech enthusiast who loves breaking down complex IT topics into simple, easy-to-understand ideas. With years of hands-on experience in system administration and enterprise IT operations, he’s developed a knack for offering practical tips and solutions. Richard aims to make technology more accessible and actionable. He's deeply committed to the Geek Rewind community, always ready to answer questions and engage in discussions.


No comments yet — be the first to share your thoughts!