How to Initialize New Disks in Windows 11

You initialize a new disk in Windows 11 to make it ready for storage and use by your PC.
Disk initialization is the crucial first step to prepare a brand new hard drive or SSD for your system. This process assigns a partition style (like GPT or MBR) and a file system (such as NTFS) so Windows can properly organize and manage your data.
Without initializing, your new storage drive remains invisible and unusable in File Explorer, even if it’s physically installed. This ensures Windows recognizes the disk and can allocate space for your files.
After initialization, you’ll format the disk, assign a drive letter, and then you can immediately begin saving your important documents, games, or applications.
To initialize a new disk in Windows 11, open Disk Management, right-click the unallocated disk, and select “Initialize Disk.” Choose GPT for modern systems, then right-click the unallocated space and select “New Simple Volume” to format it.
Should I choose MBR or GPT for my new drive?
When you initialize a new disk in Windows 11, you’ll need to pick between MBR and GPT. For most modern computers, GPT is the better choice because it supports larger drives and is needed for newer systems.
How to initialize new disks in 🪟 Windows 11
You can initialize new disks in Windows 11 using the Settings app if your new drive isn’t showing up in File Explorer.

1. Open the Settings app by pressing Windows key + I.
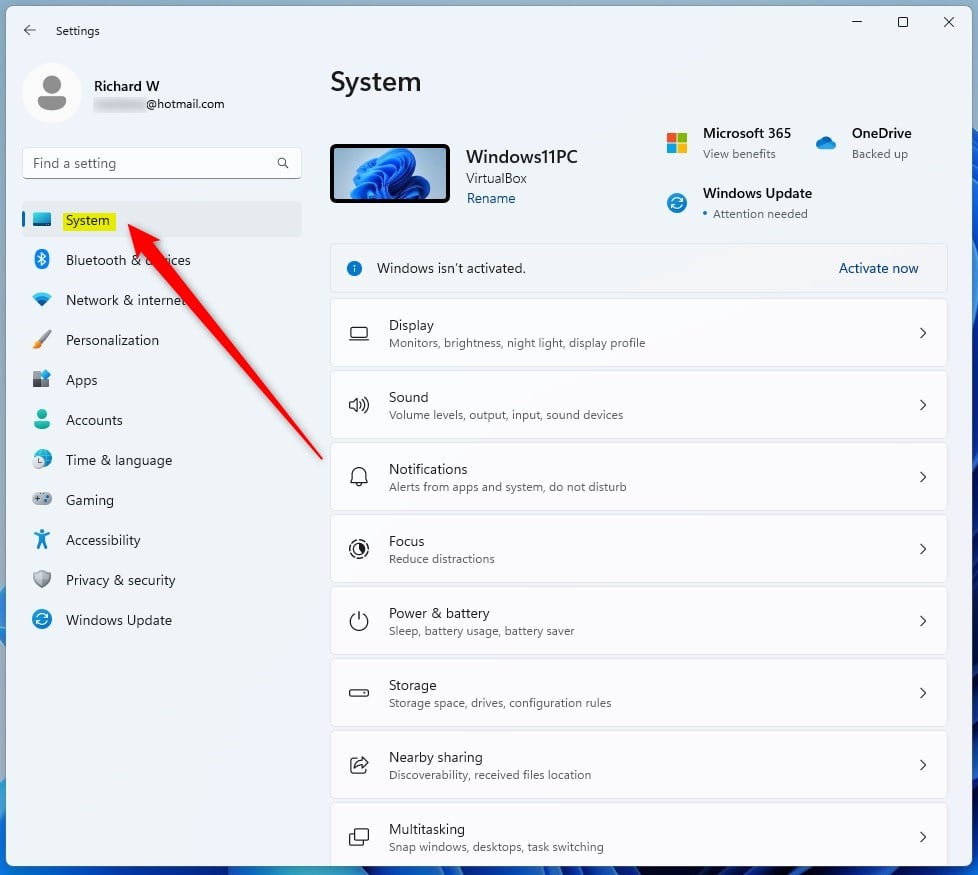
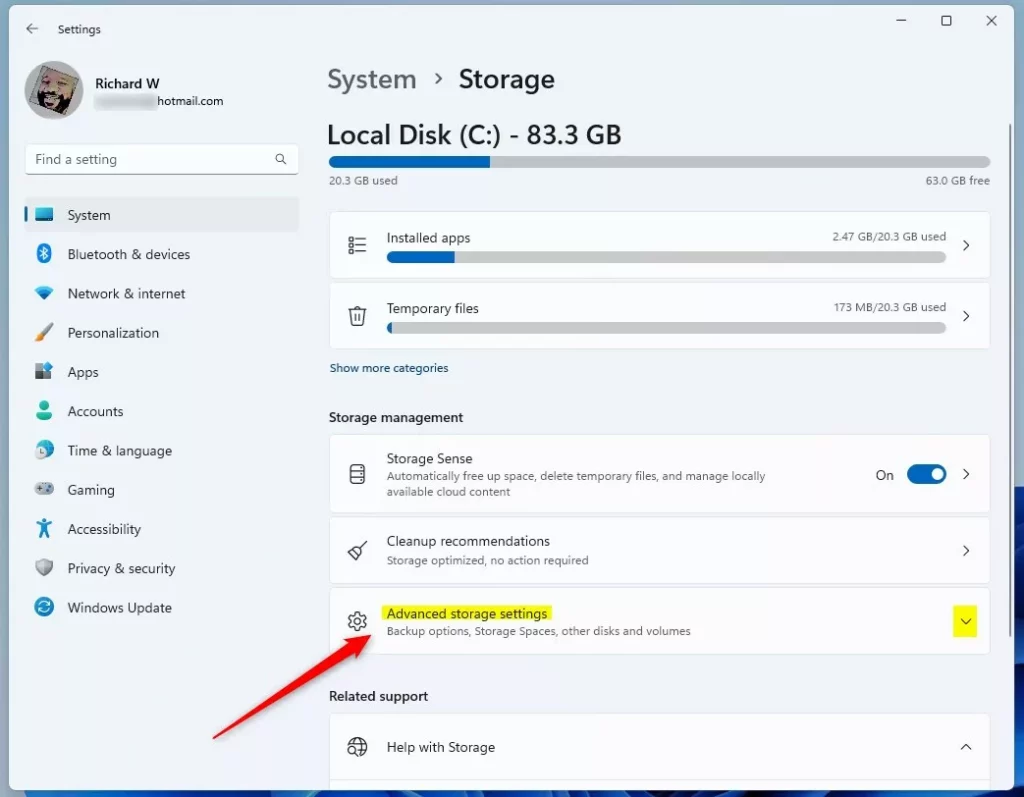
2. Click System on the left, then select Storage on the right.

3. Click Advanced storage settings to see more options.
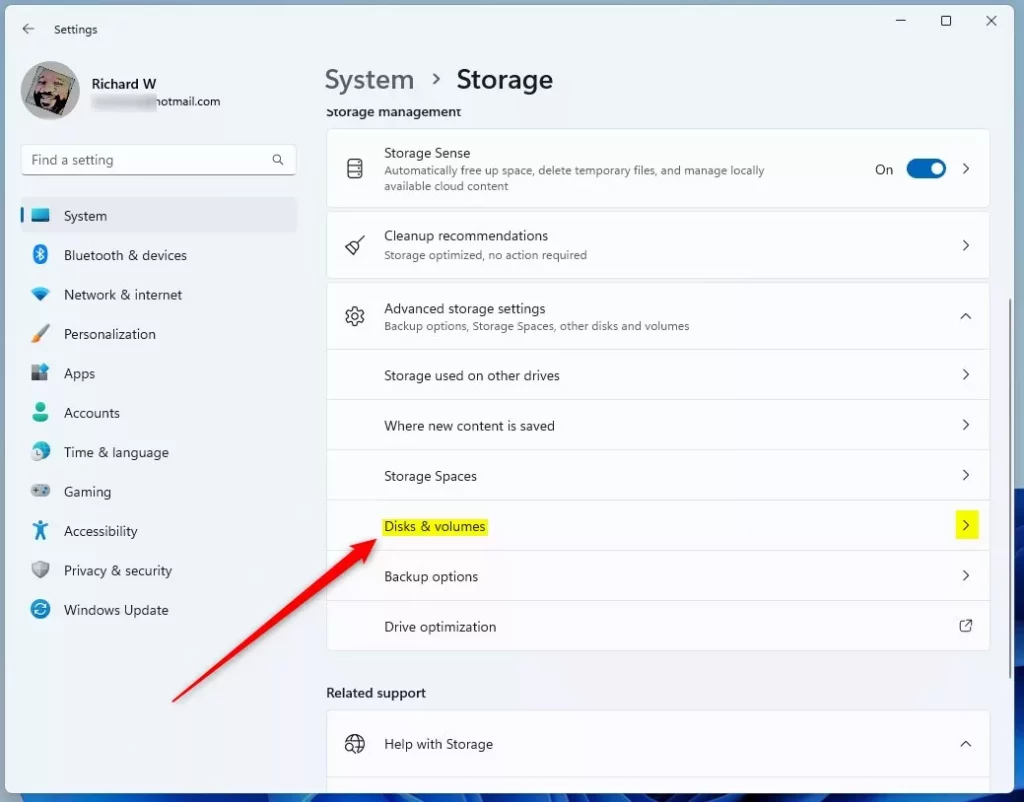
4. Select Disks & volumes.
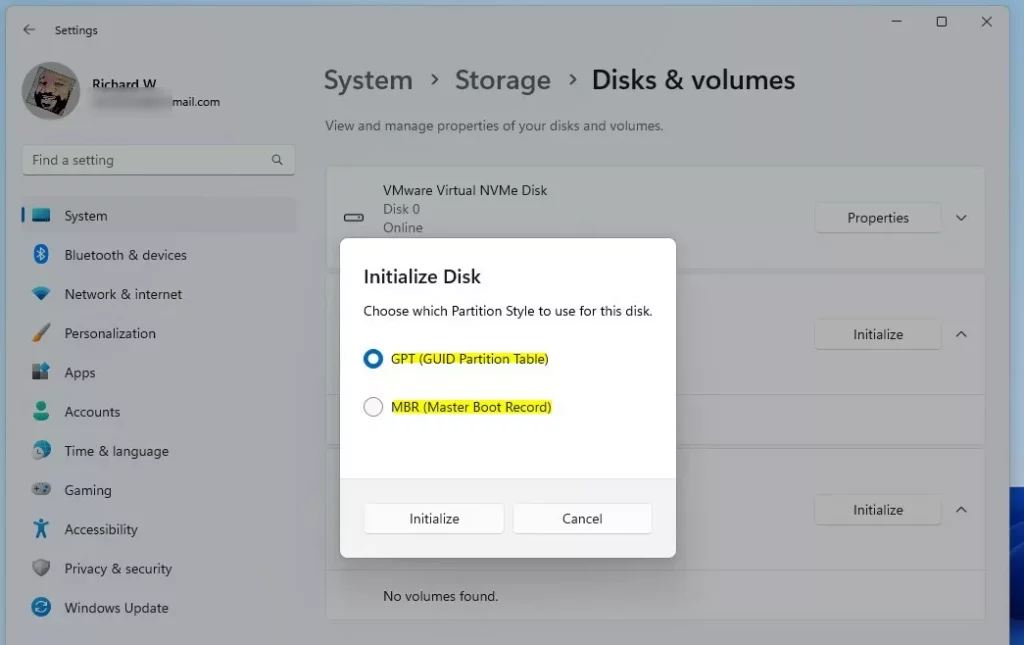
5. Find your new drive marked as Not initialized and click Initialize.
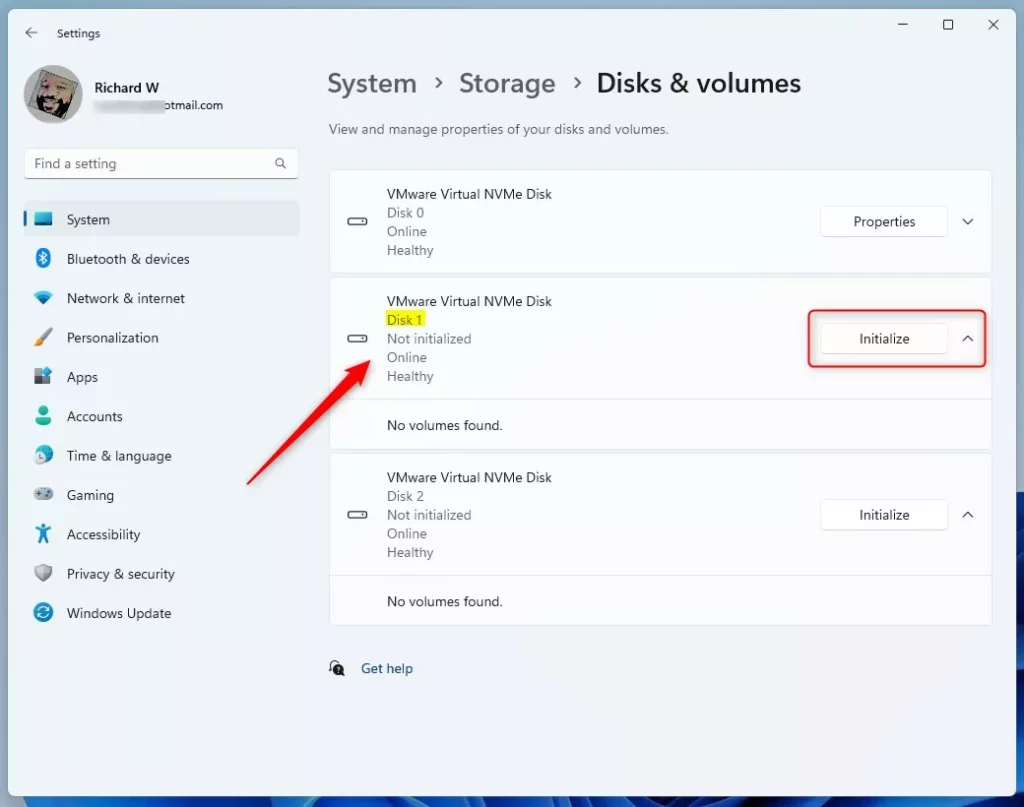
6. Choose GPT for modern drives and click OK.
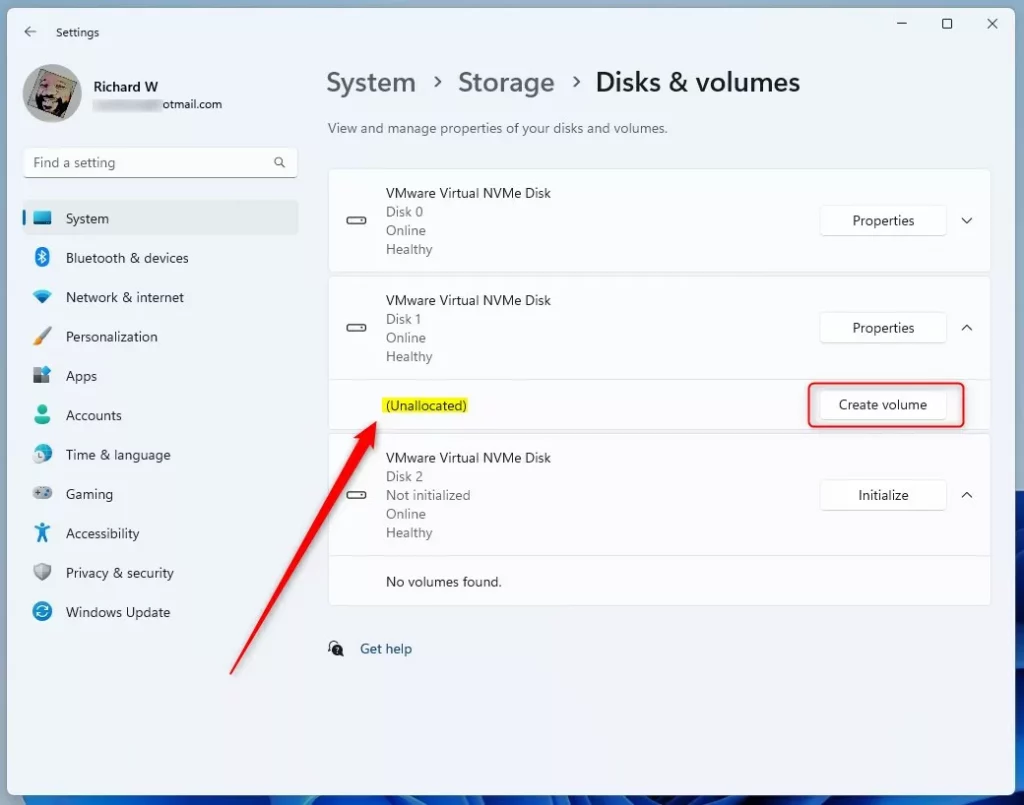
7. Click Create volume to format the drive so it can store data.
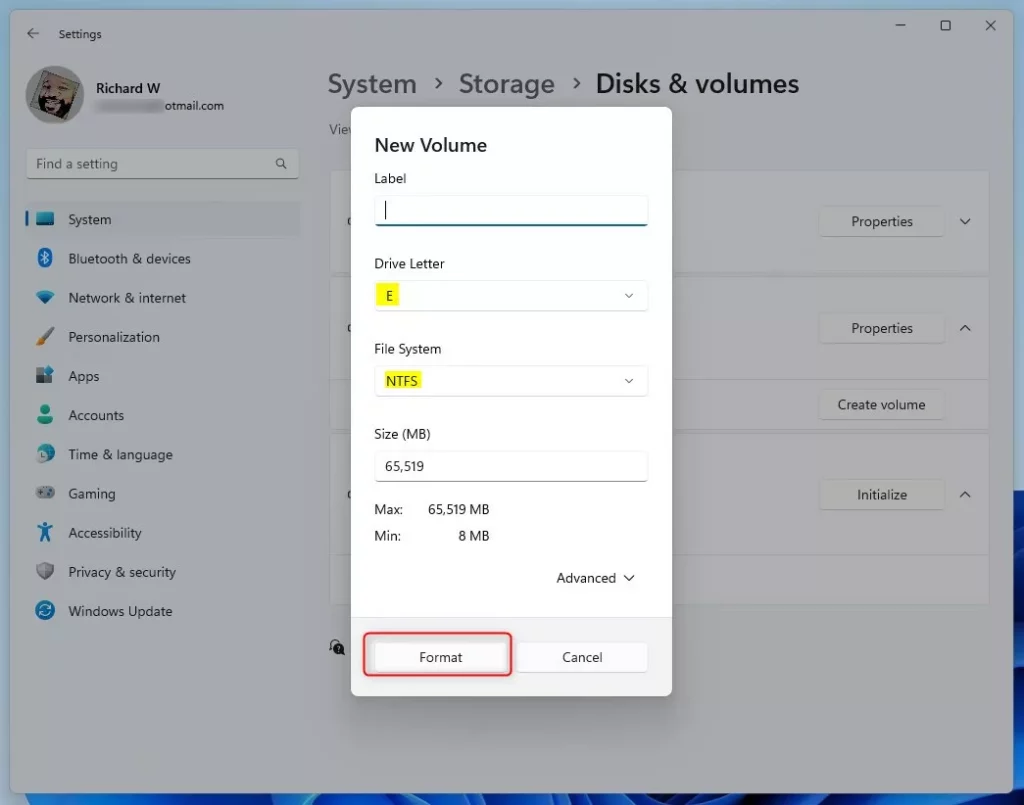
8. Give your drive a name, pick a drive letter, and click Format.
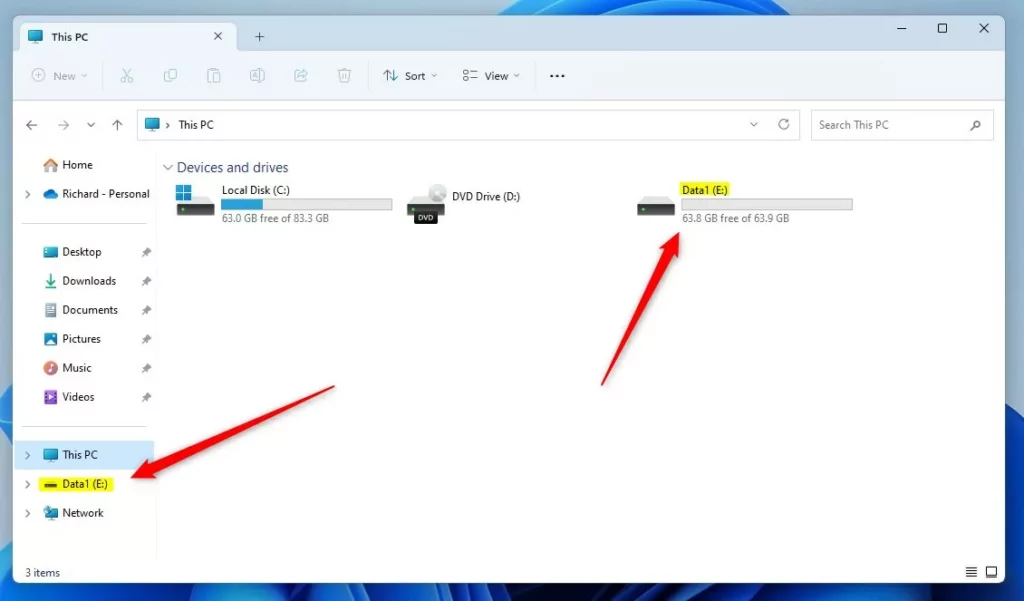
Once finished, the drive will appear in File Explorer.
Using the Disk Management tool
The Disk Management tool gives you more control when you initialize a disk in Windows 11.
1. Right-click the Start button and select Disk Management.
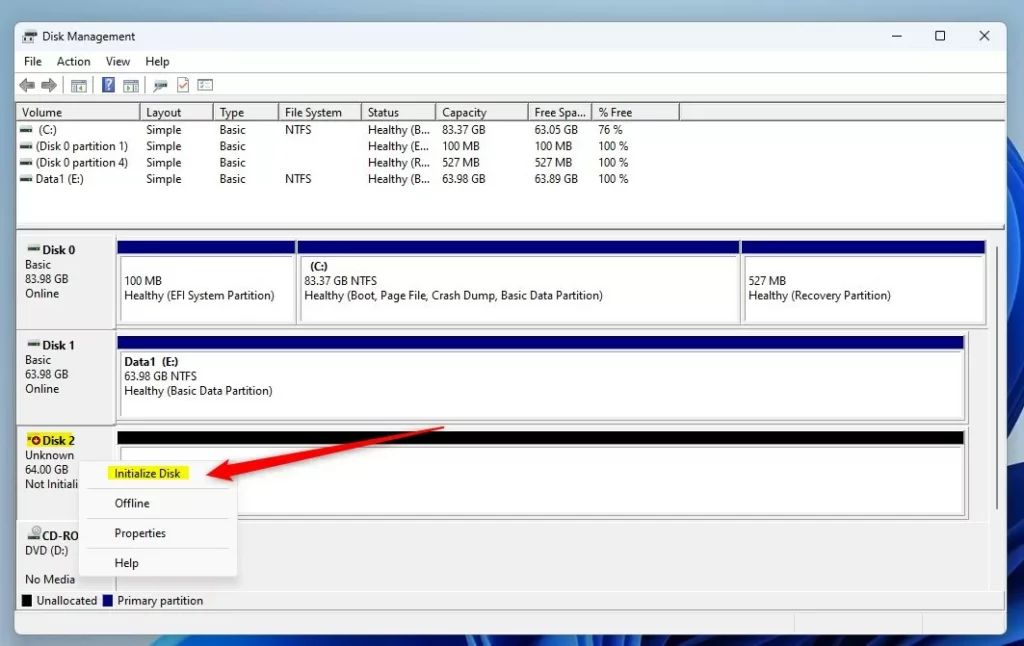
2. If the disk is marked as Not Initialized, right-click the disk name and select Initialize Disk.
3. Right-click the unallocated black bar and select New Simple Volume to finish the setup.
Troubleshooting: Why is my SSD not detected?
If your new SSD isn’t showing up in Windows 11, check that the cables are plugged in securely, look at your computer’s BIOS/UEFI settings, and see if any driver updates are needed from the manufacturer.
- Physical Connection: Ensure the SATA or NVMe cables are plugged in securely.
- BIOS/UEFI: Restart your PC and enter the BIOS menu to see if the motherboard detects the hardware.
- Drivers: Check the manufacturer’s website for specific storage controller drivers.
- Power: Ensure your power supply has enough wattage for the new hardware.
Command Line Method (Diskpart)
You can initialize a disk using Diskpart in Windows 11 if you’re comfortable with the command line.
1. Open Command Prompt as administrator. (You can do this by searching for ‘cmd’ and right-clicking to select ‘Run as administrator’.)
2. Type diskpart and press Enter.
3. Type list disk to find your drive number.
4. Type select disk X (replace X with your disk number).
5. Type clean to wipe the disk, then convert gpt to set the partition style.
Summary
Initializing a disk in Windows 11 is how you get new storage ready to use. You can use the Settings app or Disk Management, choosing GPT for modern drives, and then format it to give it a drive letter.
Does initializing a disk erase existing data?
Yes. Initializing a disk creates a new partition table, which effectively wipes the drive’s index. If you have files on a drive, do not initialize it, as you will lose access to that data. Only initialize drives that are brand new or drives you intend to completely erase.
How do I fix a disk that says ‘Not Initialized’?
If a disk says ‘Not Initialized’ in Windows 11, it just means it needs a partition style. You can fix this easily by right-clicking the disk in Disk Management, choosing ‘Initialize Disk’, selecting GPT, and then creating a new volume.
Was this guide helpful?

About the Author
Richard
Tech Writer, IT Professional
Richard, a writer for Geek Rewind, is a tech enthusiast who loves breaking down complex IT topics into simple, easy-to-understand ideas. With years of hands-on experience in system administration and enterprise IT operations, he’s developed a knack for offering practical tips and solutions. Richard aims to make technology more accessible and actionable. He's deeply committed to the Geek Rewind community, always ready to answer questions and engage in discussions.

[…] First, open the Disk Management (diskmgmt.msc). […]
[…] If you want to learn more about managing disks in Windows 11, you can check out this helpful article on How to Initialize a New Disk in Windows 11. […]