How to Exit S Mode in Windows 11

You can exit S mode in Windows 11 to install apps from outside the Microsoft Store, giving you more flexibility with your PC.
S mode is a streamlined, more secure version of Windows 11 that restricts app installations to only those available on the Microsoft Store, ensuring enhanced safety and performance for your device.
This mode is often pre-installed on new PCs, especially budget-friendly models and those intended for educational purposes, to provide a controlled and reliable user experience.
Removing S mode requires accessing your device’s settings and switching to a standard Windows 11 edition, which typically takes only a few minutes.
Why Exit S Mode?
Why do this? You may need to install specialized software, web browsers like Chrome or Firefox, or development tools that are not available in the Microsoft Store.
What happens when done? Your computer will run a standard version of Windows 11. You can install any program, but you cannot return to S mode. This change is permanent.
Security and Performance Risks
Exiting S mode removes the safety net that prevents you from installing unverified software. Once you switch, your computer is more vulnerable to viruses and malware if you download files from untrusted websites. Additionally, some users may notice a slight decrease in battery life or performance because the system is no longer restricted to optimized store apps.
How to Exit S Mode
Follow these steps to disable S mode. Note: This process requires an administrator account.
- Open the Start menu and select Settings.

windows 11 new settings button - Click on System in the left-hand sidebar.
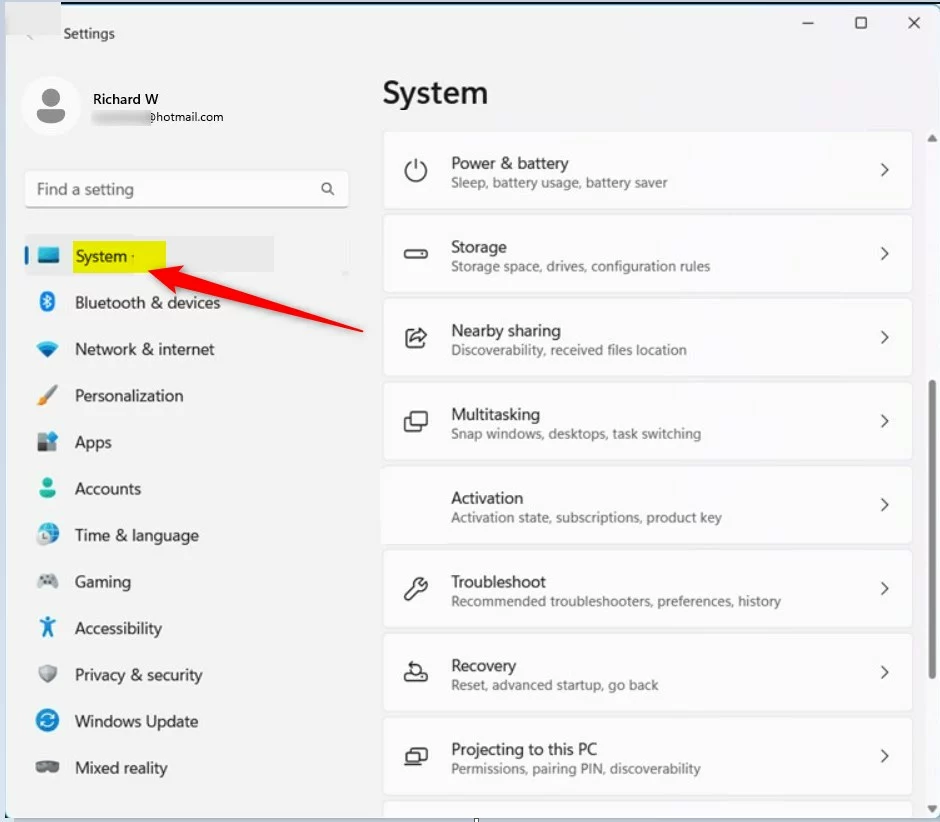
windows 11 system in settings app - Select Activation from the list.
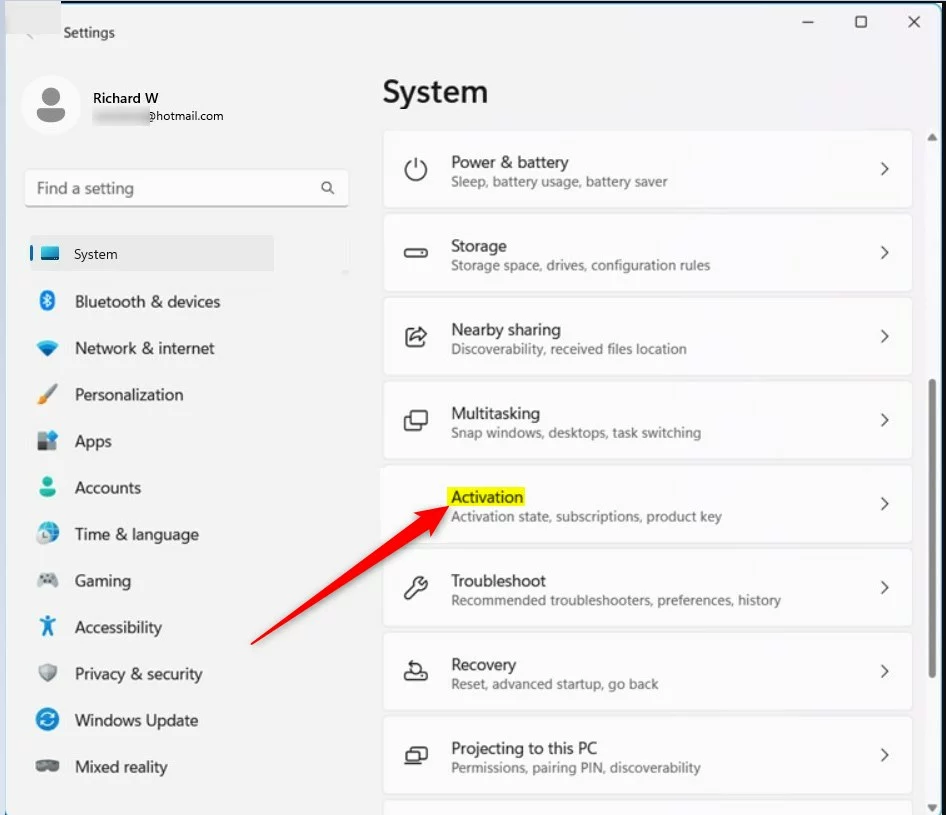
windows 11 activation in system settings app - Look for the S mode section and click the arrow to expand it.
- Click the Open Store button.
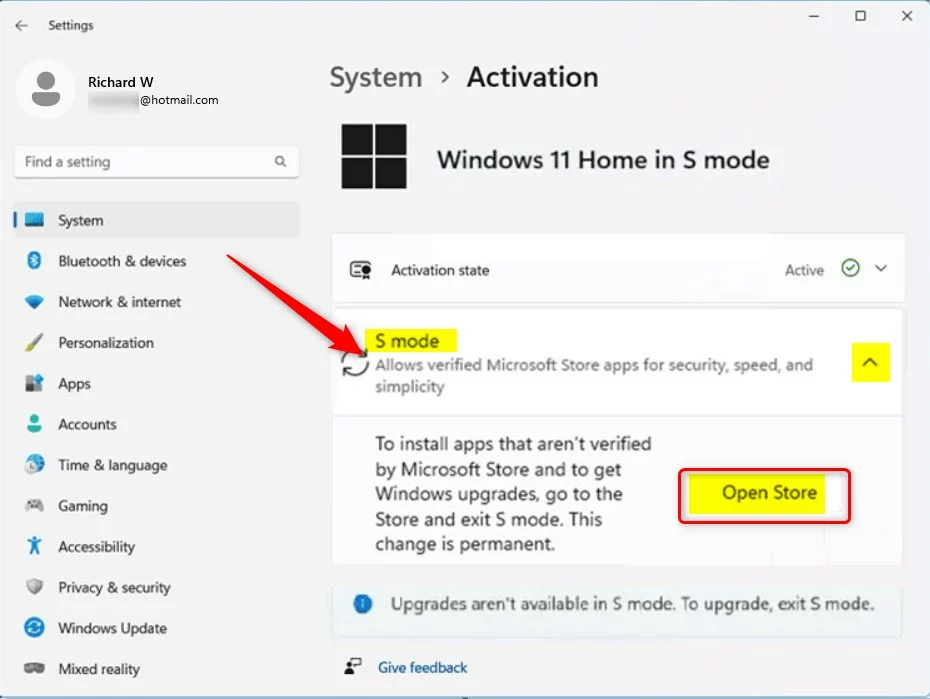
windows 11 activation s mode open store button - In the Microsoft Store, you will see the Switch out of S mode page. Click the Get button.
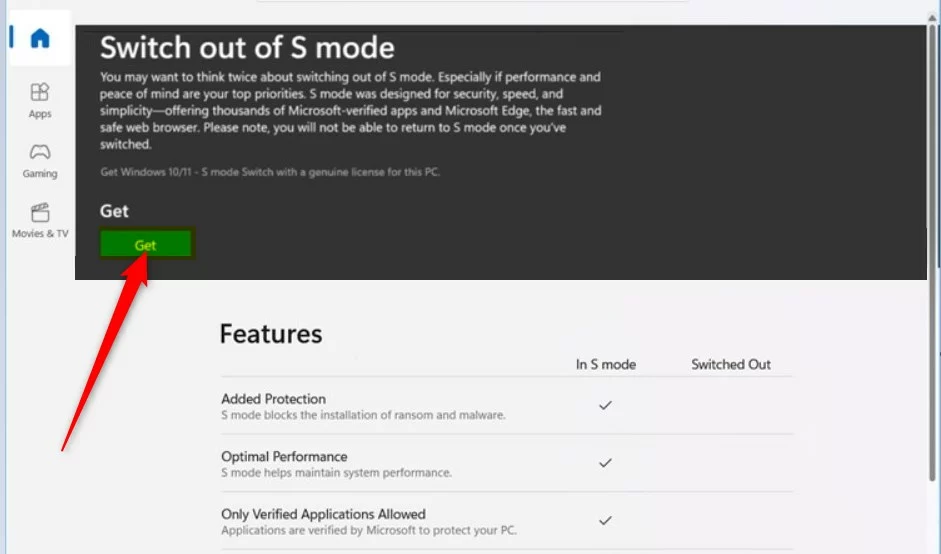
windows 11 switch out of s mode get button
Once the process completes, you will see a confirmation message. You can now install apps from any source.
Troubleshooting Common Issues
If the ‘Get’ button is missing, ensure you are signed into a valid Microsoft Account. Sometimes, a pending Windows Update can block the process. Check for updates by navigating to Settings > Windows Update. If you encounter an error, restart your computer and try again.
Summary
Exiting S mode is a permanent, free, and one-way process that allows you to install software from any source. While it offers more freedom, remember that you lose the added security of the Microsoft Store-only environment. Ensure you have reliable antivirus software installed once you make the switch.
Does exiting S mode void my laptop warranty?
No, switching out of S mode is a software configuration change provided by Microsoft. It does not void your hardware warranty. However, if you install software that causes system instability, the manufacturer may not cover the cost of software-related repairs or technical support for those specific third-party applications.
Does exiting S mode cost money?
No, switching out of S mode is completely free. You do not need to pay for any upgrades to move from Windows 11 Home in S mode to the standard version of Windows 11 Home. If you are prompted for payment, ensure you are on the official Microsoft Store page.
Was this guide helpful?

About the Author
Richard
Tech Writer, IT Professional
Richard, a writer for Geek Rewind, is a tech enthusiast who loves breaking down complex IT topics into simple, easy-to-understand ideas. With years of hands-on experience in system administration and enterprise IT operations, he’s developed a knack for offering practical tips and solutions. Richard aims to make technology more accessible and actionable. He's deeply committed to the Geek Rewind community, always ready to answer questions and engage in discussions.
[…] The blocklist is enabled on systems that have memory security (aka Hypervisor-protected Code Integrity (HVCI)) enabled or run Windows in S Mode. […]