How to Update the Bluetooth Driver Using Device Manager in Windows 11
Is your Bluetooth acting strange in Windows 11? Maybe your headphones won’t connect. Or your mouse keeps disconnecting. It’s annoying when wireless devices stop working. Often, the problem is with the driver. A driver is like a translator. It helps your hardware (like your Bluetooth adapter) talk to your computer (Windows 11). If the translator is old or confused, Bluetooth might not work right.
Don’t worry! We’ll show you how to update your Bluetooth driver. We’ll use a tool built into Windows called Device Manager. This is usually the best first step to fix Bluetooth problems. Let’s get your devices connected again!
Update Your Bluetooth Driver Using Device Manager
When your Bluetooth devices aren’t working, check their “brains” – the drivers. Device Manager is where you can see all the hardware on your computer. You can also manage its drivers there. Think of it as your computer’s hardware control center.
Here’s how to use it and update your Bluetooth driver:
1. Open Device Manager
Let’s open this tool. Click the Start button. This is usually the Windows icon in the bottom-left corner. Then, start typing devmgmt.msc. You will see it in the search results. Click on it to open the window.
Tip: You can also right-click the Start button. Then, choose “Device Manager” from the menu. It’s a quick way to get there!
2. Find Your Bluetooth Adapter
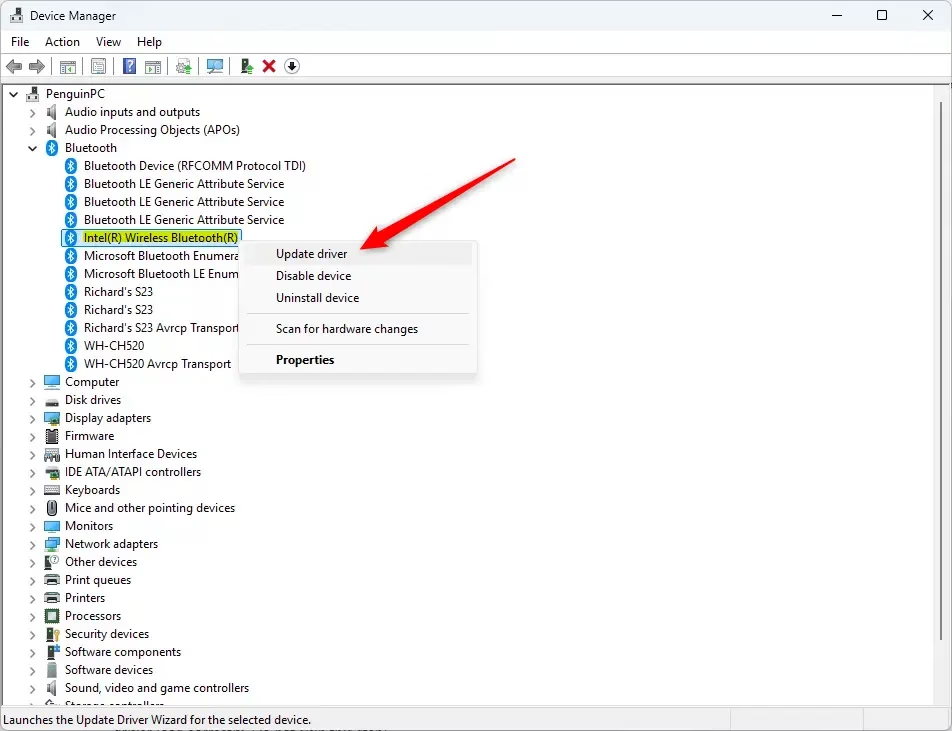
Device Manager will show a list of categories. Look for the one named Bluetooth. It might be closed. Click the small arrow next to it to open it. You’ll see your Bluetooth devices and adapters.
Warning: Be careful not to uninstall or disable devices you don’t know. Only change things in the Bluetooth section.
3. Start the Driver Update
Look for your specific Bluetooth adapter in the list. It might say something like “Intel(R) Wireless Bluetooth(R)”. This depends on your computer maker. Once you find it, right-click on it. A menu will appear. Choose “Update driver” from that menu.
4. Let Windows Search for Drivers
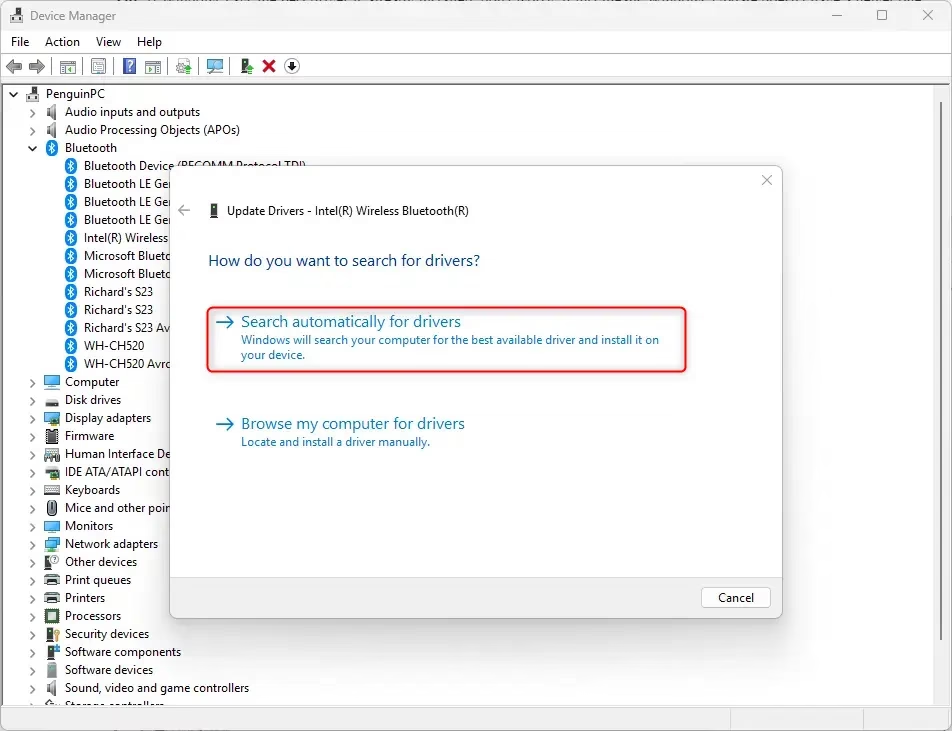
A new window will open. It will ask how you want to search for drivers. The easiest way is to choose “Search automatically for drivers.” Windows will connect to the internet. It will check if a newer driver is available for your Bluetooth adapter.
Explanation: Windows Update often has the newest drivers. But sometimes, they might not be the very latest. This step tells Windows to try its best to find an update for you.
5. Follow the On-Screen Prompts
If Windows finds a newer driver, it will guide you through installing it. Just follow the steps on the screen. It’s usually simple to click through.
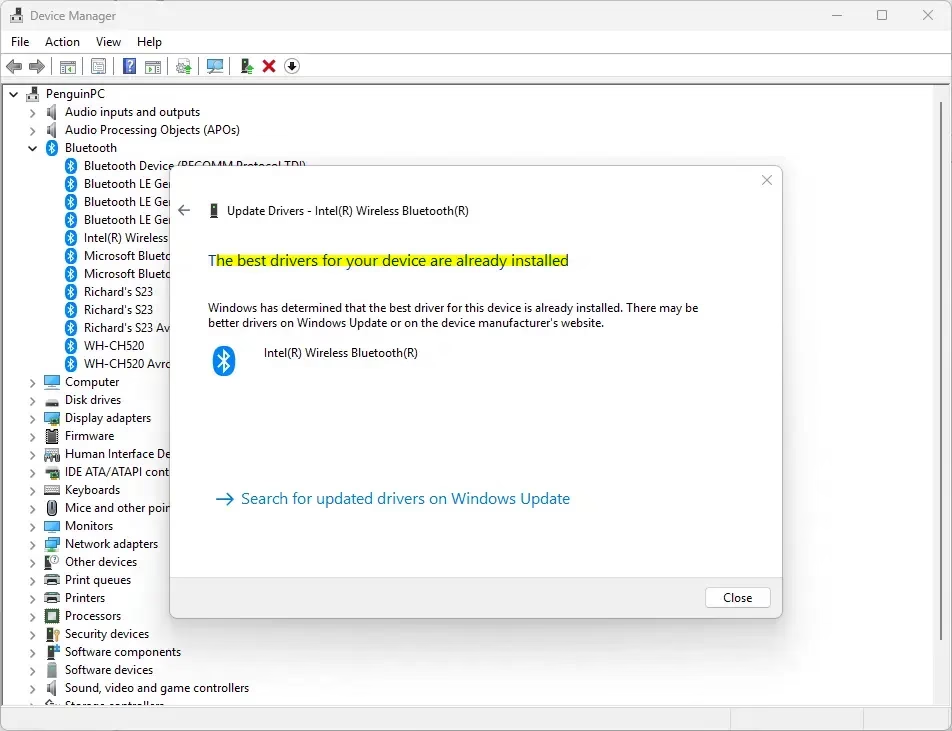
Tip: If Windows says the best driver is already installed, don’t worry. It just means Windows Update doesn’t have a newer one. We’ll explain what to do next.
6. Restart Your PC
After the driver update is done, Windows will probably ask you to restart your computer. This is important! Restarting lets the new driver load correctly. Do not skip this step!
Action: Click “Restart now” or restart your PC from the Start menu.
Reference:
Summary
Updating your Bluetooth driver through Device Manager is a simple way to fix connection problems. By following these steps, you can help Windows find and install newer drivers for your Bluetooth adapter. This often resolves issues like devices not connecting or dropping out. Remember to restart your PC after the update for the changes to take effect.
Was this guide helpful?

About the Author
Richard
Tech Writer, IT Professional
Richard, a writer for Geek Rewind, is a tech enthusiast who loves breaking down complex IT topics into simple, easy-to-understand ideas. With years of hands-on experience in system administration and enterprise IT operations, he’s developed a knack for offering practical tips and solutions. Richard aims to make technology more accessible and actionable. He's deeply committed to the Geek Rewind community, always ready to answer questions and engage in discussions.

No comments yet — be the first to share your thoughts!