How to Automatically Start Magnifier Before Signing In Windows 11

Magnifier is a built-in Windows tool that zooms in on your screen so text and images are easier to read. It works on the desktop, in apps and on the web. You can also set it to start before you sign in, which this guide covers for Windows 11.
To automatically start Magnifier before signing in to Windows 11, open Settings , navigate to Accessibility, then Magnifier. Check the box labeled “Start Magnifier before sign-in.” This ensures Magnifier is active as soon as your PC boots up.
Why automatically start Magnifier?
If you struggle to read small text, the sign-in screen is where it hurts most. You have to type a password or PIN and you can’t see the field clearly. Running Magnifier at startup means the screen is already enlarged when you reach that point, so you can see what you are typing and which account you are signing in to.
What happens when done?
Once this is set up, Windows launches Magnifier on its own when the sign-in screen appears. You don’t have to press a shortcut or ask someone to help you. The setting is saved, so it works on every startup until you turn it off.
How to enable automatic Magnifier
The easiest way to set this up is in the Settings app , under Accessibility. This makes Magnifier available as soon as you turn on the computer, before you sign in. It helps most if you need the zoom right away. The steps below apply to both Windows 11 Home and Pro.

Start in Settings and go to the Magnifier page. Follow these steps:
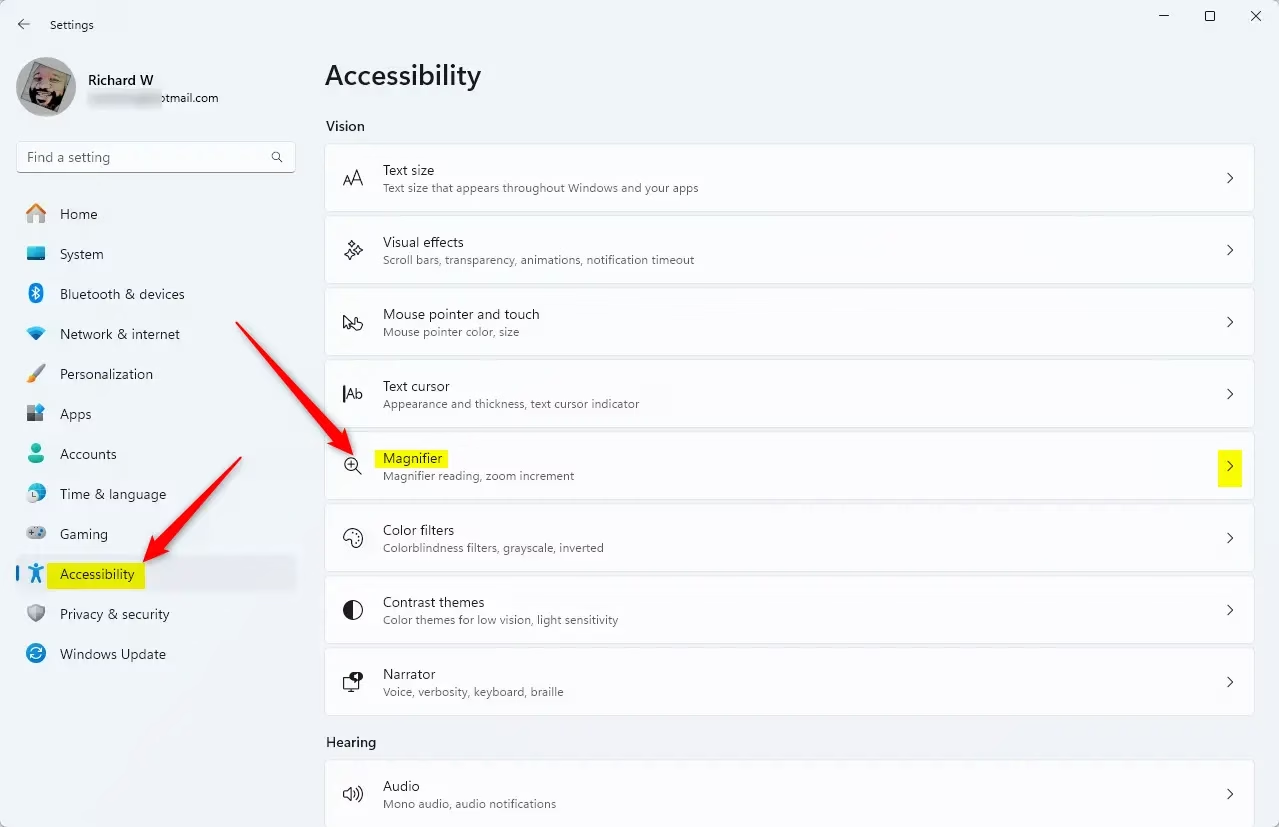
- Press the Win+I to open Settings. You can also right-click the Start button and choose Settings.
- Select Accessibility from the menu on the left.
- Scroll down to the Vision section and click Magnifier in the right pane.
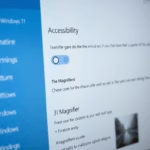
You should now see the Magnifier page with a toggle at the top. The path is Settings Accessibility Magnifier
Turn on Magnifier first, then open its extra options:
- Flip the Magnifier toggle switch to On. The screen zooms in and a small Magnifier toolbar appears.
- Click the small arrow beside the Magnifier tile to expand more options.
You will see two checkboxes:
- Start Magnifier before sign-in
- Start Magnifier after sign-in
On some builds the labels are longer. They may read "for everyone" after the first option and "for me" after the second. They are the same two options. The first applies to the sign-in screen for all users on the PC. The second applies to your own account once you are signed in.
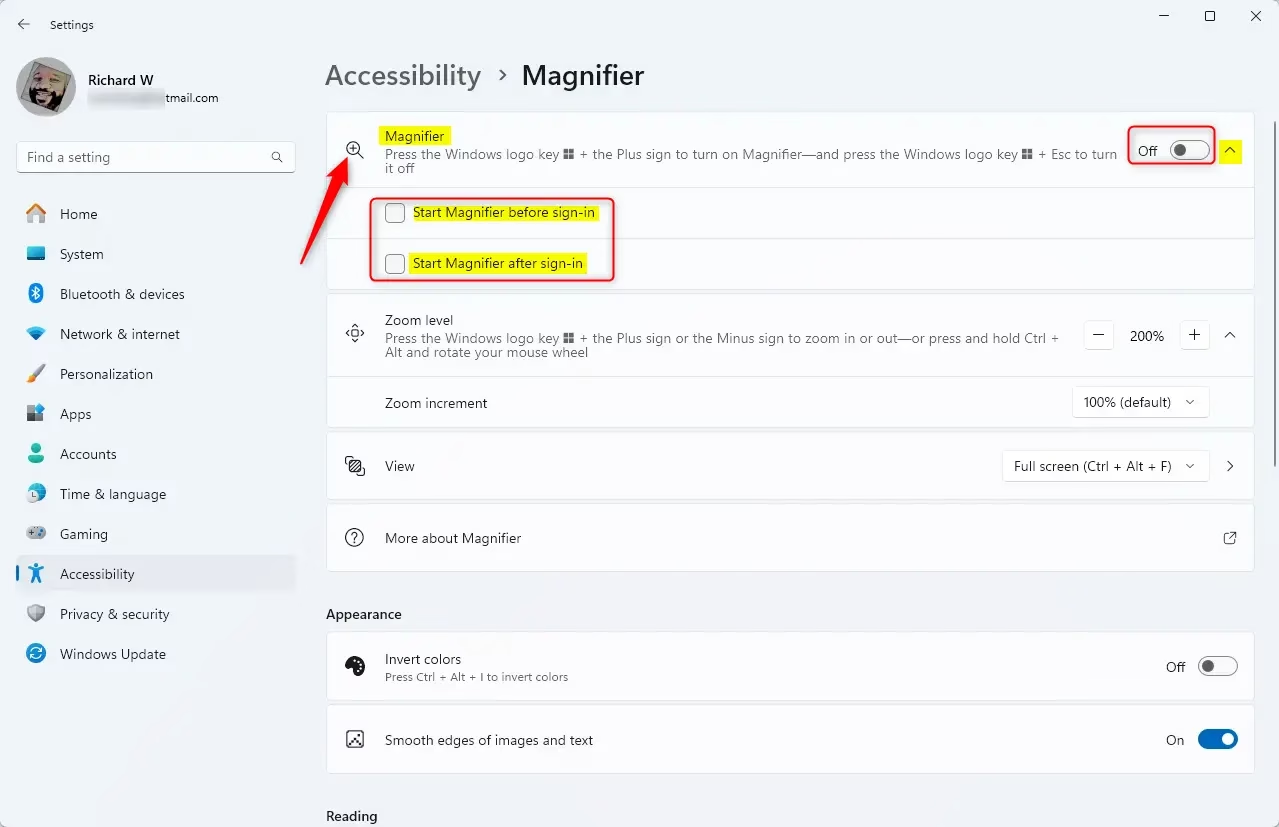
- Tick Start Magnifier before sign-in to get the zoom on the sign-in screen.
- Tick Start Magnifier after sign-in as well if you want Magnifier to keep running on your desktop. Selecting both activates the tool at all times.
- Close the Settings window. Changes save automatically, and you don't need to restart.
To test it, press the Windows logo key + L to lock the PC, then wake the screen. Magnifier should already be running at the sign-in screen. To undo the change, go back to the same page and clear the checkboxes. If an option is greyed out on a work or school PC, an administrator may be controlling it with a policy.
Advanced Configuration: Registry Editor
Advanced users can also start Magnifier before sign-in by changing a setting in the Registry Editor. This change requires administrator access. Most people should use the Settings method above, because it does the same job with no risk to the system. If you do edit the registry, back it up first and note the original value so you can restore it.
🪟 Windows 10 vs 🪟 Windows 11 Nuances
Both operating systems use the same basic accessibility system, but Windows 11 has a cleaner look. In Windows 10, these settings are often found under Ease of Access rather than Accessibility. The functionality remains identical, but the menu paths differ slightly. If you manage a mix of PCs, look for the Magnifier page under whichever name your version uses.
Summary
To sum up, you can configure Magnifier to start automatically in Windows 11 through the Accessibility settings. Turn it on, tick the before sign-in option, and the screen will be easier to view right when you need it. If you ever want to go back, clear the same checkboxes.
Was this guide helpful?

About the Author
Richard
Tech Writer, IT Professional
Richard is a writer at Geek Rewind who turns complex IT tasks into clear, step-by-step guides. He draws on years of hands-on experience in system administration and enterprise IT operations, focusing on Windows, Linux and WordPress: the problems people actually run into, and the fixes that work. His server and WordPress guides come from systems he runs himself. Richard builds and maintains the platform behind Geek Rewind, from its Ubuntu servers and Nginx configuration to its custom WordPress plugins. Many new tutorials start with readers' questions, and he's always glad to answer them in the comments.


Doesn’t work as you stated. I’ve tried checking either box or both and if I shut down the computer fully I still have to hit windows logo and the plus sign…..Never starts automatically.