How to Enable or Disable Account in Windows 11

This tutorial will show you how to enable or disable an account in Windows 11.
Why You Might Want to Do This
A shared PC can have multiple accounts. This lets different people use the same computer. Each person gets their own sign-in info, files, browser favorites, and desktop settings.
Sometimes you want to turn off an account without deleting it. You can disable the account. Then you can enable it again later if you need to.
What Happens When You Disable an Account
When an account is disabled, no one can sign into it. The account name will not appear on the sign-in screen or the Start menu until you enable it again.
⚠️ Important: You must be signed in as an administrator to enable or disable an account.
Option One
Enable or Disable Account Using the “net user” Command
- Open Windows Terminal (Admin). Select either Windows PowerShell or Command Prompt.
- Copy and paste the command below into Windows Terminal (Admin). Press Enter to see a list of all accounts and their status (True or False).PowerShell
Get-LocalUser
Disable Account
- Type one of the commands below into Windows Terminal (Admin). Press Enter.
To disable a local account:
CodeNet user "<username>" /active:noOR
To disable a domain account:
CodeNet user "<username>" /active:no /domainReplace <username> with the actual account name. For example:
CodeNet user "User1" /active:no
Enable Account
- Type one of the commands below into Windows Terminal (Admin). Press Enter.
To enable a local account:
CodeNet user "<username>" /active:yesOR
To enable a domain account:
CodeNet user "<username>" /active:yes /domainReplace <username> with the actual account name. For example:
CodeNet user "User1" /active:yes - You can now close Windows Terminal (Admin) if you like.
Option Two
Enable or Disable Account in PowerShell
- Open Windows Terminal (Admin). Select Windows PowerShell.
- Copy and paste the command below into PowerShell. Press Enter to see a list of all accounts and their status (True or False).PowerShell
Get-LocalUser
Disable Account
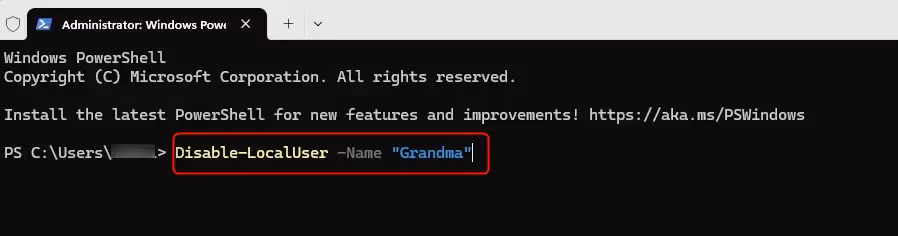
- Type the command below into PowerShell. Press Enter.Code
Disable-LocalUser -Name "<username>"Replace <username> with the actual account name. For example:
CodeDisable-LocalUser -Name "User1"
Enable Account
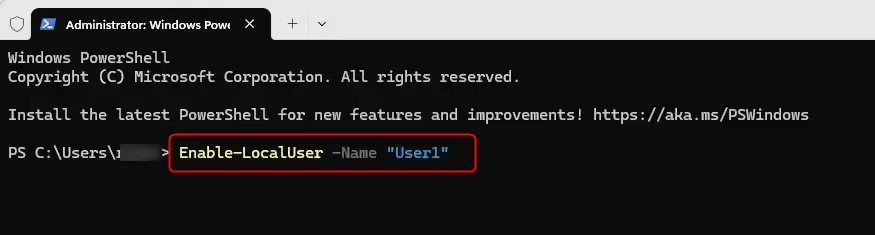
- Type the command below into PowerShell. Press Enter.Code
Enable-LocalUser -Name "<username>"Replace <username> with the actual account name. For example:
CodeEnable-LocalUser -Name "User1" - You can now close Windows Terminal (Admin) if you like.
Option Three
Enable or Disable Account in Local Users and Groups
Note: Local Users and Groups is only available in Windows 10/11 Pro, Enterprise, and Education editions.
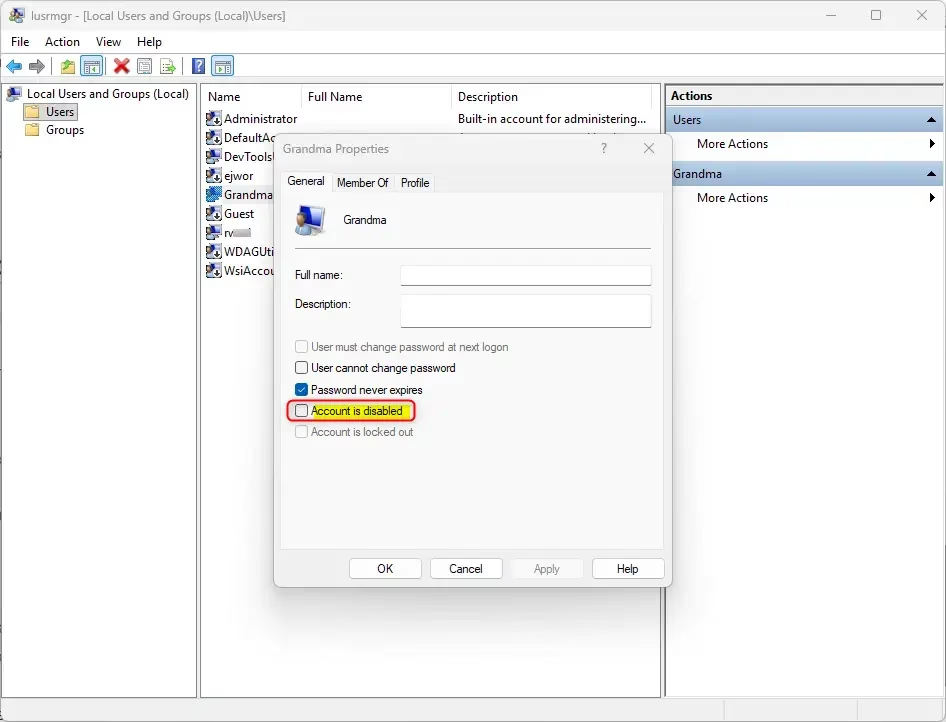
- Open Local Users and Groups (
lusrmgr.msc). - Click on the Users folder in the left pane. Double-click on the account name (for example: “User1”) in the middle pane that you want to enable or disable.
- In the General tab, check the box next to Account is disabled to disable the account. Uncheck the box to enable it. Click OK.
- You can now close Local Users and Groups if you like.
Summary
You now know three ways to enable or disable accounts in Windows 11. The first method uses the “net user” command in Windows Terminal. The second method uses PowerShell commands. The third method uses the Local Users and Groups tool. All three methods work well. Choose the one that is easiest for you. Remember that you must be an administrator to make these changes.
Was this guide helpful?


Leave a Reply