How to Turn On or Off Scroll Inactive Windows in Windows 11
This tutorial will show you how to turn on or off scroll inactive windows when hovering over them in Windows 11. It’s easier than you might think!
Windows has a built-in feature that lets you scroll windows in the background just by moving your mouse over them. Your main window stays active the whole time. Let’s learn how to turn this feature on or off.
Option One
Turn On or Off Scroll Inactive Windows in Settings
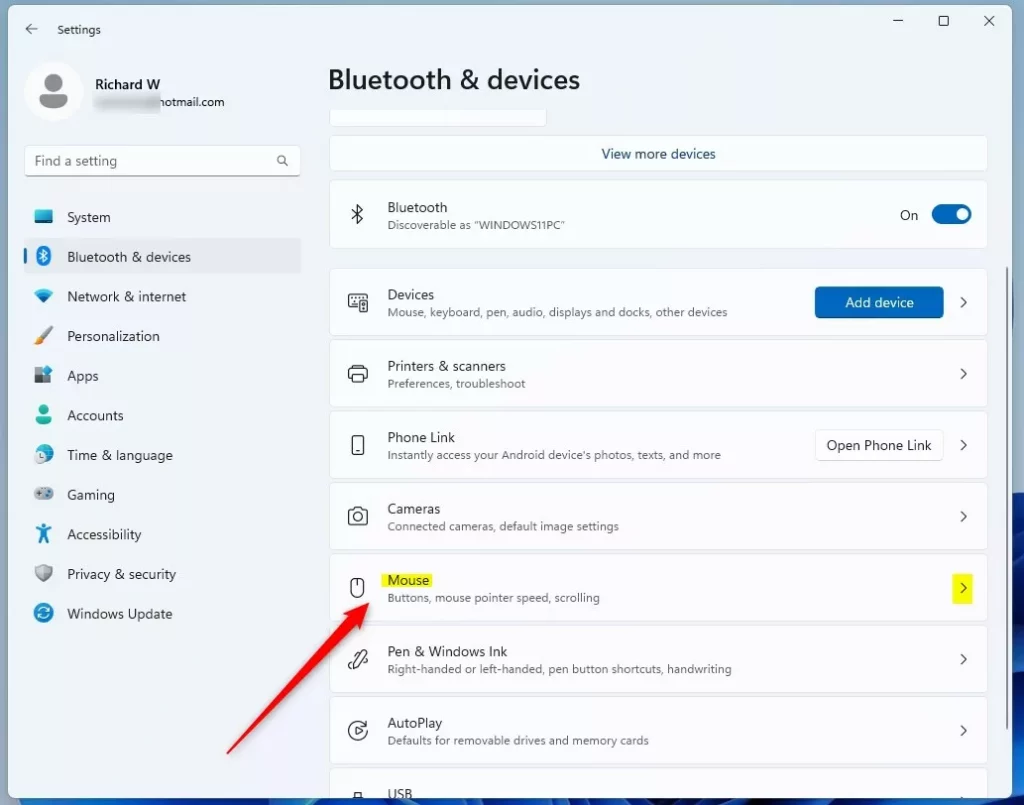
- Open Settings by pressing Win+I on your keyboard.
- Click Bluetooth & devices on the left side.
- Click Mouse on the right side.
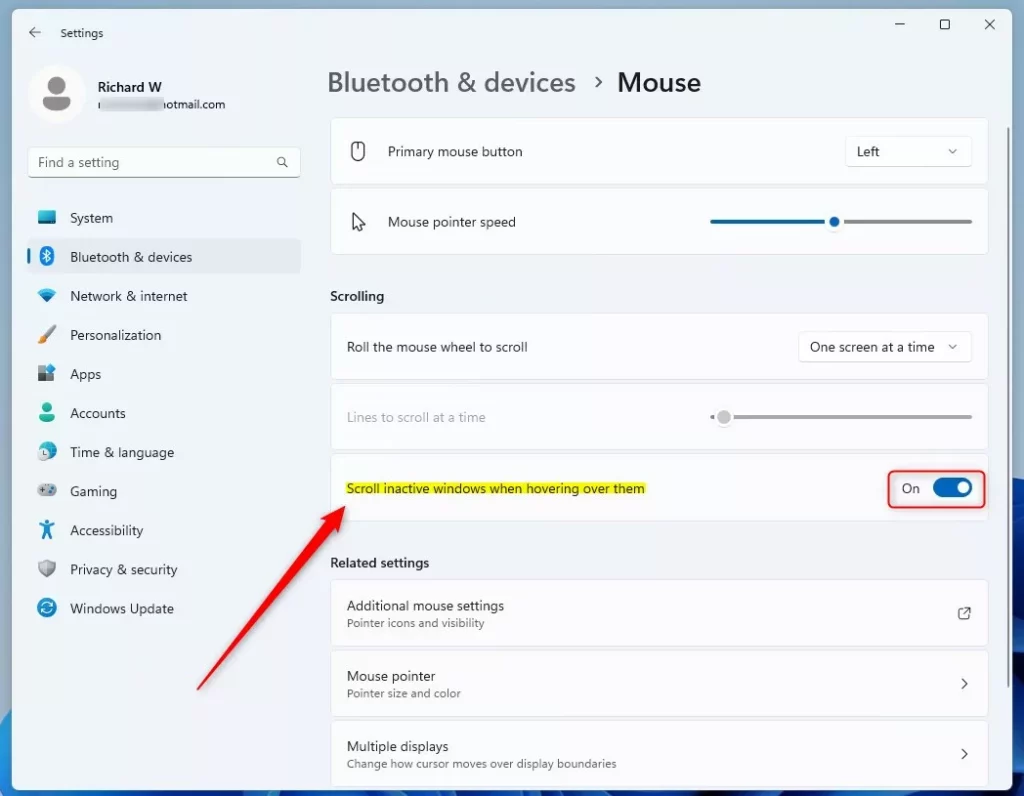
- Find the option Scroll inactive windows when hovering over them.
- Turn it On (this is the default) or Off based on what you want.
- Close Settings when you’re done.
Option Two
Turn On or Off Scroll Inactive Windows Using Command Line
- Open Windows Terminal.
- Select either Windows PowerShell or Command Prompt.
- Copy and paste one of the commands below and press Enter.
To Turn On:
reg add "HKCU\Control Panel\Desktop" /V MouseWheelRouting /T REG_DWORD /d 2 /F
To Turn Off:
reg add "HKCU\Control Panel\Desktop" /V MouseWheelRouting /T REG_DWORD /d 0 /F
That’s it! Your setting will take effect right away.
Summary
You now know three easy ways to control scroll inactive windows in Windows 11. The Settings option is the simplest if you prefer using the graphical interface. The Registry and Command Line options work if you’re comfortable with those tools. All three methods do the same thing—they just give you choices based on how you like to work with your computer.
Was this guide helpful?

About the Author
Richard
Tech Writer, IT Professional
Richard, a writer for Geek Rewind, is a tech enthusiast who loves breaking down complex IT topics into simple, easy-to-understand ideas. With years of hands-on experience in system administration and enterprise IT operations, he’s developed a knack for offering practical tips and solutions. Richard aims to make technology more accessible and actionable. He's deeply committed to the Geek Rewind community, always ready to answer questions and engage in discussions.


No comments yet — be the first to share your thoughts!