How to Show or Hide Pen Menu icon on Taskbar in Windows 11

Written by
Richard
Mar 17, 2026
Updated Mar 18, 2026
1 min read
The pen menu in Windows 11 makes it easy to access your favorite apps. If you have a pen, tap it on your screen to open the menu in the corner of your taskbar. You can add up to four apps as shortcuts to your pen menu.
This tutorial will show you two ways to show or hide the pen menu icon on your taskbar.
Option One: Using Settings
- Open Settings by pressing ⊞ Win+I on your keyboard.
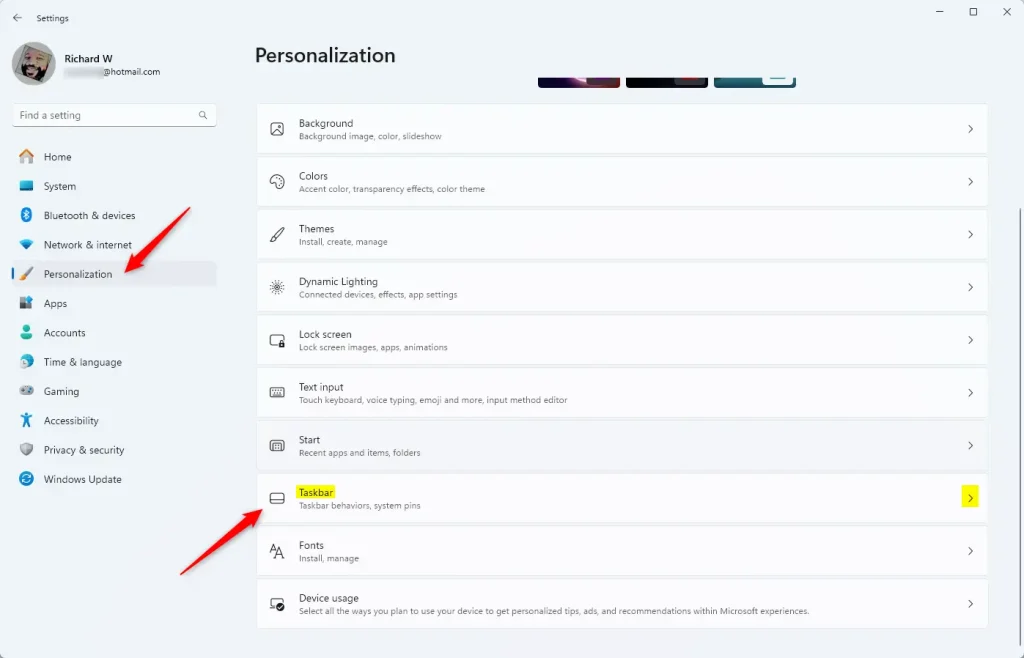
- Click Personalization on the left side.
- Click Taskbar on the right side.
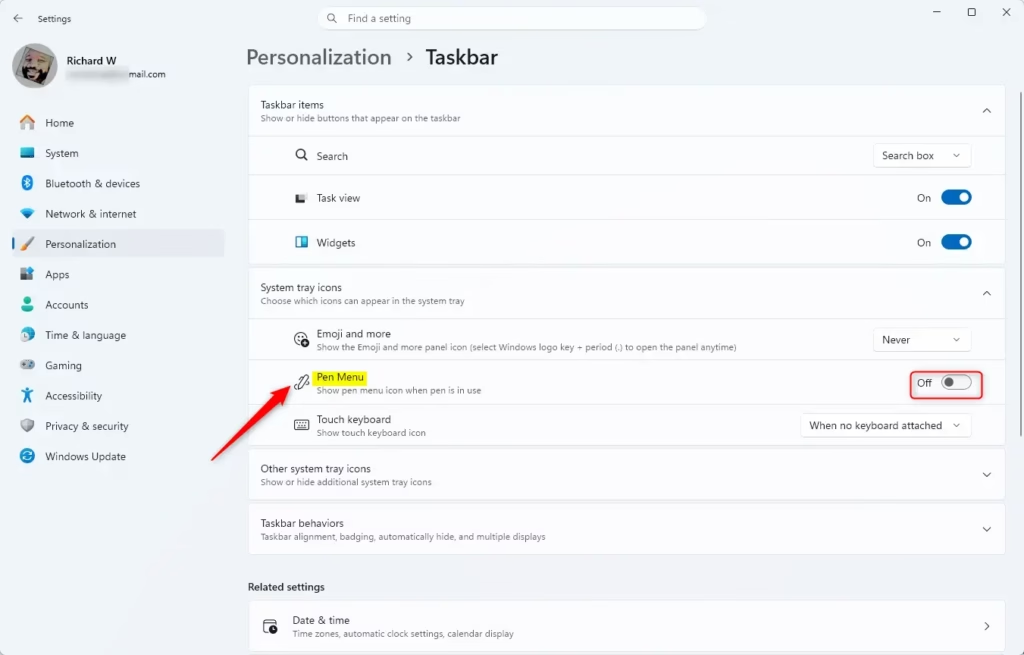
- Find Pen menu and turn it On or Off based on what you want.
- Close Settings when you’re done.
Option Two: Using Registry Editor
⚠️ Admin privileges required
To Show the Pen Menu Icon:
- Press ⊞ Win+R to open the Run dialog.
- Type regedit and press Enter.
- Navigate to: 🗝️HKEY_CURRENT_USER\Software\Microsoft\Windows\CurrentVersion\PenWorkspace
- Find PenWorkspaceButtonDesiredVisibility.
- Set the value to 1 to show the icon.
To Hide the Pen Menu Icon:
- Follow steps 1-3 above.
- Find PenWorkspaceButtonDesiredVisibility.
- Set the value to 0 to hide the icon (this is the default setting).
Summary
You now know two ways to control the pen menu icon on your Windows 11 taskbar. The easiest method is using Settings. If you prefer using the registry editor, remember that this method requires admin access to your computer. Choose whichever method works best for you.
Was this guide helpful?
Was this helpful?
No comments yet — be the first to share your thoughts!