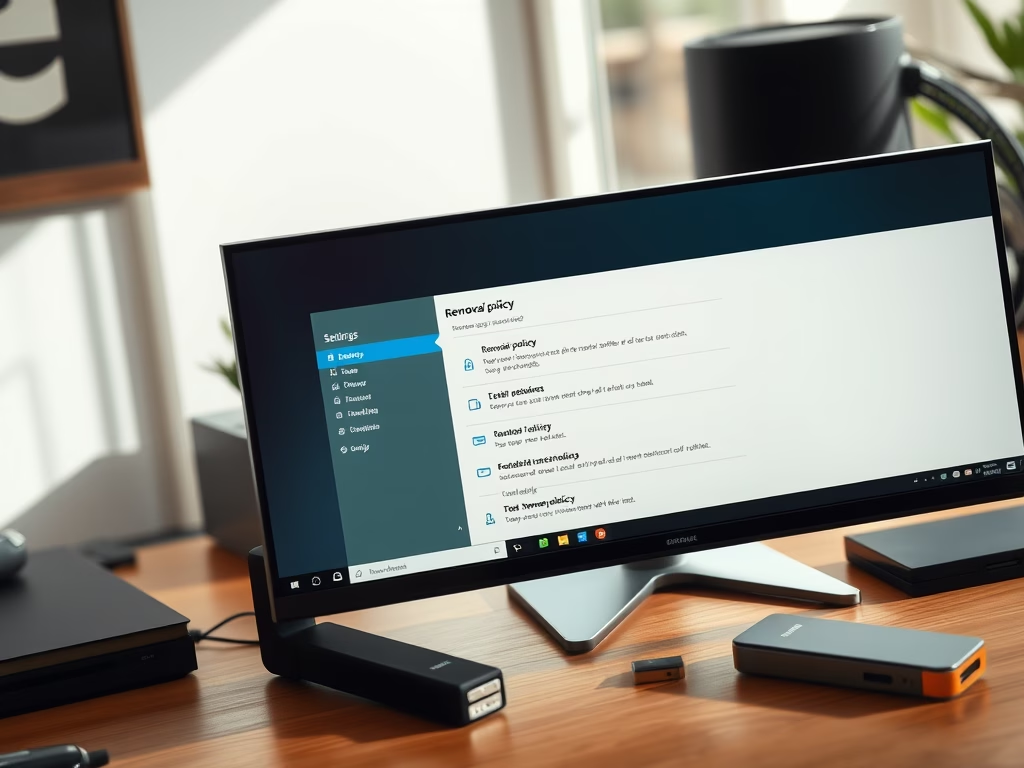
How to Change Removal Policy for USB and External Drives in Windows 11
You change the removal policy for USB and external drives in Windows 11 to control how the operating system manages connected storage devices, specifically regarding write caching and quick removal options.
This policy determines whether Windows prioritizes performance by enabling write caching or safety by allowing for immediate unplugging without using the “Safely Remove Hardware” option.
For instance, Windows 11 typically defaults to “Quick removal” for most USB drives, which disables write caching to ensure data integrity upon immediate disconnection.
You can switch this to “Better performance” if you frequently transfer large files and want faster write speeds, but remember to use the “Safely Remove Hardware” icon to prevent data corruption.
What Are Removal Policies?
Windows 11 gives you two choices for how your computer works with removable drives:
- Quick removal (default): You can unplug your device anytime without clicking “Safely Remove Hardware.” Your computer might run a tiny bit slower though.
- Better performance: Your computer runs faster with the device plugged in. But you must click “Safely Remove Hardware” before unplugging to protect your data.
Pick the setting that matches how you use your device.
⚠️ Admin Privileges Required: You need to be signed in as an administrator on your PC to change these settings.
Three Easy Ways to Change Removal Policy
Option 1Change Using Windows Settings
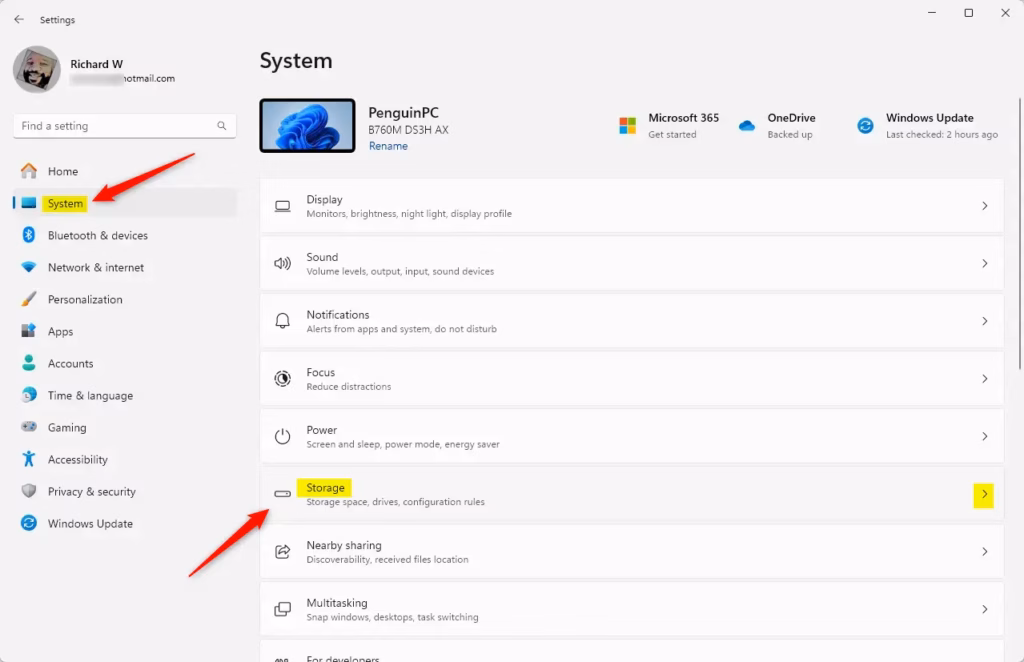
- Press Windows key + I to open Settings.
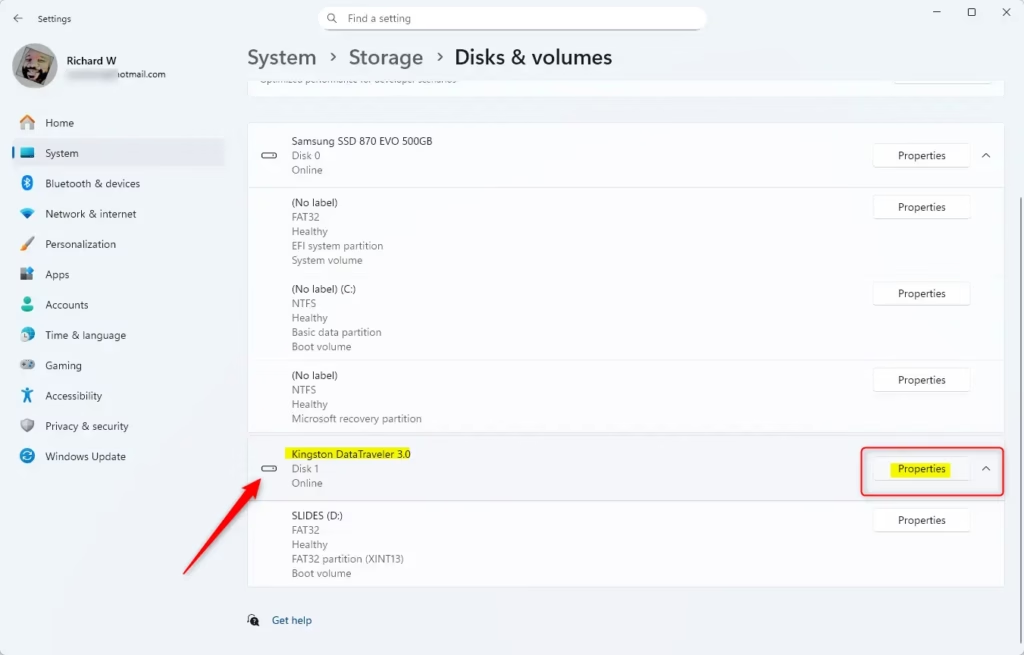
- Click System on the left, then choose Storage on the right. Or use this shortcut: Open Storage settings
- If a pop-up asks for permission, click Yes.
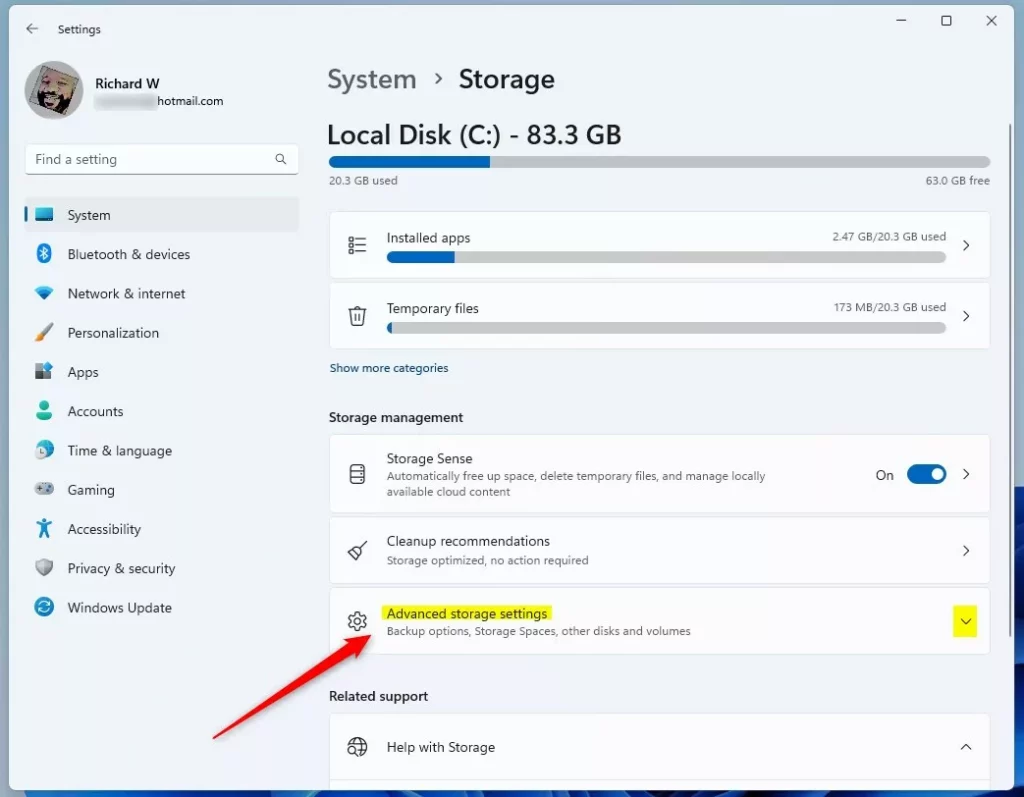
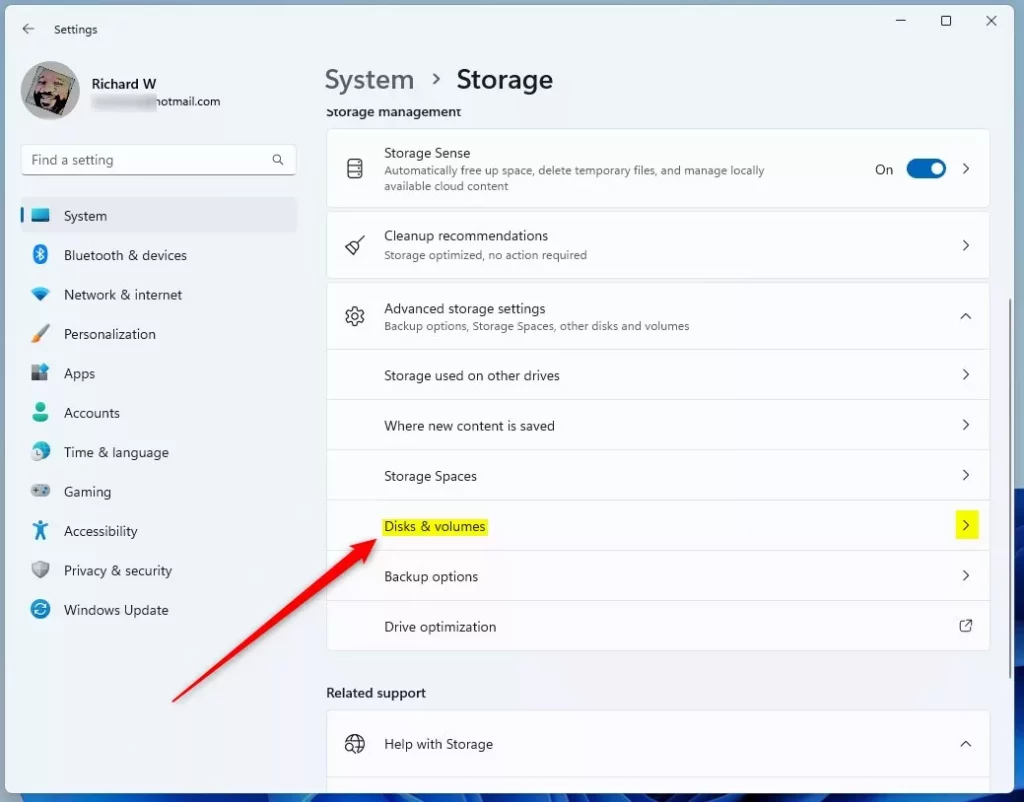
- Scroll down and click Advanced storage settings to expand it, then select Disks & volumes. Or open it directly: Open Disks & volumes
- Find your removable drive in the list, then click the Properties button.
- Under Removal policy, pick either Quick removal or Better performance.
- Close Settings when done.

Option 2Change Using Disk Management
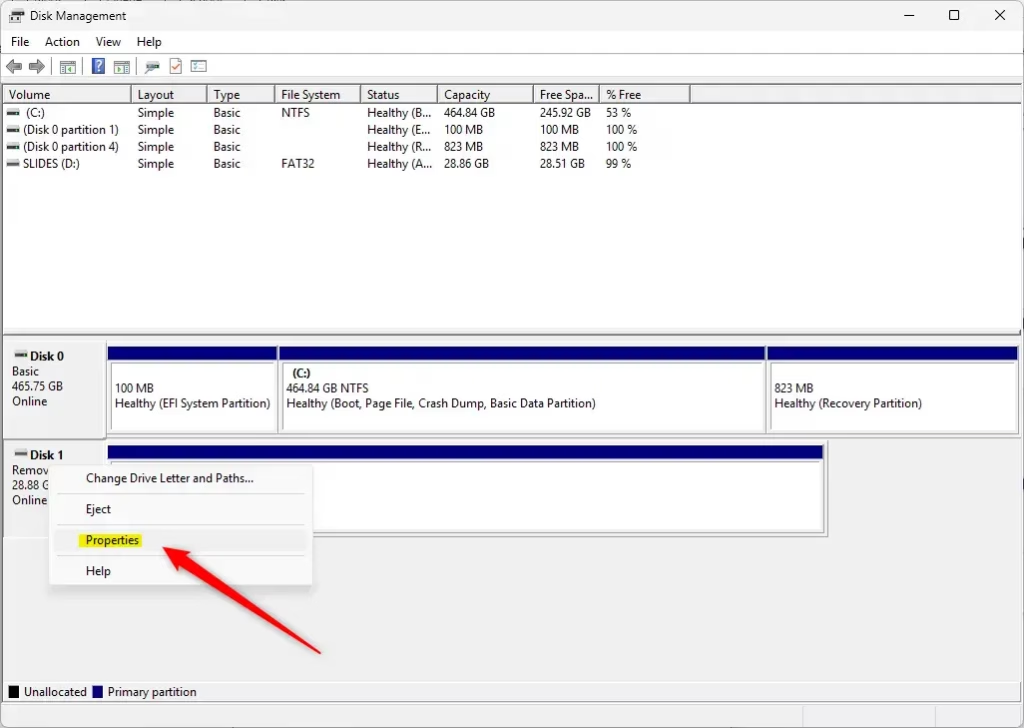
- Press Windows key + R, type
diskmgmt.msc, and press Enter to open Disk Management. - In the list at the bottom, find your removable drive and right-click its label (like “Disk 1”).
- Select Properties from the menu.
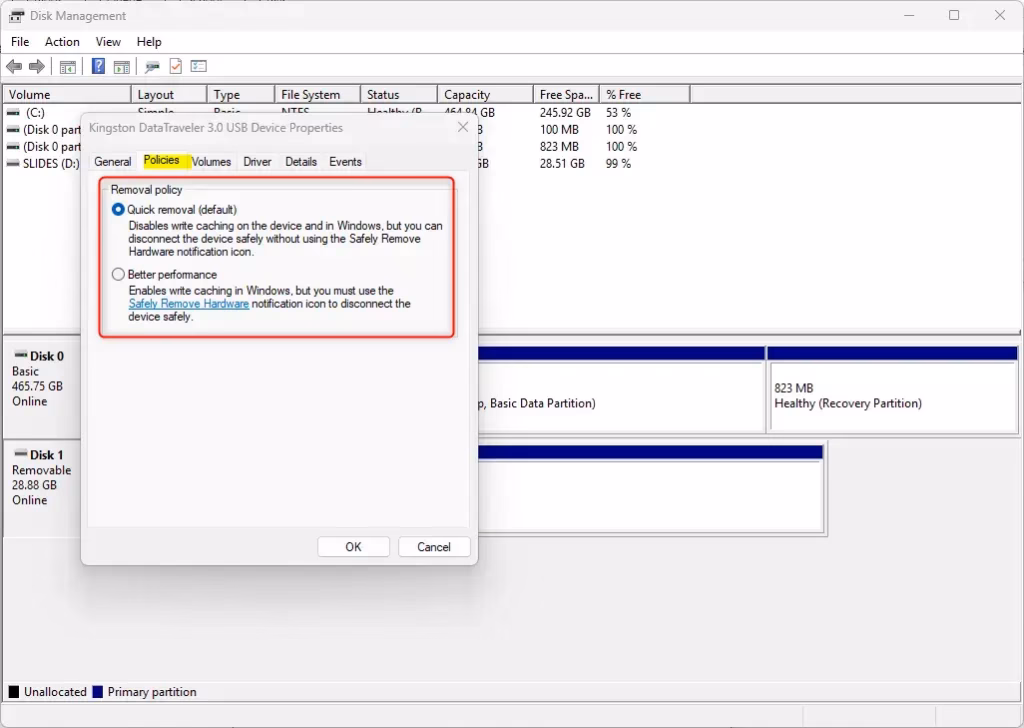
- Go to the Policies tab.
- Choose Quick removal or Better performance, then click OK.
- Close Disk Management.
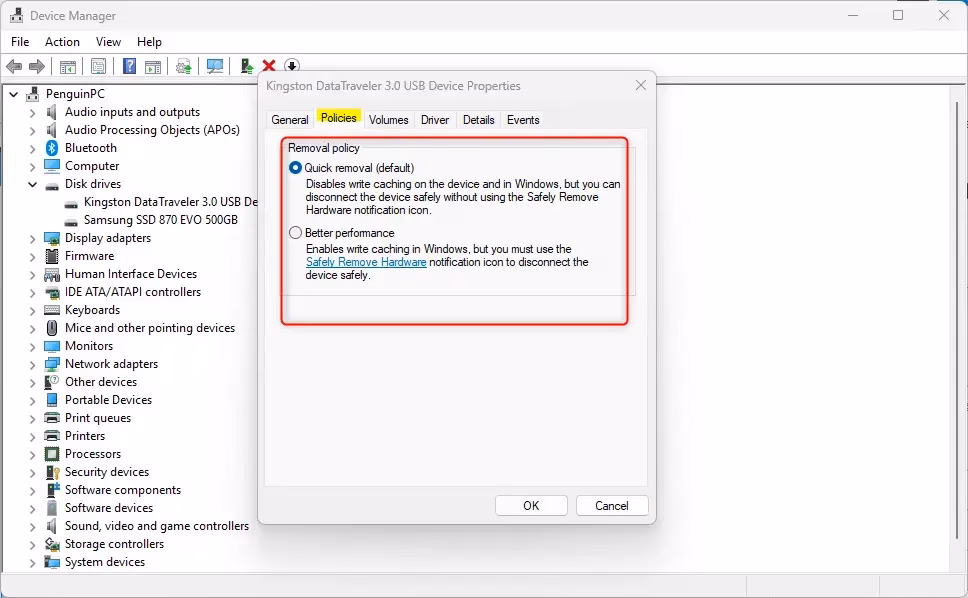
Option 3Change Using Device Manager
- Press Windows key + R, type
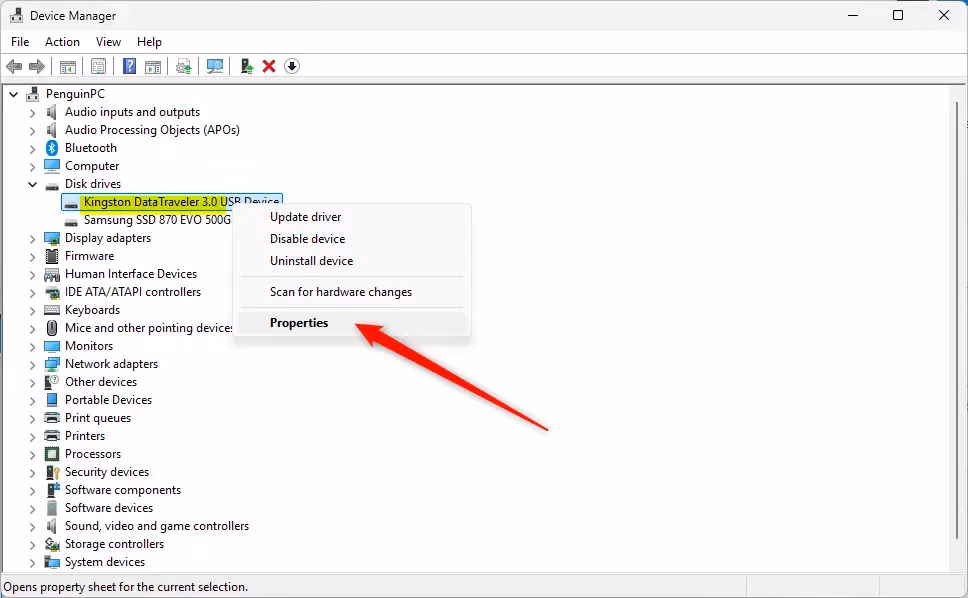
devmgmt.msc, and press Enter to open Device Manager. - Expand the Disk drives section.
- Double-click your removable drive.
- Go to the Policies tab.
- Select Quick removal or Better performance, then click OK.
- Close Device Manager.
Summary
- Quick removal: Unplug your USB or external drive anytime without extra steps. You get slightly slower performance.
- Better performance: You get faster data transfers, but you must always use “Safely Remove Hardware” before unplugging.
- You can change these settings anytime while your drive is plugged in.
- Three ways to change settings: Settings, Disk Management, or Device Manager.
- Administrator permission is needed to make changes.
- Changing this setting helps protect your data or improve speed, depending on what you need.
Helpful Links
Was this guide helpful?

About the Author
Richard
Tech Writer, IT Professional
Richard, a writer for Geek Rewind, is a tech enthusiast who loves breaking down complex IT topics into simple, easy-to-understand ideas. With years of hands-on experience in system administration and enterprise IT operations, he’s developed a knack for offering practical tips and solutions. Richard aims to make technology more accessible and actionable. He's deeply committed to the Geek Rewind community, always ready to answer questions and engage in discussions.


No comments yet — be the first to share your thoughts!