Step-by-Step Guide to Install vsftpd on Ubuntu 24.04
This article explains how to install vsftpd on Ubuntu 24.04.
vsftpd (Very Secure FTP Daemon) is an FTP server for Unix-like systems, including Ubuntu. It is known for its security, performance, and ease of use, making it a popular choice for hosting FTP services.
vsftpd is designed with security in mind. It offers features like SSL/TLS support for secure data transfer and is less susceptible to attacks than other FTP services. Whether setting up anonymous FTP access, limiting user access, or managing file permissions, vsftpd is a solid choice.
Install vsftpd
On Ubuntu, you can install vsftpd using the command below. There are no additional packages to install since vsftpd packages are included in Ubuntu’s default repositories.
sudo apt update
sudo apt install vsftpd
Once installed, its default configuration file is at [/etc/vsftpd.conf].
Configure basic settings
To get started, run the command below to open its configuration file.
sudo nano /etc/vsftpd.conf
Then, adjust the server settings based on your environment.
# Uncomment this to enable any form of FTP write command.

write_enable=YES

#
# You may specify an explicit list of local users to chroot() to their home
# Uncomment this to enable a secure environment.

chroot_local_user=YES
chroot_list_enable=YES
chroot_list_file=/etc/vsftpd.chroot_list
allow_writeable_chroot=YES

#
# You may activate the "-R" option to the builtin ls. This is disabled by
# the presence of the "-R" option, so there is a strong case for enabling it.

ls_recurse_enable=YES

#
# add to last line : specify chroot directory
# if not specified, users' home directory equals FTP home directory

local_root=public_html
Save the file and exit.
Next, run the command below to vsftpd chroot_list file.
sudo nano /etc/vsftpd.chroot_list
Add your account name to the file to allow access. Add other accounts on separate lines if you want more users to access vsftpd.
richard
Save and exit the file, then restart vsftpd.
sudo systemctl restart vsftpd
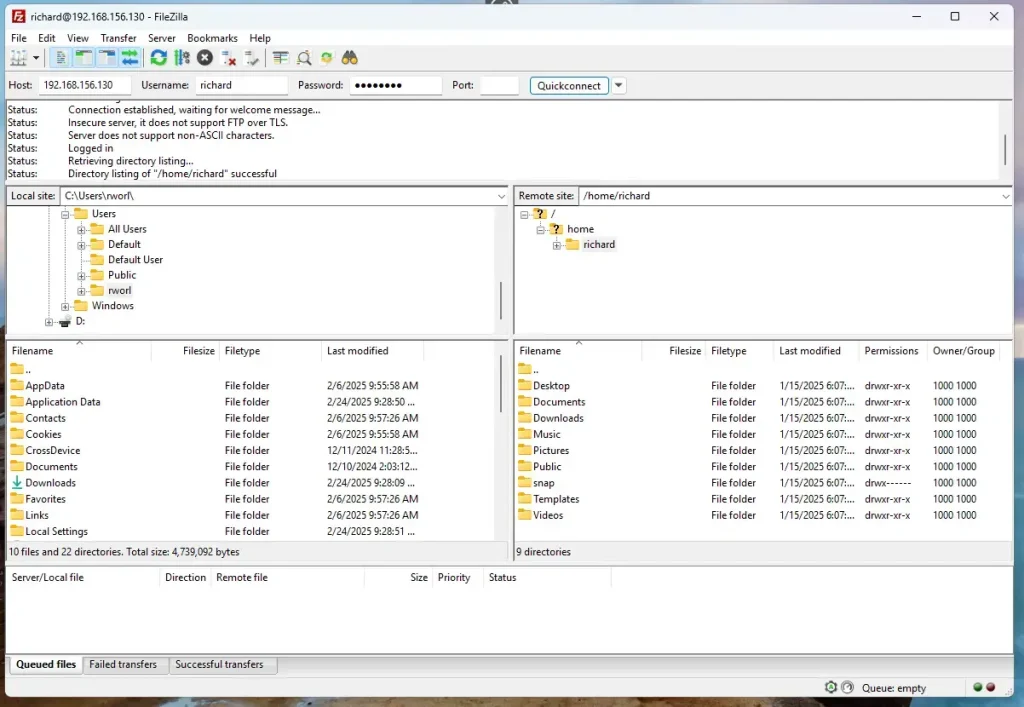
At this point, you should be able to access vsftpd using any FTP client. Access will be granted to those in the chroot file.
Access vsftpd over SSL/TLS
Although vsftpd is accessible, it’s not secured. You should configure vsftpd communication over SSL/TLS.
Use a public certificate like Let’s Encrypt or a self-signed on your server.
For this post, we’ll be creating a self-signed certificate for vsftpd.
Run the command below to generate a self-signed certificate to use with vsftpd.
sudo openssl req -x509 -nodes -newkey rsa:3072 -keyout vsftpd.pem -out vsftpd.pem -days 3650
When prompted, enter the certificate details.
Country Name (2 letter code) [AU]:US
State or Province Name (full name) [Some-State]:NY
Locality Name (eg, city) []:Brooklyn
Organization Name (eg, company) [Internet Widgits Pty Ltd]:GeekRewind
Organizational Unit Name (eg, section) []:IT
Common Name (e.g. server FQDN or YOUR name) []:vsftpd.example.com
Email Address []:
After generating the certificates, copy them into the [/etc/ssl/private] directory.
sudo cp vsftpd.* /etc/ssl/private
sudo chmod 600 /etc/ssl/private/vsftpd.pem
Next, reopen vsftpd configuration file and add the certificate details.
sudo nano /etc/vsftpd.conf
Update the lines below in the file to reference the new certificates.
# This option specifies the location of the RSA certificate to use for SSL
# encrypted connections.
rsa_cert_file=/etc/ssl/private/vsftpd.pem
rsa_private_key_file=/etc/ssl/private/vsftpd.pem
ssl_enable=YES
ssl_ciphers=HIGH
force_local_data_ssl=YES
force_local_logins_ssl=YES

#
Save the exit, then restart vsftpd.
sudo systemctl restart vsftpd
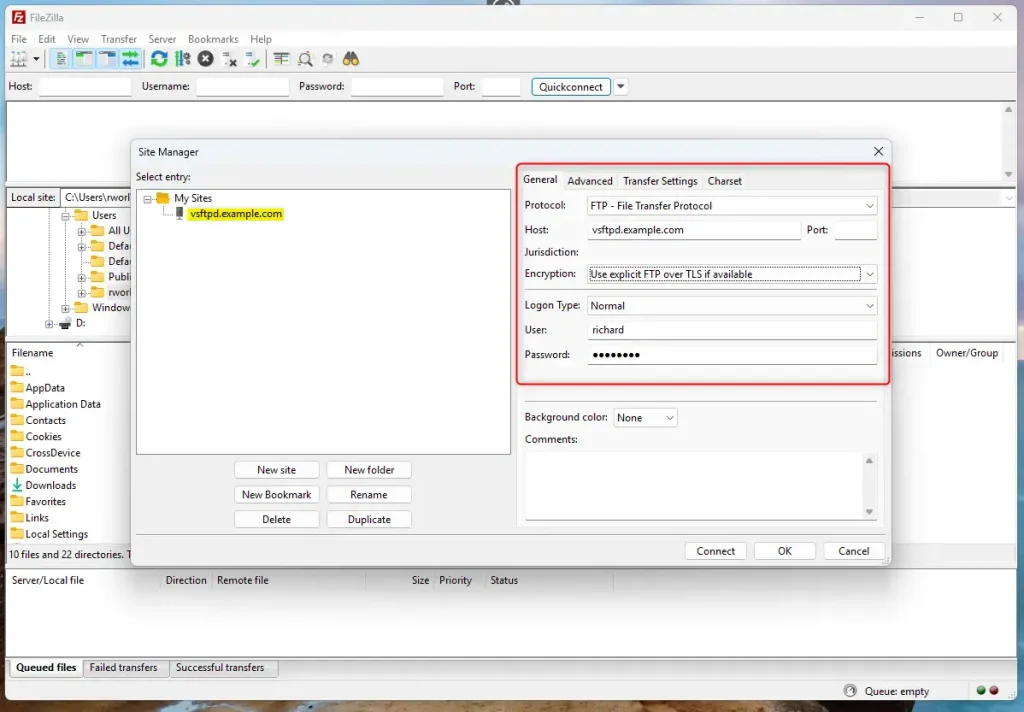
With SSL/TLS configured, open your FTP client and set up the sites to use SSL/TLs.
Since we used a self-signed certificate when prompted to trust it, OK.
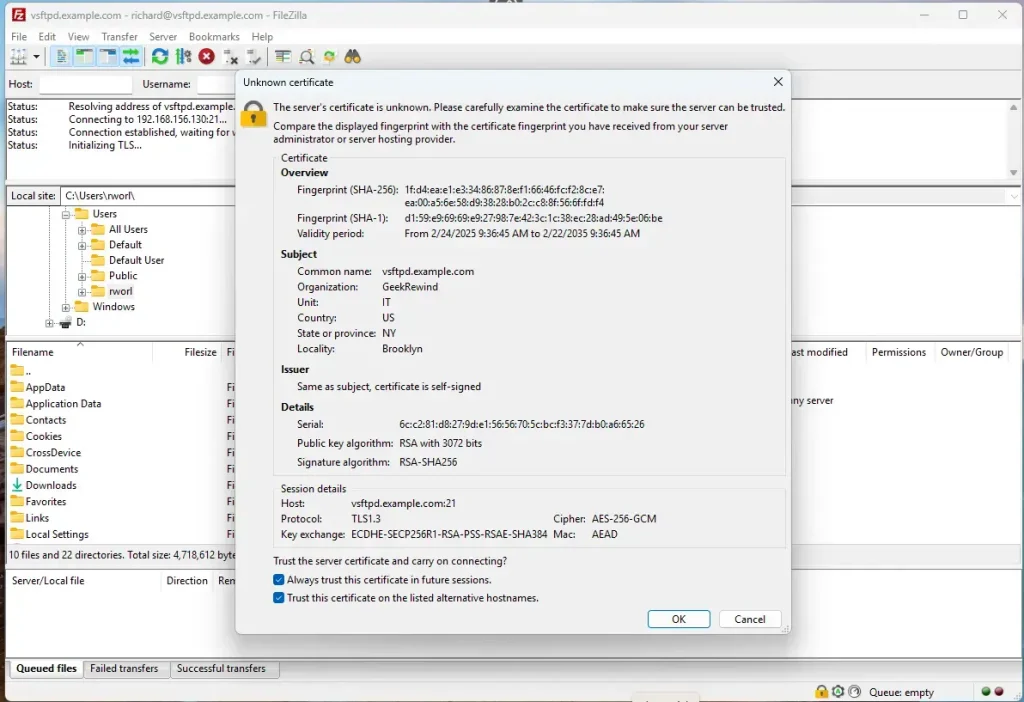
Now, vsftpd is communicating over SSL/TLS.
That should do it!
Conclusion:
Installing and configuring vsftpd on Ubuntu is a straightforward process that enhances your server’s file transfer capabilities while ensuring secure communication. Here are the key points to remember:
- Ease of Installation: vsftpd is available in Ubuntu’s default repositories, making installation simple with a single command.
- Security Features: Offers robust security options, including SSL/TLS support to protect data during transfer.
- Configuration Flexibility: Allows for various configurations, such as user access control and directory management.
- Self-Signed Certificates: Provides a way to generate and implement self-signed certificates for secure connections.
- Chroot Environment: Ensures users are confined to their home directories for added security.
- Testing & Validation: After configuration, use an FTP client to verify that the server operates as intended and handles secure connections correctly.
Following this guide, you can successfully set up and secure your FTP server with vsftpd on Ubuntu 24.04.
Frequently Asked Questions
What is vsftpd and why should I use it?
How do I install vsftpd on Ubuntu 24.04?
How can I configure vsftpd for secure access?
What is the purpose of the chroot list in vsftpd?
Can I use vsftpd for anonymous FTP access?
Was this guide helpful?

About the Author
Richard
Tech Writer, IT Professional
Richard, a writer for Geek Rewind, is a tech enthusiast who loves breaking down complex IT topics into simple, easy-to-understand ideas. With years of hands-on experience in system administration and enterprise IT operations, he’s developed a knack for offering practical tips and solutions. Richard aims to make technology more accessible and actionable. He's deeply committed to the Geek Rewind community, always ready to answer questions and engage in discussions.


No comments yet — be the first to share your thoughts!