
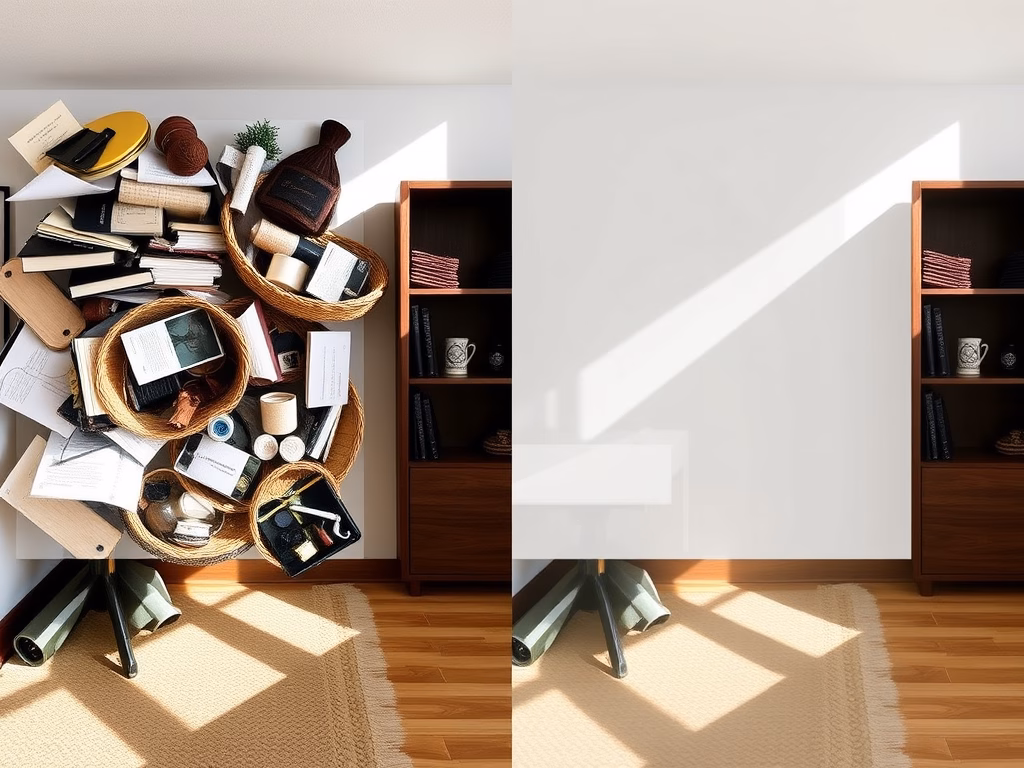
Do you have unwanted objects in your photos? Maybe a photobomber or a distracting sign? Windows 11’s Photos app now has a smart feature called Generative Erase. It removes these things quickly and makes your photos look natural and clean.
What is the Photos app?
The Photos app comes already installed on Windows 11. You can open, view, and organize your photos here. It also lets you edit pictures and connect to online photo storage like OneDrive or iCloud.
You can do a lot with Photos, like change picture backgrounds, remove backgrounds, and more.
What is Generative Erase?
Starting from Photos app version 2024.11020.21001.0, you get a smart new tool called Generative Erase. This tool removes people, signs, or other objects from your photos with a clean, natural look. It works better than older eraser tools, even when you need to remove large areas.
How to Use Generative Erase
Why use this? Generative Erase saves you time and makes your photos look professional without complicated editing skills.
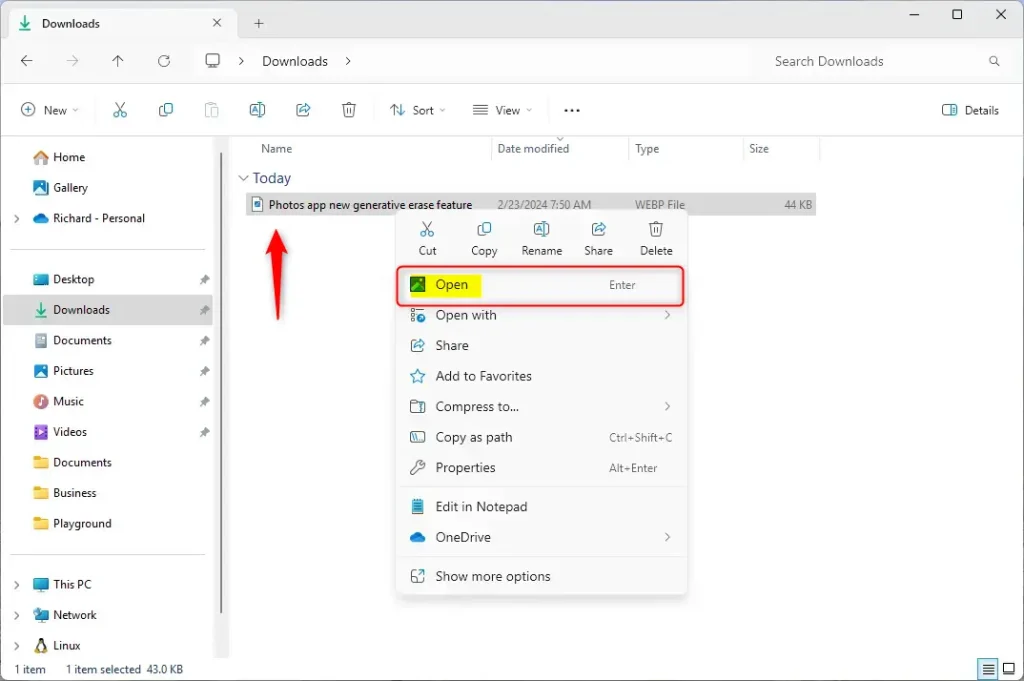
- Open the Photos app and choose the picture you want to edit.
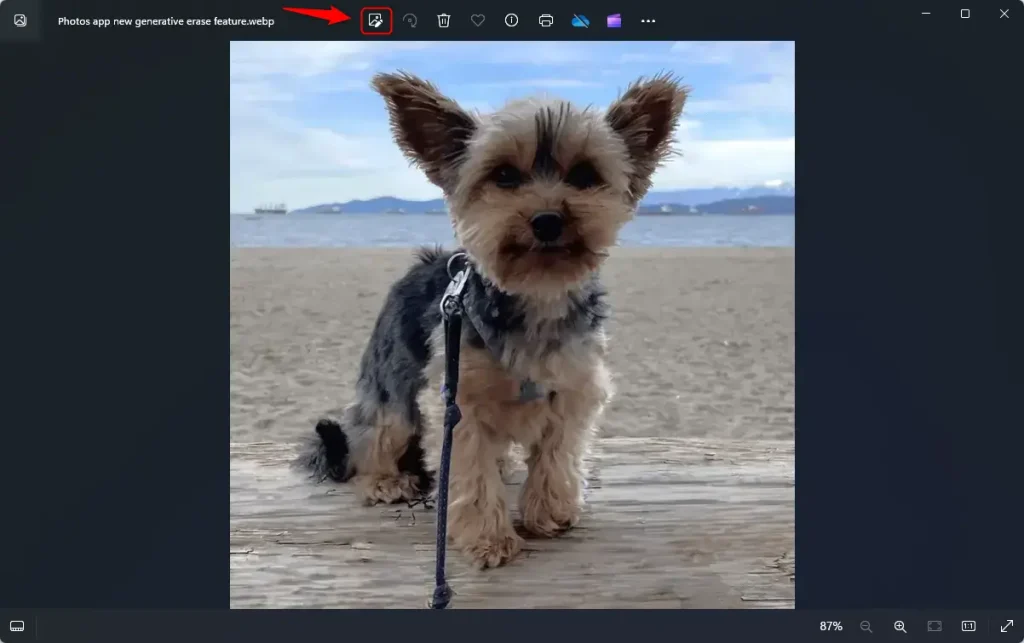
- Click the Edit Image button at the top. You can also press
Ctrl + Eon your keyboard.
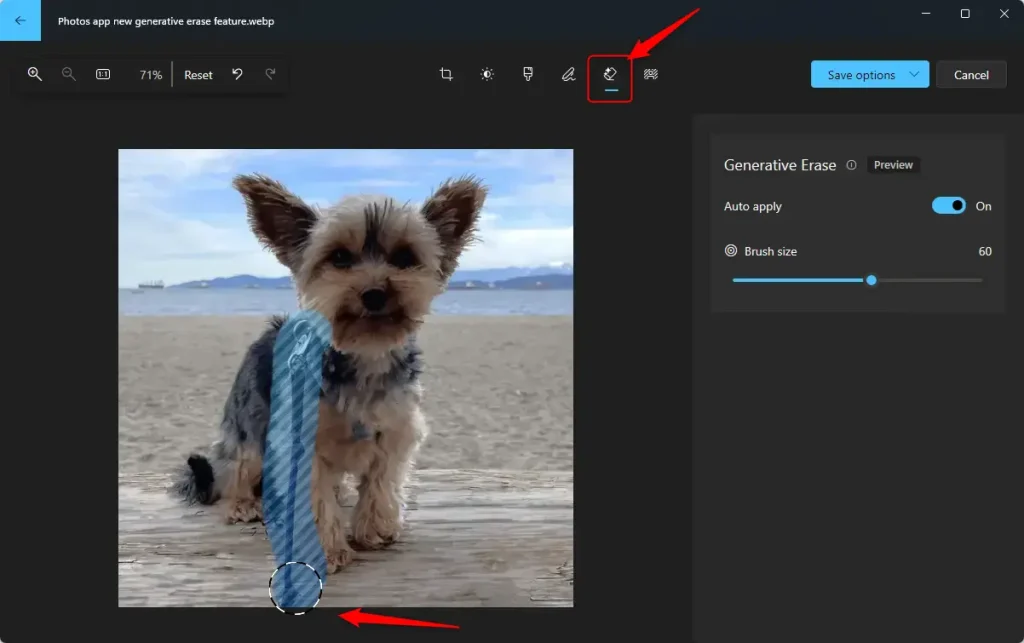
- Look at the toolbar at the top. Click the Erase tab.
- Use your mouse or finger to paint over the object or area you want to remove.
- Change the brush size as needed. Make it smaller for precise edits or bigger for larger areas.
- Watch as the unwanted object disappears. The background fills in naturally!
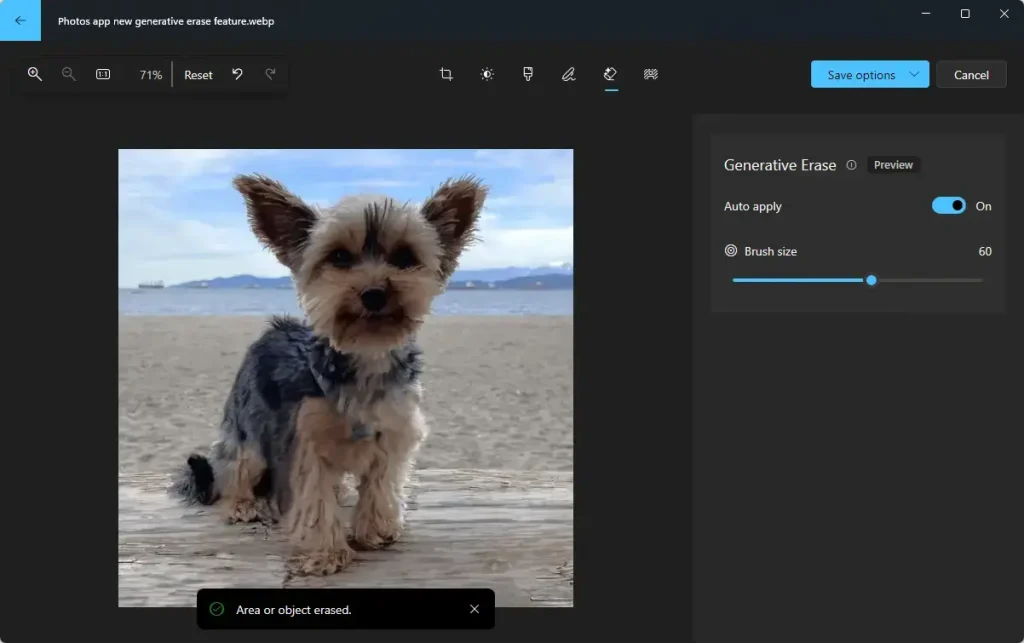
Tip: If you want more control, turn off Auto Apply. This lets you add or remove multiple erased areas (called masks) before you save your photo.
- When you’re happy with the result, save your edited photo.
Summary
The new Generative Erase tool helps you quickly remove unwanted objects from photos. What happens when you use it? The app intelligently fills in the area where the object was, making it look like it was never there.
You can adjust brush size for detailed work. You can also switch off Auto Apply to erase several objects carefully before saving.
Try this feature out and make your photos look cleaner and more professional!
For more information, check out the official Microsoft blog post.
Leave a Reply