
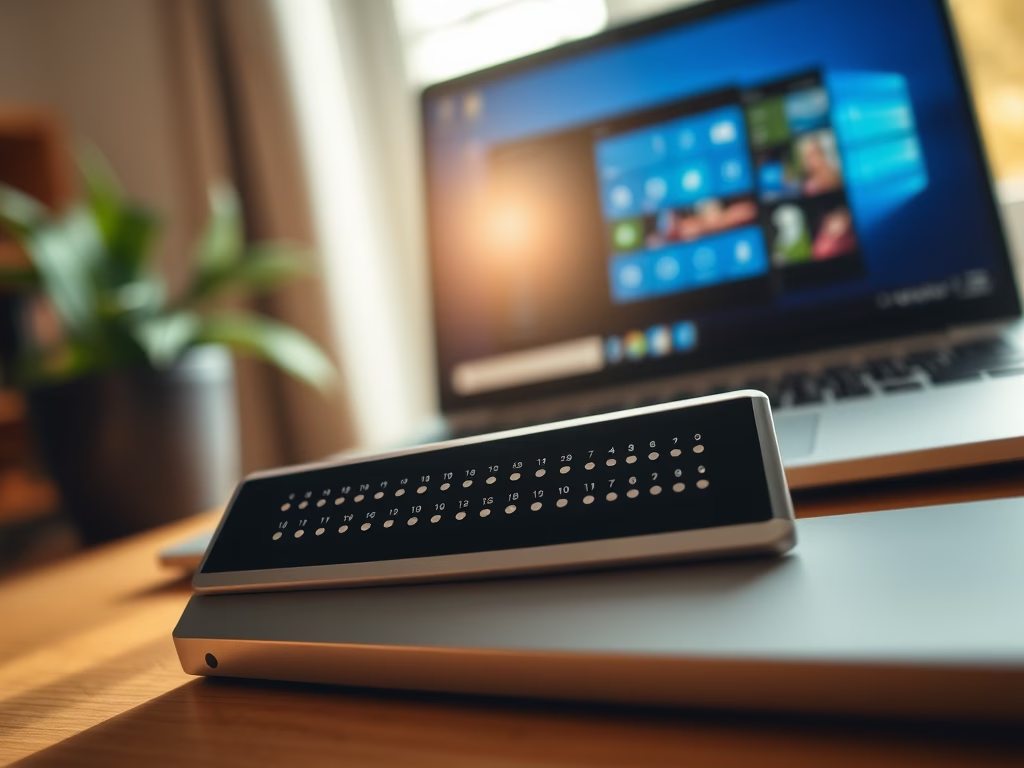
This guide helps you set up and use a braille display with Narrator on Windows 11. Why? Narrator is a built-in tool that reads text on your screen out loud. This makes it easier for people with low vision or blindness to use their computer. What happens? You can hear descriptions, text, and other information read to you while you work.
Narrator is already built into Windows 11. You can use it to hear text, descriptions, and other information on your screen.
You can also do things like:
- Turn keyboard shortcuts on or off
- Change the voice, speed, and volume
- Choose where the voice comes from (like speakers or headphones)
To use a braille display with Narrator, you need to install special software and drivers on your PC. The braille display connects to your computer using a USB cable or a serial port.
How to Set Up a Braille Display on Windows 11
Follow these simple steps to get your braille display working with Narrator:
Step 1: Open Windows Settings
Click on the Start menu (the Windows logo in the bottom-left corner) and select Settings. Or press Windows key + I on your keyboard to open the Settings app quickly.
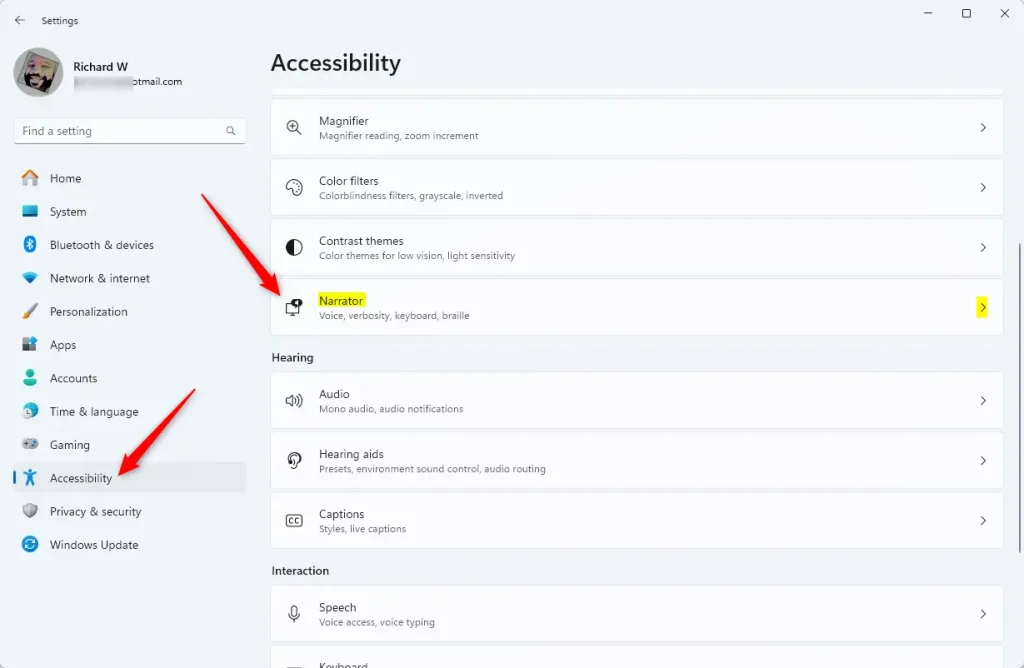
Step 2: Go to Accessibility and Find Narrator
In the Settings window, click Accessibility from the left menu.
Next, find and click on Narrator on the right side.
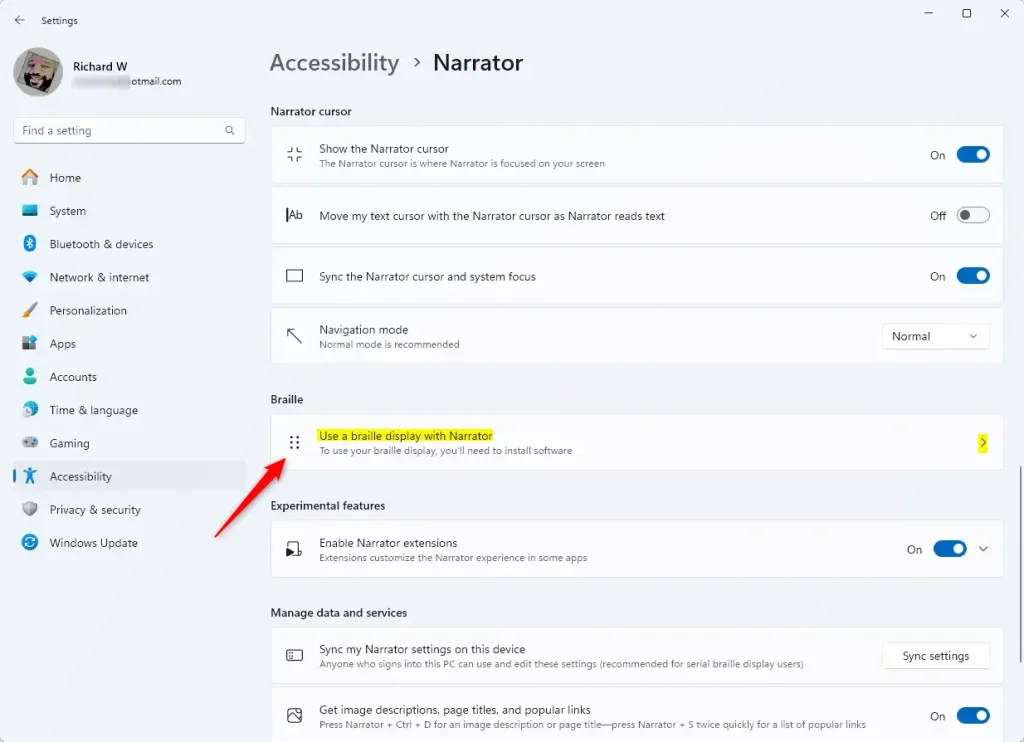
Step 3: Open Braille Settings
Under the Narrator settings, scroll down to the Braille section.
Click on Use a braille display with Narrator to open the braille options.
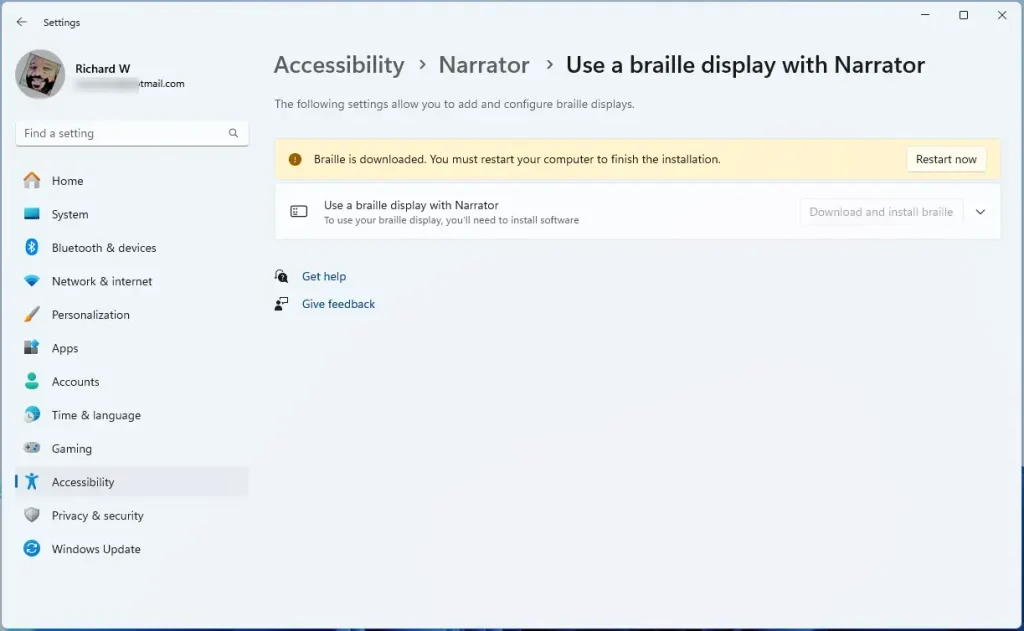
Step 4: Download and Install Braille Support
Click the Download and install braille button.
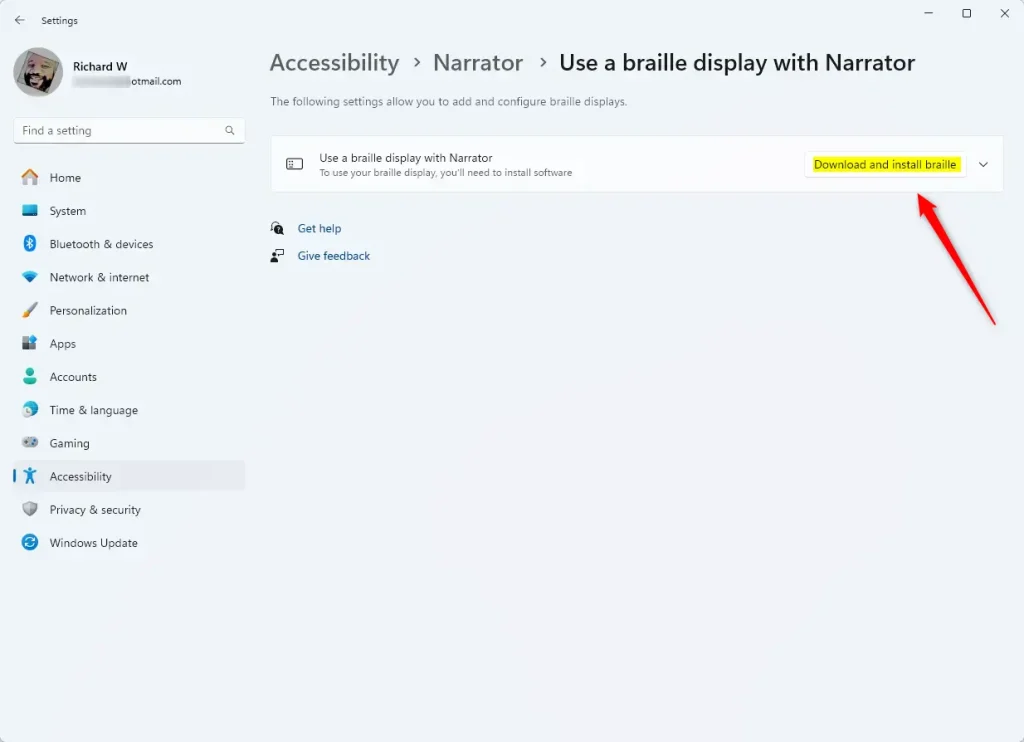
Wait for the download and installation to finish. Then restart your computer when asked.
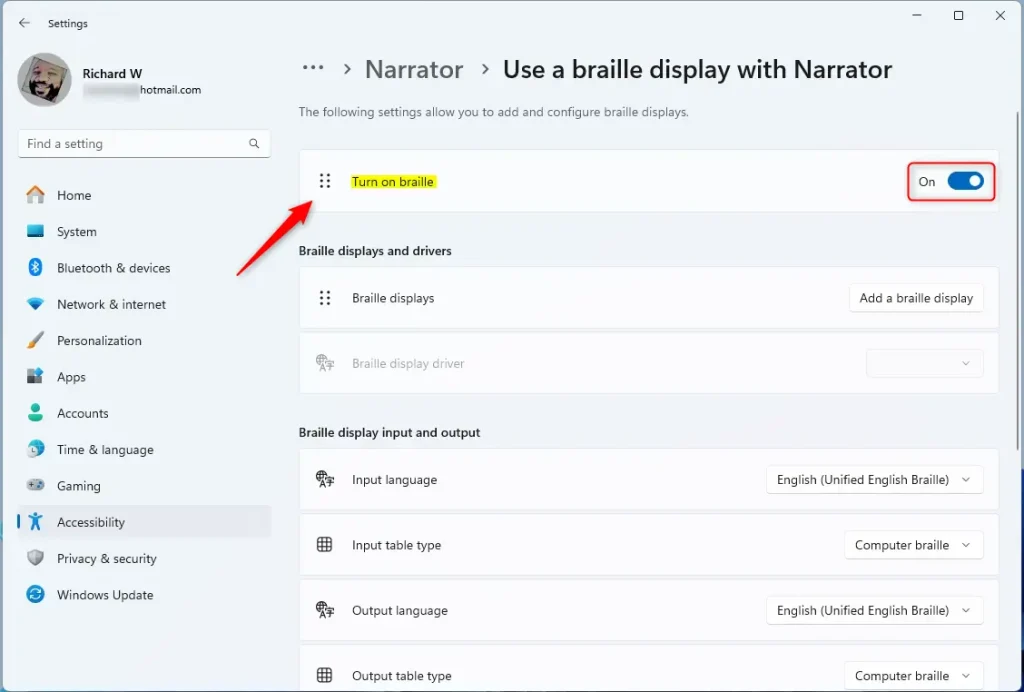
Step 5: Turn On Braille Support
After restarting, go back to the Narrator settings.
Turn on the switch next to Turn on braille.
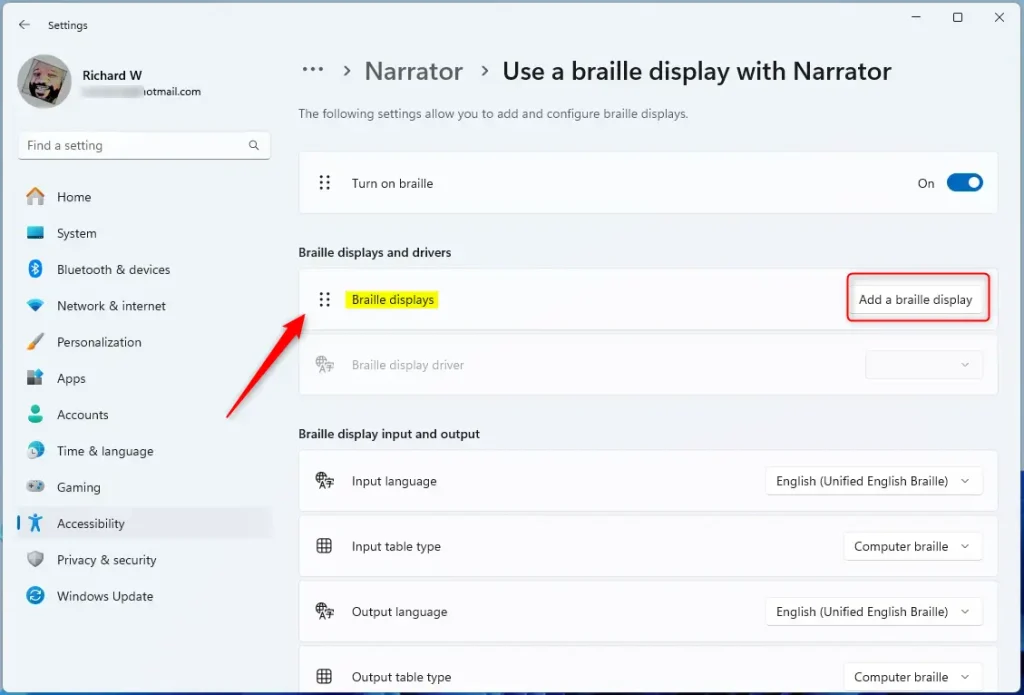
Step 6: Add Your Braille Display
Click the Add a braille display button.
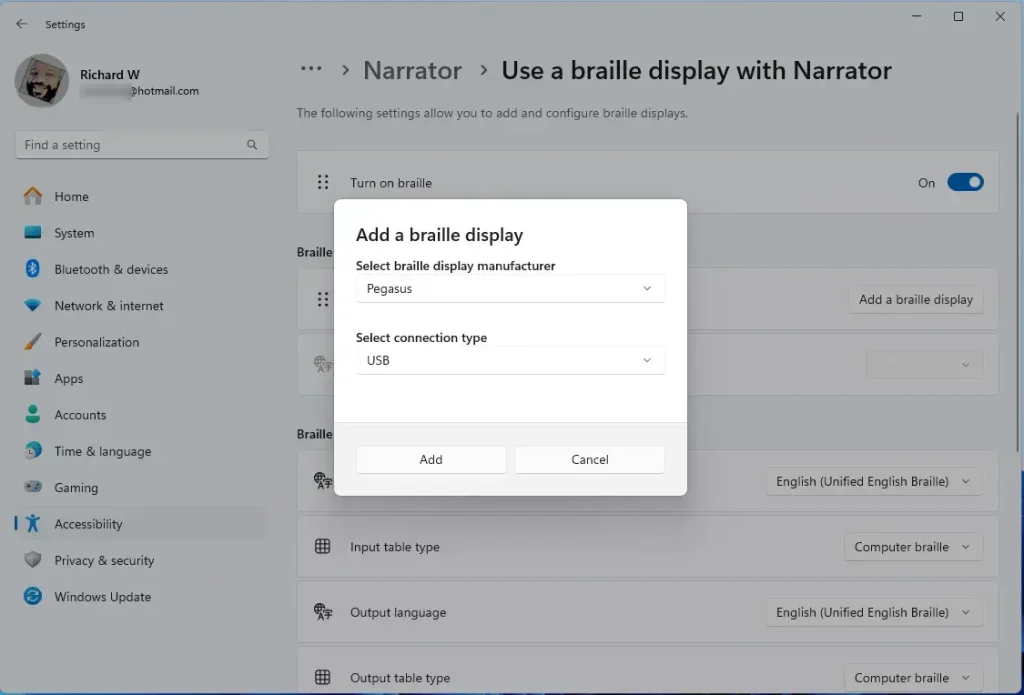
Choose the brand of your braille display and how it connects (USB or serial). Then click Add.
If you use a different screen reader or special software, follow any extra steps it asks for to finish setting up.
That’s it! Your braille display should now work with Narrator on Windows 11.
Summary
Using a braille display with Narrator helps people who are blind or have low vision use Windows 11 more easily.
To get started, download braille support software and drivers through Windows Settings. It’s a simple process that takes just a few minutes.
Once set up, you can enjoy a better, more accessible computer experience with braille output.
If you want to learn more about Narrator and its features, visit this helpful guide.


Leave a Reply