How to Enable or Disable Language List Access in Windows 11
Windows 11 can share your preferred language list with websites. This helps sites show you content in your native language automatically. You do not have to pick a language on every new site you visit. Managing your Windows 11 language settings is key to a smooth browsing experience.
Why do this?
You might want to change this setting to protect your privacy. By turning it off, you stop Windows from sharing your language data with web browsers. If you value convenience, you should keep it on.
What happens when done?
Once you change this setting, websites will no longer receive your language preferences from your computer. You may have to manually select your language on some websites if the site cannot detect your preferences automatically.
Comparison of Language List Management Methods
| Method | Difficulty | Best For |
|---|---|---|
| Settings App | Easy | General users |
| registry-in-windows-11/" class="sal-link" rel="noopener" target="_blank" data-sal-id="11236">Registry Editor | Advanced | Power users/IT admins |
| Group Policy | Advanced | Shared PCs/Enterprise |
Method 1: Using Windows Settings
This is the easiest way to change your settings.
- Open the Windows Settings app.
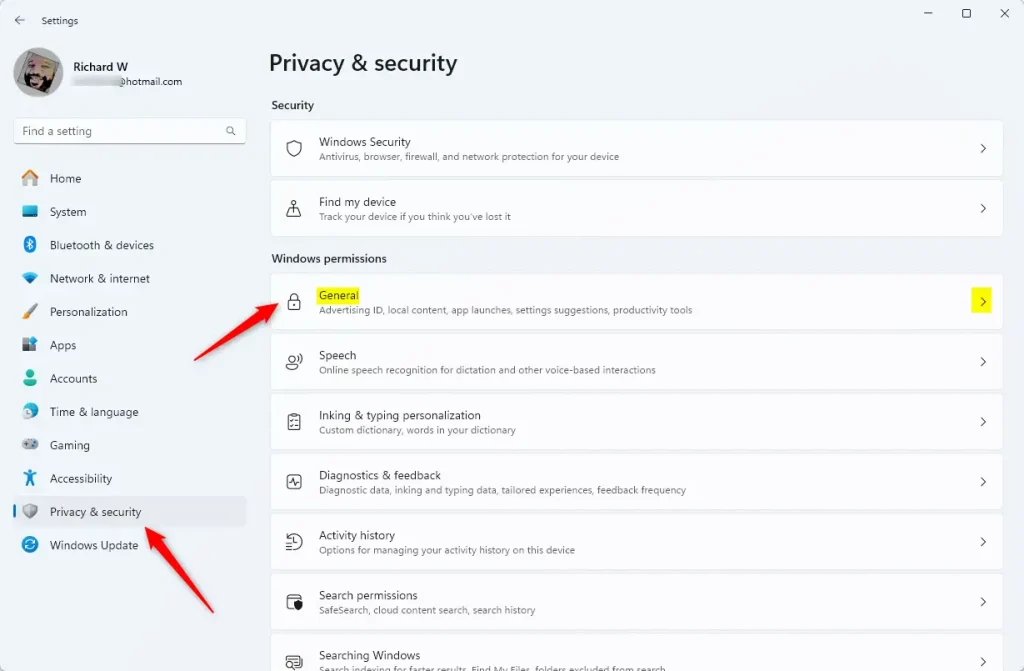
- Click on Privacy and security on the left side.
- Click on the General tile.
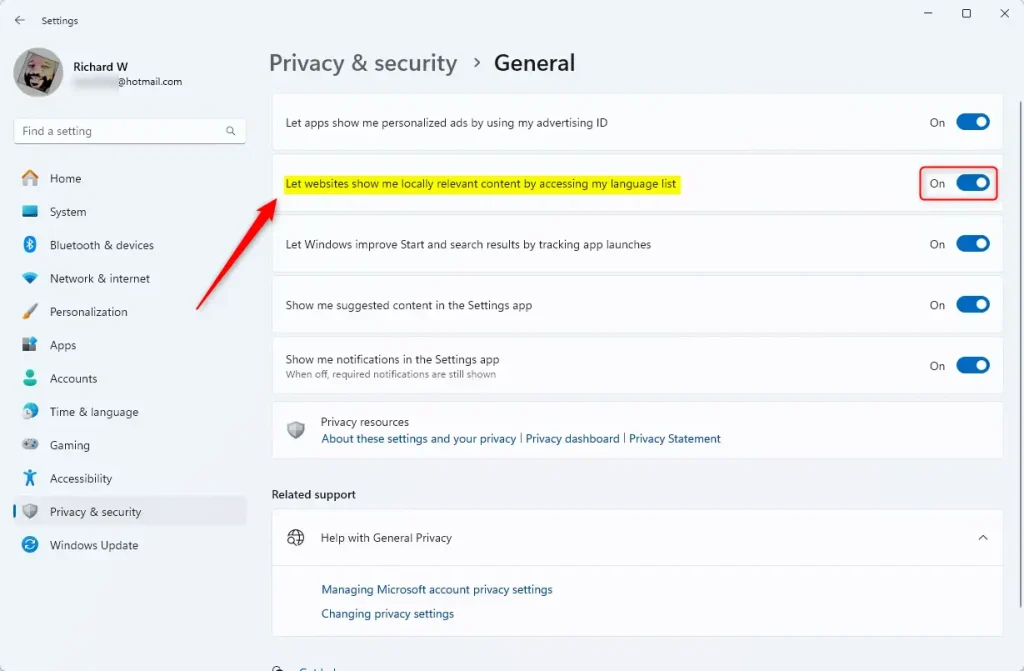
Find the option that says “Let websites show me locally relevant content by accessing my language list.” Flip the switch to On to share your language list, or Off to stop sharing it.
Method 2: Using the Registry Editor
Note: This method requires admin privileges. Be careful, as changing the registry can affect your system.
- Open the Windows Registry editor by searching for
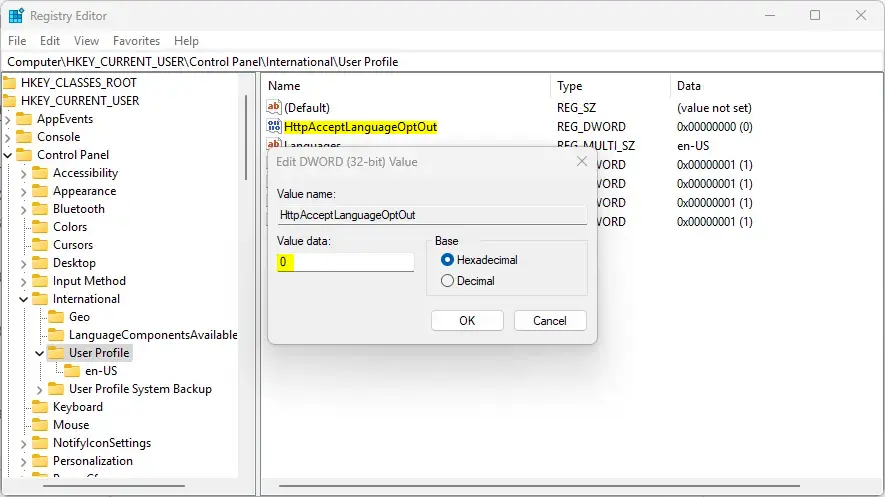
regeditin the start menu. - Go to the following path:
HKEY_CURRENT_USER\Control Panel\International\User Profile - Look for
HttpAcceptLanguageOptOuton the right side. - If you see it, double-click it. Set the value to
1to disable access. - If you do not see it, right-click in the empty space, select New, then DWORD (32-bit) Value. Name it
HttpAcceptLanguageOptOutand set the value to1.
To go back to the original setting, simply delete the HttpAcceptLanguageOptOut item you created. Restart your computer to finish.
Method 3: Group Policy Management (Admin Only)
Note: This method requires admin privileges and is for Windows Pro or Enterprise editions.
- Press
Win + R, typegpedit.msc, and hit Enter. - Navigate to
Computer Configuration\Administrative Templates\Control Panel\Regional and Language Options. - Locate the policy for language list access and set it to Disabled to restrict access for all users on the machine.
Summary
You can control how Windows shares your language list with websites. Use the Settings app for a quick toggle, or the Registry Editor if you prefer advanced controls. Turning this off improves your privacy, while turning it on makes browsing more convenient. Remember to manage your Input Method Editor (IME) and regional settings if you encounter issues with keyboard layouts or display languages.
Why is the ‘Add a language’ button greyed out in Windows 11?
This often happens if your organization has restricted language changes via Group Policy or if your Windows edition does not support additional language packs. Ensure you have an active internet connection, as Windows needs to download the necessary Language Interface Pack (LIP) from Microsoft servers to complete the installation.
How do I fix language pack installation errors?
First, check your internet connection. If the error persists, run the Windows Update troubleshooter. You can also try manually downloading the language pack from the Microsoft Store or checking if your Windows Display Language matches the region settings. Ensure your Windows Update services are running correctly in the background.
Was this guide helpful?


Leave a Reply Cancel reply