How to Change Maximum Disk Usage for Point-in-time Restore in Windows 11
To control how much storage space Windows 11 allocates for system restore snapshots, you’ll change the maximum disk usage for point-in-time restore.
Point-in-time restore, which uses the Volume Shadow Copy Service (VSS) behind the scenes, creates restore points that let you roll back your PC to an earlier state. This feature is crucial for recovering from software issues or accidental changes.
By default, Windows 11 might use a good chunk of your C: drive for these restore points, which can eat into your available space. You can manually adjust this limit, typically between 5% and 10% of your drive capacity, to ensure you have sufficient recovery options without sacrificing your own file storage.
Adjust the Maximum usage limit slider in Settings > System > Recovery > Point-in-time restore. You can also use the Registry Editor under 🗝️HKEY_LOCAL_MACHINESOFTWAREMicrosoftWindowsCurrentVersionSetupRecoveryPITRSettings to set a custom size in MB.
How to Change Maximum Disk Usage in Settings
You can easily change how much disk space your Windows 11 restore points use right in the Settings app, but you’ll need administrator access to do it.
- Open Settings by pressing ⊞ Win+I on your keyboard.
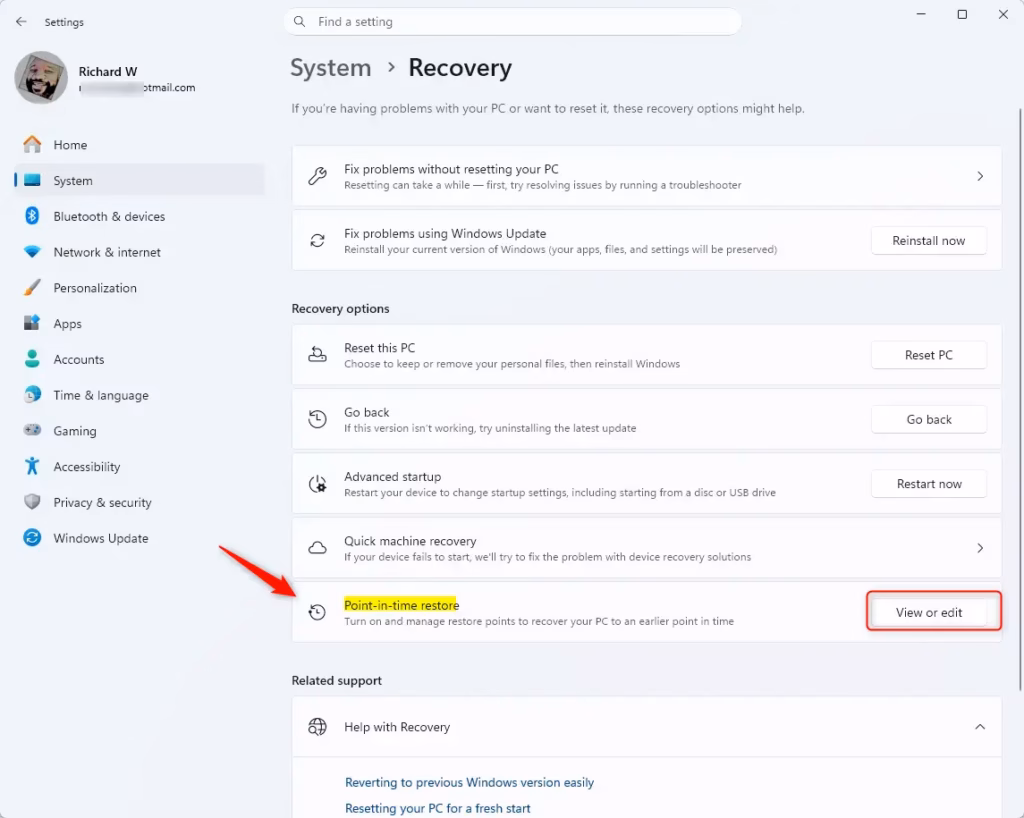
- Click System on the left, then select Recovery on the right.
3. Under Recovery options, click Point-in-time restore or the View or edit button.
4. Move the Maximum usage limit slider to choose between 2 GB and 50 GB.

Advanced Configuration via Registry Editor
For more control, you can change the maximum disk usage for Windows 11 restore points using the Registry Editor, but be careful as mistakes can impact your system.
- Press ⊞ Win+R, type regedit, and press Enter to open the Registry Editor.
- Navigate to: 🗝️HKEY_LOCAL_MACHINE\SOFTWARE\Microsoft\Windows\CurrentVersion\Setup\Recovery\PITR\Settings
3. Double-click MaxGlobalSize_UX in the right pane.
4. Choose Decimal and then type in your desired size in MB (for example, 10240 for 10 GB). Then, click OK.

Troubleshooting: Volsnap Event ID 36
If you encounter the Volsnap Event ID 36 error in Windows 11, it means your restore point storage is full, and you need to increase the maximum disk usage limit to fix it.
Best Practices for Storage
Choosing the right amount of disk space for Windows 11 restore points depends on your drive size; generally, 10 GB to 20 GB is good, but adjust it based on your needs and available space.
Summary
Managing the disk space for your Windows 11 restore points helps keep your system running smoothly, and you can adjust it using Settings or the Registry Editor.
What happens if the disk usage limit is set to 0?
If you set the limit to 0, the Volume Shadow Copy Service will be unable to allocate storage for snapshots. This effectively disables the creation of new restore points, meaning you will have no recovery options available if your system encounters a critical error or file corruption.
Does increasing the limit affect system performance?
Increasing the limit does not directly slow down your computer. However, if your disk is nearly full, the system may struggle to manage large shadow copy files. Always ensure you have plenty of free physical disk space to maintain optimal system performance and stability.
Was this guide helpful?

About the Author
Richard
Tech Writer, IT Professional
Richard, a writer for Geek Rewind, is a tech enthusiast who loves breaking down complex IT topics into simple, easy-to-understand ideas. With years of hands-on experience in system administration and enterprise IT operations, he’s developed a knack for offering practical tips and solutions. Richard aims to make technology more accessible and actionable. He's deeply committed to the Geek Rewind community, always ready to answer questions and engage in discussions.


No comments yet — be the first to share your thoughts!