How to Enable or Disable Auto-Start for Microsoft Teams

Auto-start for Microsoft Teams makes the chat app open by itself when you sign in to Windows 11 or Windows 10. Turning it off stops Teams from loading in the background at sign-in. That usually shortens the wait before your desktop is usable and frees some memory for the apps you actually use.
The quickest fix is inside Teams. It takes less than 30 seconds, and you can undo it the same way:
- Open Microsoft Teams.
- Click the three dots near your profile picture.
- Select Settings.
- Find the option to auto-start the application and switch it off (or on, if you want Teams to start with Windows).
The change applies the next time you sign in to Windows. You don’t need to restart. Teams stays open until you close it. If Teams still starts after you sign in again, use one of the methods below.
Open Microsoft Teams, click the three dots next to your profile picture, select Settings, and switch off the auto-start option. The change applies at your next Windows sign-in, and you don’t need to restart. If Teams still opens at sign-in, turn it off in Settings Apps Startup or in the Startup apps tab of Task Manager .
New Teams vs. Classic Teams Behavior
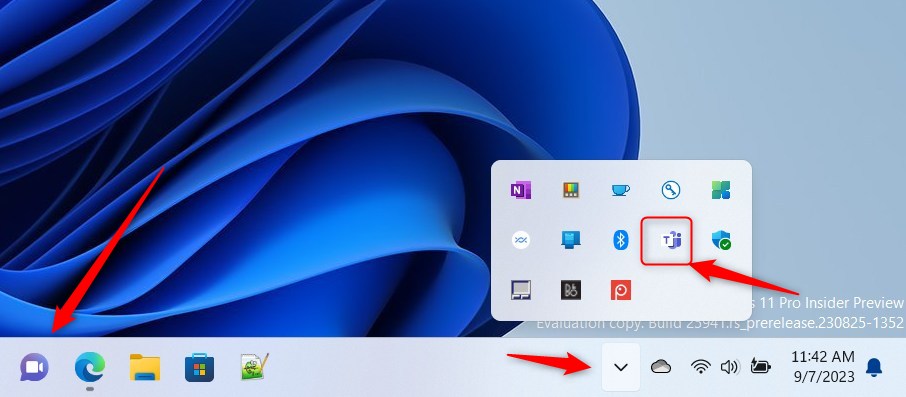
That is one reason people notice Teams opening at sign-in after an update. On some PCs you may have both versions installed, and each one has its own auto-start setting. If Teams keeps opening after you turn it off, check that you changed the setting in the version that is actually starting.
How to Enable or Disable Microsoft Teams Auto-Start
Method 1Windows Startup Settings
The fastest way to manage startup apps is through the Windows settings menu. You can open it directly with Windows Startup Apps. Otherwise, go to Settings Apps Startup in Windows 11. In Windows 10, go to Settings Apps Startup as well. The page lists every app that can start with Windows, each with an On/Off switch and an impact label. Follow the steps below to find Teams and change its switch.
- Open Settings.
- Click Apps in the left sidebar.
- Select Startup.
- Find Microsoft Teams and toggle the switch to Off to disable auto-launch.
When you are done, the switch next to Microsoft Teams should show Off. The change is saved straight away and takes effect at your next sign-in. To undo it, come back to this page and turn the switch on again. If Teams is missing from the list, it may not have been run yet under your account, or it may be starting by another route. In that case, use the Teams app settings or the Task Manager method.

Method 2Task Manager Startup Tab
If the settings menu does not work, use the Task Manager to force the change. The Task Manager reads the same startup list as the Settings app, but it also shows each entry's status and startup impact. That makes it easier to see what is really enabled. The steps are below.
- Press Ctrl + Shift + Esc.
- Click the Startup apps icon on the left.
- Right-click Microsoft Teams and select Disable.
After the change, the Status column for Microsoft Teams should read Disabled. In Windows 11 the tab is called Startup apps. In Windows 10 it is called Startup. To reverse the change, right-click the same entry and choose Enable. If you see no Startup tab at all, click More details at the bottom of the Task Manager window to switch from the compact view. Also note that a work or school PC may have startup rules set by your IT department. In that case the entry can reappear or be greyed out, and you will need to ask your administrator.
Troubleshooting: When Settings Won't Save
Teams auto-start sometimes won't stay off because of a leftover entry in the Windows registry. Registry Editor is a database for low-level Windows settings. Deleting the leftover Teams startup entry by hand can make your change stick. This mainly applies to the classic Teams app, which registers itself in the Run key. The newer Teams app usually starts through a different mechanism, so the Settings and Task Manager methods are more likely to work for it.
Follow these steps:
- Press Win + R to open the Run box.
- Type regedit and press Enter. If Windows asks whether to allow the app to make changes, click Yes. Registry Editor opens.
- In the left pane, go to HKEY_CURRENT_USER\Software\Microsoft\Windows\CurrentVersion\Run. You can also paste the path into the address bar at the top of the window. The right pane lists the programs that start when you sign in.
- Optional but wise: back up first. Click File Export, choose a location, and save the file. Double-clicking that file later will restore the entry.
- Locate the value named com.squirrel.Teams.Teams (or a similar name that mentions Teams).
- Right-click it and select Delete, then confirm by clicking Yes. The entry disappears from the list.
- Close Registry Editor.
You don't need to restart. The change takes effect the next time you sign in. This key belongs to your user account only, so other users on the same PC are not affected. If Teams later adds the entry back, it means auto-start was turned on again in the Teams settings. Turn it off there too. To bring auto-start back, switch the option on in Teams, or import the file you exported.
Summary
Controlling Teams auto-start helps your computer run better by limiting which apps launch when you turn it on. Background apps then don't use CPU, memory and network the moment you sign in. You can still open Teams yourself whenever you need it, and you can re-enable auto-start at any time if you want to be reachable as soon as you log on.
Have a question about this guide?
Answered by AI from this guide. Good questions may be added to this page — please don't include personal details.
Did this guide fix your problem?

About the Author
Richard
Tech Writer, IT Professional
Richard is a writer at Geek Rewind who turns complex IT tasks into clear, step-by-step guides. He draws on years of hands-on experience in system administration and enterprise IT operations, focusing on Windows, Linux and WordPress: the problems people actually run into, and the fixes that work. His server and WordPress guides come from systems he runs himself. Richard builds and maintains the platform behind Geek Rewind, from its Ubuntu servers and Nginx configuration to its custom WordPress plugins. Many new tutorials start with readers' questions, and he's always glad to answer them in the comments.
[…] calendar, turn the camera and mic on or off on the lock screen, turn read receipts on or off, auto start Teams, disable Teams chat, sync contacts with Teams, connect to Google Calendar, link your mobile […]
[…] calendar, turn the camera and mic on or off on the lock screen, turn read receipts on or off, auto start Teams, disable Teams chat, sync contacts with Teams, connect to Google Calendar, link your mobile […]
[…] the camera and mic on or off on the lock screen, turn read receipts on or off, auto start Teams, disable Teams chat, sync contacts with Teams, connect to Google Calendar, link […]
[…] the camera and mic on or off on the lock screen, turn read receipts on or off, auto start Teams, disable Teams chat, sync contacts with Teams, connect to Google Calendar, link your […]
[…] the camera and mic on or off on the lock screen, turn read receipts on or off, auto start Teams, disable Teams chat, sync contacts with Teams, connect to Google Calendar, link […]
[…] the camera and mic on or off on the lock screen, turn read receipts on or off, auto start Teams, disable Teams chat, sync contacts with Teams, connect to Google Calendar, link […]
[…] calendar, turn the camera and mic on or off on the lock screen, turn read receipts on or off, auto start Teams, disable Teams chat, sync contacts with Teams, connect to Google Calendar, link your mobile device, […]