How to Enable or Disable Energy Saver in Windows 11
You enable or disable Energy Saver in Windows 11 to reduce power consumption and extend battery life.
Energy Saver is a power-saving mode that limits background activity and adjusts certain settings to make your PC more efficient. It’s particularly useful for laptops when you need to maximize battery runtime.
Starting with Windows Build 26002, Microsoft introduced a streamlined way to manage this feature, even when your device is plugged in.
Enabling Energy Saver can help decrease your electricity bill and ensure your computer runs optimally when you’re not actively using it.
Enable or disable Energy Saver in Windows 11 through Settings by navigating to System > Power & battery and toggling the switch. Alternatively, access it quickly via the Quick Settings menu. This feature conserves power and extends battery life.
How to Turn On or Off “Always use energy saver”
You can control the “Always use energy saver” setting in Windows 11 directly from the main Settings app. Go to System, then Power & battery, and you will find the switch to turn this feature on or off for your computer.
- Open the Settings app. To open Settings, click the Start menu and choose Settings, or press Windows key + I on your keyboard.
- In Settings, click on System on the left side.
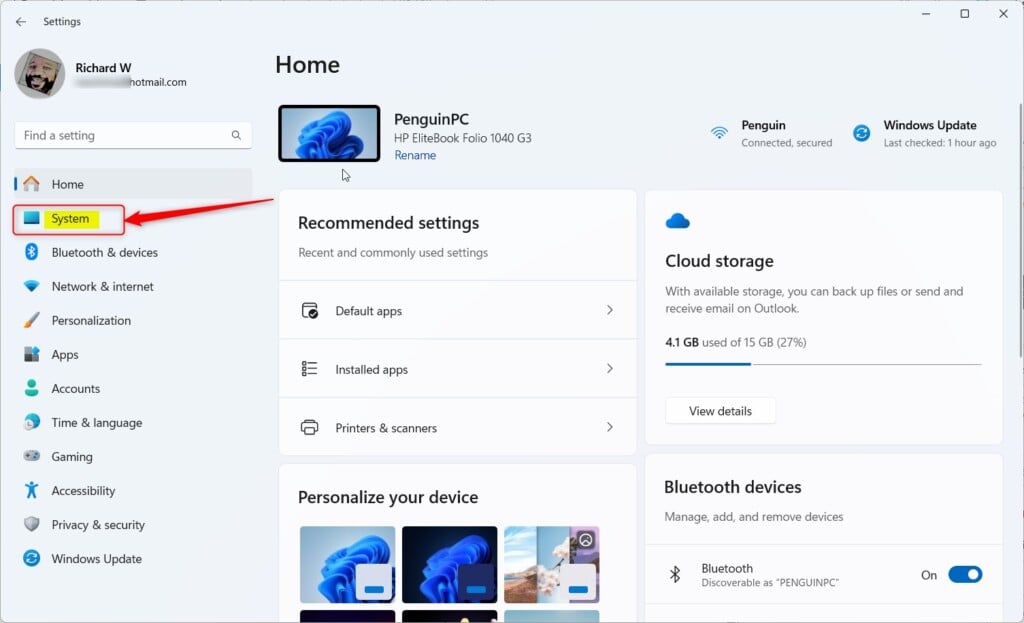
Windows 11 System button in Settings - On the right, click on Power & battery (or just Power).
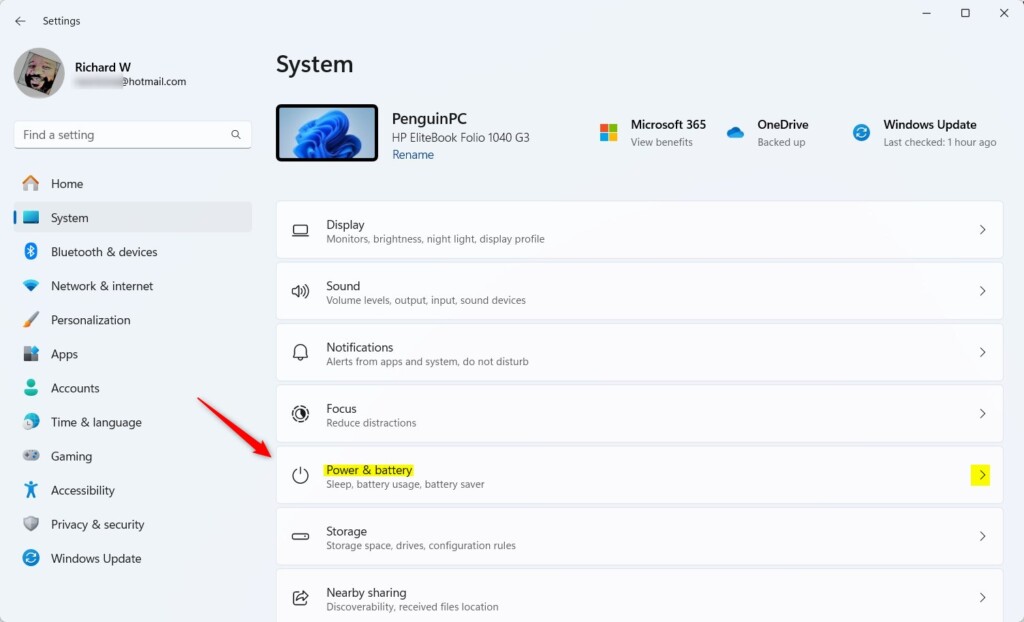
Windows 11 Power and Battery Settings - Find the Energy saver section and click to expand it.
- Turn on the switch for “Always use energy saver” to save power all the time.
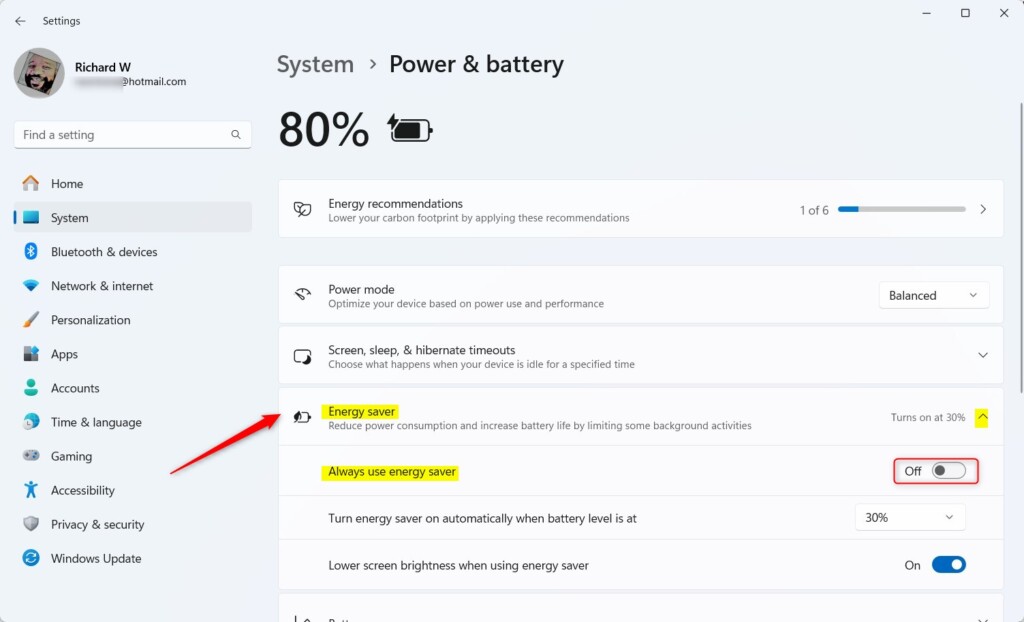
Toggle Always use Energy Saver in Windows 11 - To stop using Energy Saver all the time, just switch it off here.
Turn Energy Saver On or Off Quickly from Quick Settings
You can easily turn Windows 11 Energy Saver on or off without opening the full Settings app by using the Quick Settings menu. Just click the icons near the bottom right of your screen and look for the Energy saver button to toggle it.
- Click the Quick Settings button on the bottom right of your screen (where the volume and network icons are).
- Look for the Energy saver button and click it to turn Energy Saver on or off.
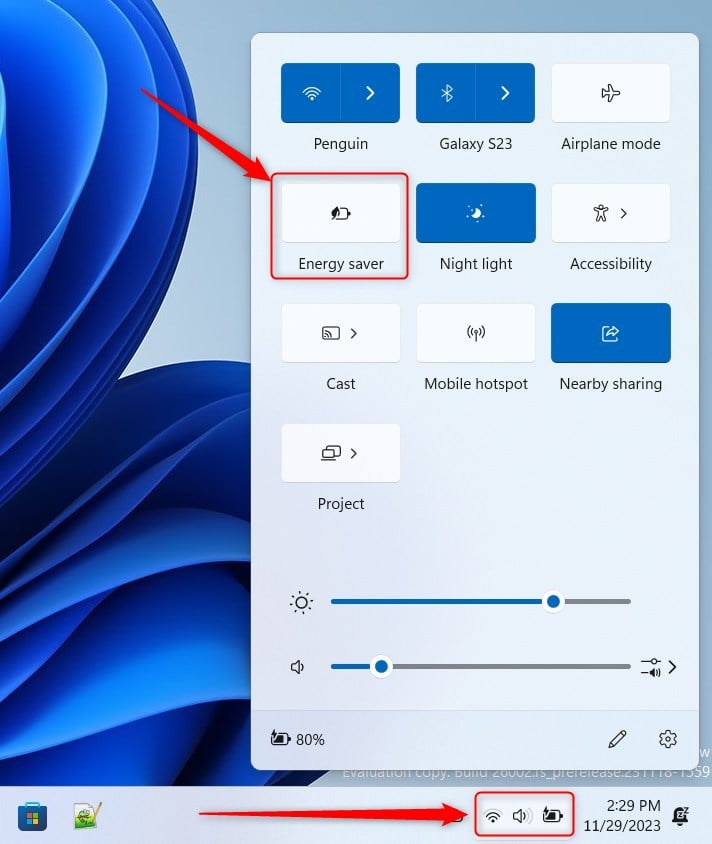
Toggle Energy Saver in Quick Settings
Using Windows Registry Editor (Advanced)
Advanced users can change the Windows 11 Energy Saver setting by using the Registry Editor, but this requires caution and administrator access. You will need to navigate to a specific folder path and make careful changes to adjust the setting.
- ⚙️ Requires admin access. Open Registry Editor by typing
regeditin the Start menu search and pressing Enter. - Go to this folder (called a key):
Computer\HKEY_LOCAL_MACHINE\SYSTEM\CurrentControlSet\Control\Power - In the right panel, find
EcoModeState(a DWORD value). If you don’t see it, right-click inside the panel, choose New > DWORD (32-bit) Value, and name itEcoModeState. - Double-click
EcoModeStateand set its value to:1to turn Energy Saver ON2to turn Energy Saver OFF
- Click OK and close the Registry Editor.
- Restart your computer to apply the changes.
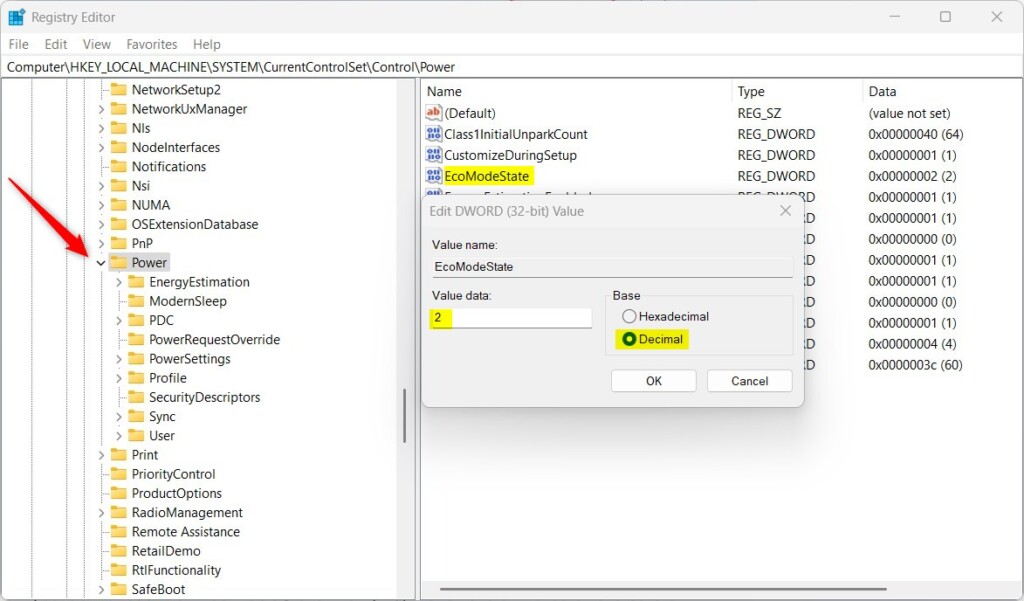
Windows 11 Registry Editor Energy Saver Settings
Summary
Windows 11 Energy Saver is a helpful tool that cuts down on power use and makes your battery last longer. You can easily switch it on or off in Settings or Quick Settings, and even advanced users can adjust it with the Registry Editor.
Should I use energy saver 🪟 Windows 11?
Using the energy saver feature and additional power management tools in Windows 11, you can significantly extend your laptop's battery life without compromising functionality.
What is energy saver mode in 🪟 Windows 11?
Energy Saver. Settings > System > Power & battery > Energy saver. Activates when battery is low; dims screen and limits background processes. Turn on Lower screen brightness when using energy saver.
Does 🪟 Windows 11 have a battery saver?
Application simply open settings. Here click on system here scroll down and select power and battery option. And look for the battery. Section and select the battery saver drop-down menu.
Was this guide helpful?

About the Author
Richard
Tech Writer, IT Professional
Richard, a writer for Geek Rewind, is a tech enthusiast who loves breaking down complex IT topics into simple, easy-to-understand ideas. With years of hands-on experience in system administration and enterprise IT operations, he’s developed a knack for offering practical tips and solutions. Richard aims to make technology more accessible and actionable. He's deeply committed to the Geek Rewind community, always ready to answer questions and engage in discussions.

No comments yet — be the first to share your thoughts!