How to Set Up File History on Windows 11
You set up File History on Windows 11 to automatically back up your personal files and protect them from accidental deletion or hardware failure.
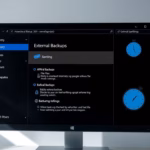
Open Settings, go to System, then Storage, and select File History. Choose a drive to back up to and turn on File History. You can then select additional folders to include in your backups.
File History is a built-in Windows feature that creates backup copies of your files, allowing you to restore them to a previous state. It specifically targets your user library folders like Documents, Pictures, and Desktop, and can also include offline OneDrive folders.
For example, File History backs up files located within your 📁C:\Users\[YourUsername] directory. To use it, you need an external hard drive or a network location with at least 200 GB of free space.
Was this guide helpful?

About the Author
Richard
Tech Writer, IT Professional
Richard, a writer for Geek Rewind, is a tech enthusiast who loves breaking down complex IT topics into simple, easy-to-understand ideas. With years of hands-on experience in system administration and enterprise IT operations, he’s developed a knack for offering practical tips and solutions. Richard aims to make technology more accessible and actionable. He's deeply committed to the Geek Rewind community, always ready to answer questions and engage in discussions.

[…] File History is a built-in tool that saves copies of your files. It backs up your home folder, including your Documents, Music, Pictures, Videos, and Desktop. These files are stored in your profile folder at C:UsersUsername. […]