How to Record Your Screen with Snipping Tool in Windows 11
You can record your screen directly within Windows 11 using the Snipping Tool.
The Snipping Tool is a built-in Windows feature that now lets you capture video of your desktop activity, eliminating the need for third-party software.
This handy tool, significantly updated for Windows 11, integrates video recording capabilities alongside its familiar screenshot functions. You can capture exactly what’s happening on your screen.
Once you’ve finished recording, the Snipping Tool immediately displays a preview. You can then easily trim your video and save it directly to your PC as an MP4 file.
Open Snipping Tool, click the Record icon, then New. Select your desired screen area and click Start. Click the red Stop button when finished to preview and save your MP4 recording.
Prerequisites
To use this feature, you must be running Windows 11. Make sure your Snipping Tool app is updated to version 11.2211.35.0 or higher through the Microsoft Store. This feature is not available on Windows 10.
Keyboard Shortcuts
Using shortcuts makes capturing faster. Use the following table to navigate the tool:
| Action | Shortcut |
|---|---|
| Open Snipping Tool | ⊞ Win+Shift+S |
| Start Recording | Click Record button |
How to Record Your Screen
- Open the Snipping Tool app from your Start menu.
- Click the Record icon on the menu bar.
- Click the New button.
- Use your mouse to drag and select the area of your screen you want to capture.
- Click the Start button to begin recording.
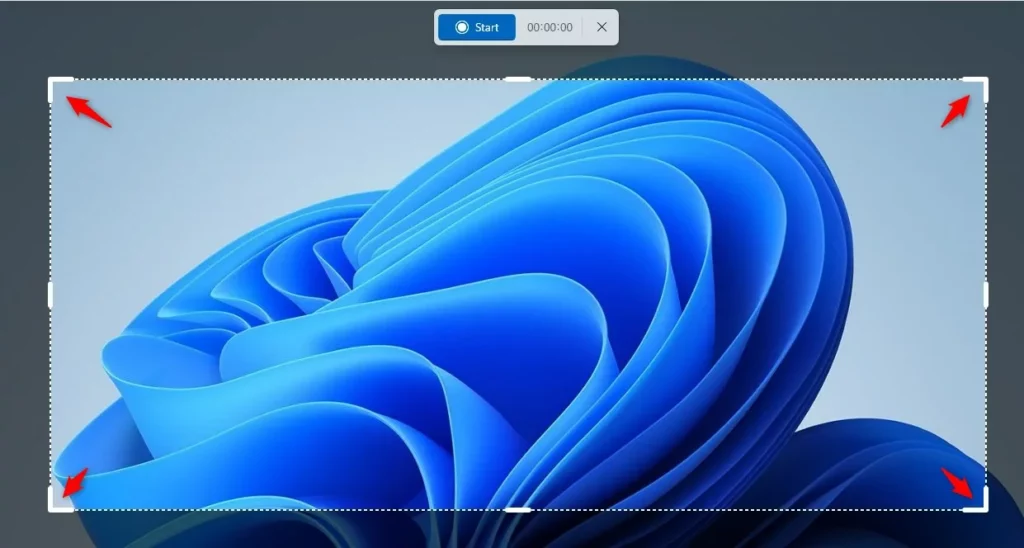
- When finished, click the red Stop recording button.

You can record your screen using the Snipping Tool in Windows 11 by opening the app, clicking the Record icon, and then selecting New.
Troubleshooting and Settings
Why is the video recording option missing?
If you do not see the record button, your app is likely outdated. Open the Microsoft Store, go to Library, and click Get updates to ensure you have the latest version of the Snipping Tool.
Microphone Permissions
If your audio is not recording, you must check your privacy settings. Go to Settings > Privacy & security > Microphone and make sure Microphone access is turned On. Note: This step may require admin privileges if your system is managed by an organization.
Summary
- The Snipping Tool is a powerful Windows 11 screen recorder that requires no extra software.
- Always ensure your app is updated via the Microsoft Store to access the latest features.
- Videos are saved as MP4 files in your user videos folder by default.
- Check your microphone permissions if you intend to record voice-over audio.
The Snipping Tool lets you record your screen in Windows 11 without needing extra programs, saving videos as MP4 files to your user videos folder.
Does Snipping Tool record system audio?
Right now, the Snipping Tool doesn’t record system audio or high-quality microphone sound, focusing mainly on what you see on screen.
Can I edit the video after recording in Snipping Tool?
The Snipping Tool offers basic trimming functionality immediately after you stop recording. You can adjust the start and end points of your video in the preview window. For more advanced editing, such as adding text or transitions, you should export the file and use a dedicated video editor.
Was this guide helpful?

About the Author
Richard
Tech Writer, IT Professional
Richard, a writer for Geek Rewind, is a tech enthusiast who loves breaking down complex IT topics into simple, easy-to-understand ideas. With years of hands-on experience in system administration and enterprise IT operations, he’s developed a knack for offering practical tips and solutions. Richard aims to make technology more accessible and actionable. He's deeply committed to the Geek Rewind community, always ready to answer questions and engage in discussions.


[…] Snipping Tool is a built-in screenshot-capturing and video-recording tool in Windows that allows you to capture a […]
[…] Snipping Tool makes it easy to record your screen. By default, it saves these files to your Videos folder. You can go into the app settings at any […]