How to Manage Notifications in Microsoft Teams on Windows 11
You can manage Microsoft Teams notifications on Windows 11 to minimize distractions and focus on your tasks.
Microsoft Teams uses notifications for new messages, mentions, and activity, which can easily become overwhelming without proper configuration.
This guide helps you adjust settings within Teams, such as notification styles, sounds, and quiet hours, to ensure you receive alerts only for critical communications.
For instance, you can customize banner notifications and choose to mute specific channels, ensuring you stay informed without constant interruptions.
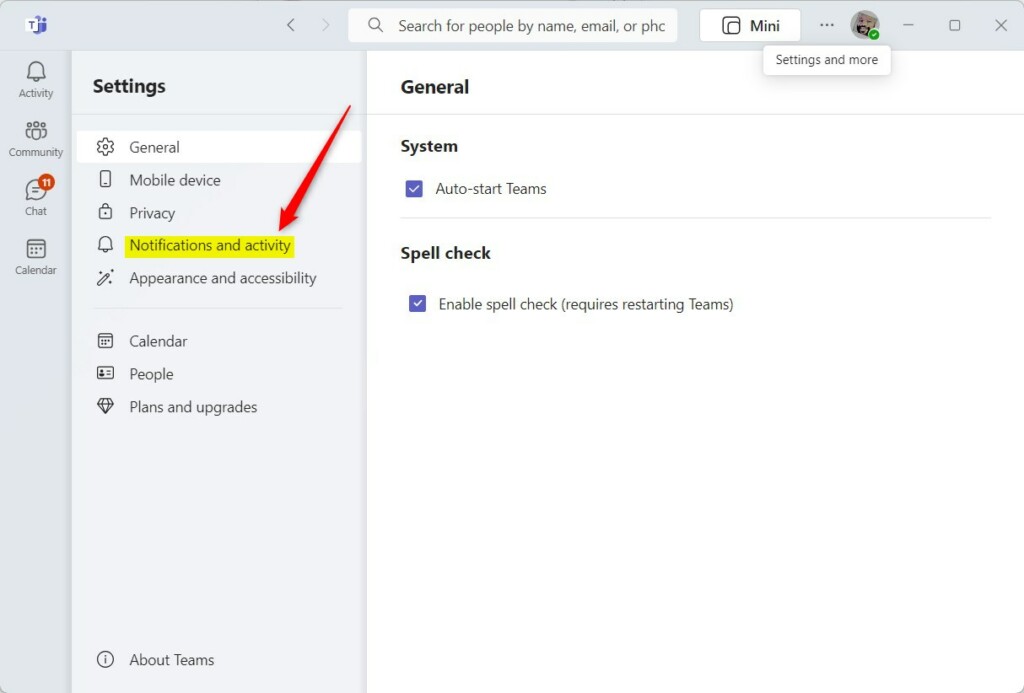
Access Teams notification settings by clicking the (…) icon, selecting Settings, then Notifications and activity. Customize banner styles, sounds, and quiet hours to control alerts for messages and activity. You can also mute specific channels for less noise.
Why manage Teams notifications?
Constant pings and pop-ups can break your concentration and lower your productivity. By learning how to manage Teams notifications, you take control of your digital workspace. You ensure that you only receive alerts for the messages and meetings that truly matter, allowing you to focus on your deep work without unnecessary interruptions.
What happens when done?
Once you finish configuring your settings, you will have a quiet, distraction-free environment. You will no longer be overwhelmed by constant banners or sounds. Instead, you will receive alerts only when you choose, helping you stay organized and calm throughout your workday.
How to access notification settings
To start, open the Microsoft Teams app on your Windows 11 computer. Click the Settings and more (…) icon located at the top right, next to your profile picture. Select Settings from the dropdown menu, then click the Notifications and activity tab on the left sidebar.


Granular channel and thread management
You do not have to receive alerts for every single message. You can mute specific channels to stop the noise. Right-click a channel name in your list and select Channel notifications. From here, you can choose to turn off all activity or only get notified for personal mentions. This is a great way to keep your Teams activity feed clean.
Presence and Meeting alerts
You can manage how you are alerted during meetings. In the Notifications and activity menu, look for the Meetings section. You can toggle alerts for when a meeting starts or when someone joins. Using Do Not Disturb mode is another effective way to silence all incoming pings while you are in a meeting or presenting your screen.
Troubleshooting and common issues
If you find that you are not getting alerts, check your Windows 11 Focus Assist settings. Sometimes, Windows blocks notifications to help you focus. Ensure that Teams is allowed to send notifications in your system settings. If you still face issues, check the Teams desktop app settings to ensure your status is not set to ‘Appear offline’.
Note: If you need to reset system-wide notification permissions, you may need admin privileges to modify files in 🗝️HKEY_CURRENT_USER\Control Panel\Desktop">📁C:\Windows\System32 or registry keys like 🗝️HKEY_CURRENT_USER\Control Panel\Desktop, though standard user settings in Teams do not require this.
For more detailed information, visit the official Microsoft support page.
Summary
Managing your notifications in Microsoft Teams is the best way to avoid distractions. By customizing your sounds, banners, and email alerts, you can ensure your computer stays quiet while you work. You can always change these settings back if you decide you want to see more or fewer alerts in the future.
Why am I not receiving Teams notifications?
Check if your status is set to ‘Do Not Disturb’ or if Windows Focus Assist is blocking alerts. Ensure that your notification settings within the Teams app are enabled for banners and the activity feed. Sometimes, a simple restart of the application can resolve sync issues with your account.
How do I stop Teams from sending me email notifications?
Navigate to Settings, then select Notifications and activity. Look for the Email section and click Edit. You can change the frequency of missed activity emails to ‘Off’ or ‘As soon as possible’. This prevents your inbox from becoming cluttered with redundant alerts from the Teams platform.
Can I set different notification sounds for different people?
Currently, Microsoft Teams does not support custom notification sounds for individual contacts. You can only toggle sounds on or off for general activity. For the best experience, rely on the Activity feed to prioritize messages from important colleagues while keeping general channel alerts muted.
Was this guide helpful?

About the Author
Richard
Tech Writer, IT Professional
Richard, a writer for Geek Rewind, is a tech enthusiast who loves breaking down complex IT topics into simple, easy-to-understand ideas. With years of hands-on experience in system administration and enterprise IT operations, he’s developed a knack for offering practical tips and solutions. Richard aims to make technology more accessible and actionable. He's deeply committed to the Geek Rewind community, always ready to answer questions and engage in discussions.

[…] preview on or off, turn spell check on or off, turn on or off phone number in search results, manage notifications, turn on or off suggested replies in chat, and […]
[…] or off, turn spell check on or off, turn on or off phone number in search results, manage notifications, turn on or off suggested replies in chat, and […]
[…] preview on or off, turn spell check on or off, turn on or off phone number in search results, manage notifications, turn on or off suggested replies in chat, enable or disable sound notifications, and […]
[…] or off, turn spell check on or off, turn on or off phone number in search results, manage notifications, turn on or off suggested replies in chat, enable or disable sound […]