Enable Google Authentication on Ubuntu
Google Authentication on Ubuntu secures your login using your Google account, adding an extra layer of protection to your computer.
This process connects your Google account’s two-factor authentication (2FA). 2FA means you need a second step, beyond just your password, to prove it’s really you logging in.
For example, you can set up Google Authenticator to protect Ubuntu 20.04 or 18.04. This adds a vital second check, making it much harder for anyone else to access your computer.
Install the `libpam-google-authenticator` package and the Google Authenticator app on your mobile device. Then, edit the `/etc/pam.d/common-auth` file to include `auth required pam_google_authenticator.so` and run `google-authenticator` to set up your account.
Install the Google PAM package
Google authentication relies on a Pluggable Authentication Module (PAM) package. PAM acts as a modular system allowing you to add extra layers of security to your Linux login process.
To install it, run the commands below:
sudo apt update
sudo apt install libpam-google-authenticator
Install the Google Authenticator app
You need the Google Authenticator app on your phone to set up Google authentication on Ubuntu. This app generates the one-time codes required for secure logins. Open your phone’s app store, search for ‘Google Authenticator’, and install it.
On your mobile device, visit the app store and search for Google Authentication, or use this link:
https://play.google.com/store/apps/details?id=com.google.android.apps.authenticator2
After installing it on your mobile device, go back to Ubuntu and configure it to log in using a one-time password.
Configure Ubuntu
After installing the Google Authenticator app on your phone, you must configure Ubuntu to use it for logging in. This involves editing a system file to add a specific line that enables Google authentication. Open the `common-auth` file using a command.
sudo nano /etc/pam.d/common-auth
Then copy and paste the line below anywhere into the file and save.
auth required pam_google_authenticator.so
Paste the line anywhere in the file.
# since the modules above will each just jump aroundauth    required                        pam_permit.so
# and here are more per-package modules (the "Additional" block)
auth    optional                        pam_cap.so
# end of pam-auth-update config
auth required pam_google_authenticator.so
Save and exit the editor.
After that, run the commands below to initialize Google Authentator.
google-authenticator
Running the commands above will evoke a setup prompt. You’ll answer questions about your environment, and a QR code will appear in your terminal, along with some details below it.
Do you want authentication tokens to be time-based (y/n) y
A QR code will be displayed on the terminal, as shown below, and some information will be displayed right below it.
You can’t scan the QR code directly from your terminal. Instead, open your mobile app and add a new profile, selecting the option to enter the setup key rather than scanning. Then, input the new secret key and the confirmation code:
Your new secret key is: M7I5532H5ZG4QYYEIQIMXFENIMI
Your verification code is 6593222
Your emergency scratch codes are:
The emergency codes are backups you can use if you don’t have your mobile device. Please take note and store it in a secure but accessible location.
In most environments, answering yes to all the questions will be enough to provide the kind of security that works.
Do you want me to update your "/home/richard/.google_authenticator" file? (y/n) y

Do you want to disallow multiple uses of the same authentication
token? This restricts you to one login about every 30s, but it increases
your chances to notice or even prevent man-in-the-middle attacks (y/n) y

By default, a new token is generated every 30 seconds by the mobile app.
In order to compensate for possible time-skew between the client and the server,
we allow an extra token before and after the current time. This allows for a
time skew of up to 30 seconds between authentication server and client. If you
experience problems with poor time synchronization, you can increase the window
from its default size of 3 permitted codes (one previous code, the current
code, the next code) to 17 permitted codes (the 8 previous codes, the current
code, and the 8 next codes). This will permit for a time skew of up to 4 minutes
between client and server.
Do you want to do so? (y/n) n

If the computer that you are logging into isn't hardened against brute-force
login attempts, you can enable rate-limiting for the authentication module.
By default, this limits attackers to no more than 3 login attempts every 30s.
Do you want to enable rate-limiting? (y/n) y
As you’ll see, you’ll still need to verify your username and password, but a third layer, a one-time code, will also be required to log in.
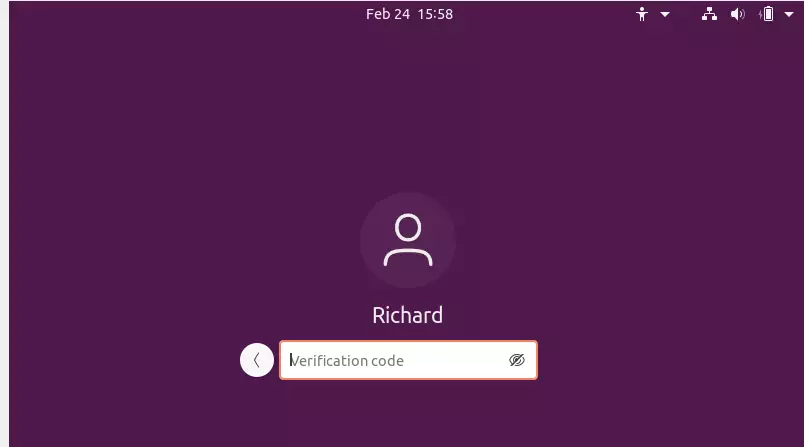
Enter the code from your mobile device to complete the verification.
This completes the setup.
Conclusion:
This post showed you how to install and configure Google Authenticator on Ubuntu to provide an additional layer of security.
If you find any error above, please use the form below to report.
Was this guide helpful?

About the Author
Richard
Tech Writer, IT Professional
Richard, a writer for Geek Rewind, is a tech enthusiast who loves breaking down complex IT topics into simple, easy-to-understand ideas. With years of hands-on experience in system administration and enterprise IT operations, he’s developed a knack for offering practical tips and solutions. Richard aims to make technology more accessible and actionable. He's deeply committed to the Geek Rewind community, always ready to answer questions and engage in discussions.


[…] To read this post, click here. […]