How to Install Zabbix with Apache on Ubuntu 24.04

Installing Zabbix with Apache on Ubuntu 24.04 creates a robust, free system for watching over your computers and network.
Zabbix is a popular program that keeps an eye on IT stuff, like servers and devices, and tells you what’s happening right now. Apache is a common web server that will show you the Zabbix information through your web browser.
This setup lets you see all your monitoring data in one place. We’ll cover putting Zabbix server and its agent onto Ubuntu 24.04, which is a current stable version, and setting up Apache to show the Zabbix web pages.
Install Zabbix server, PHP, and Apache packages using `sudo apt install zabbix-server-pgsql zabbix-frontend-php php8.3-pgsql zabbix-apache-conf zabbix-sql-scripts zabbix-agent`. Then, configure the Zabbix server file `/etc/zabbix/zabbix_server.conf` with your database details. Finally, restart services with `sudo systemctl restart zabbix-server zabbix-agent apache2`.
Install PostgreSQL server
To install Zabbix on Ubuntu 24.04, you first require a PostgreSQL database to store Zabbix's monitoring data. You can install the PostgreSQL server and tools using the command `sudo apt install postgresql postgresql-contrib`. This command installs the PostgreSQL database system that Zabbix needs.
For this guide, we’ll use the PostgreSQL database with Zabbix.
Run the command below to install PostgreSQL.
PostgreSQL services start automatically after installation to ensure continuous monitoring. You can check the PostgreSQL service status using the command `sudo systemctl status postgresql`.
sudo systemctl is-enabled postgresql
sudo systemctl status postgresql
For more details on installing and using PostgreSQL on Ubuntu, check out this post.
Install Zabbix packages
With the database ready, the next step to install Zabbix on Ubuntu 24.04 is to add the Zabbix software and Apache web server. You’ll start by downloading and installing the official Zabbix repository for Ubuntu. This makes the necessary Zabbix packages available for you to install on your system.
First, download and install the Zabbix repository for Ubuntu by running the command below.
wget https://repo.zabbix.com/zabbix/7.0/ubuntu/pool/main/z/zabbix-release/zabbix-release_latest+ubuntu24.04_all.deb
Then, run this command to install the Zabbix repository.
sudo dpkg -i zabbix-release_latest+ubuntu24.04_all.deb
After adding the new repository, you’ll need to refresh your package index. Run the command below.
Once the Zabbix repository is installed on Ubuntu, run the `sudo apt install zabbix-server-mysql zabbix-frontend-php zabbix-agent` command to install the Zabbix server, frontend, and agent packages from the Zabbix repository.
sudo apt install zabbix-server-pgsql zabbix-frontend-php php8.3-pgsql zabbix-apache-conf zabbix-sql-scripts zabbix-agent
This command will install the following packages:
- Zabbix with PostgreSQL database support
- Zabbix web application or frontend
- PHP and modules, including the ‘pgsql’ module for the PostgreSQL driver
- Apache and configuration for Zabbix
- Zabbix SQL scripts
- Zabbix agent for monitoring the Zabbix system
Configure Zabbix
After installing the Zabbix software on Ubuntu 24.04, you need to configure its connection to the database. This involves creating a specific database and a user account for Zabbix to use. You will use PostgreSQL commands to set up a new user and database named ‘zabbix’ and create a secure password for access.
First, let’s create a database and account for Zabbix to use.
You will run two specific commands to create a new PostgreSQL user and database. The PostgreSQL user and database, which you will name 'zabbix', are necessary for Zabbix to store its monitoring data. This storage ensures Zabbix functions correctly.
You’ll be prompted to create a password for the account.
sudo -u postgres createuser --pwprompt zabbix
sudo -u postgres createdb -O zabbix zabbix
Confirm the password you created earlier.
zcat /usr/share/zabbix-sql-scripts/postgresql/server.sql.gz | sudo -u zabbix psql zabbix
You should see a success message if everything went as expected.
You can edit the Zabbix server configuration file, located at /etc/zabbix/zabbix_server.conf, by using a command-line text editor. This file contains important settings for Zabbix server operations, such as database connection details and network ports.
sudo nano /etc/zabbix/zabbix_server.conf
Update the ‘DBName‘, ‘DBUser‘, and ‘DBPassword‘ settings with your PostgreSQL database details.
### Option: DBName
# Database Name
# Mandatory: yes
# Default:
# DBName=

DBName=zabbix

### Option: DBUser
#Database user.
# Mandatory: no
# Default:
# DBUser=

DBUser=zabbix

### Option: DBPassword
#Database password.
# Mandatory: no
# Default:
 DBPassword=Type_DBuser_password
Save the file and exit the editor when you’re done.
Restart Zabbix services
Zabbix server, Zabbix agent, and Apache web server services on Ubuntu 24.04 require restarting after setup for Zabbix to work correctly. Running the `systemctl restart zabbix-server zabbix-agent apache2` command for each service loads new settings. The `systemctl enable zabbix-server zabbix-agent apache2` command keeps these services running after your computer restarts.
Run the commands below to restart the services.
sudo systemctl restart zabbix-server zabbix-agent apache2
sudo systemctl enable zabbix-server zabbix-agent apache2
You can check the status after restarting the services with the command below.
sudo systemctl status zabbix-server zabbix-agent apache2
Access Zabbix
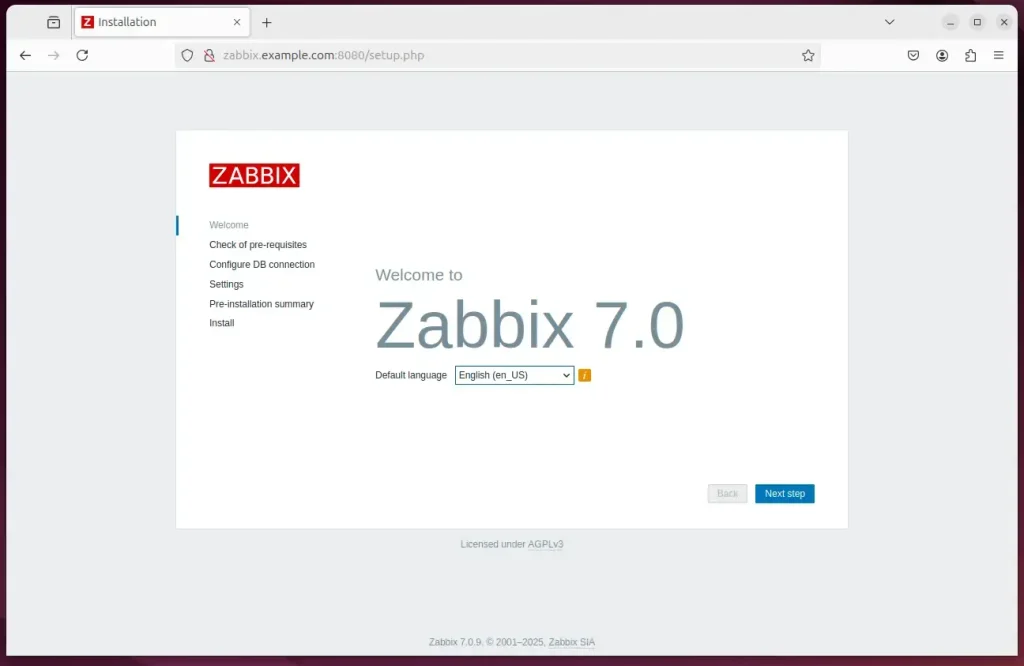
Once Zabbix services are running on Ubuntu 24.04, you can access the Zabbix web interface to complete the installation. Simply open your web browser and go to the address `http://localhost/zabbix`. The setup wizard will then guide you through choosing your language, connecting to the database, and naming your Zabbix server.
http://localhost/zabbix
Select your preferred installation language and proceed.
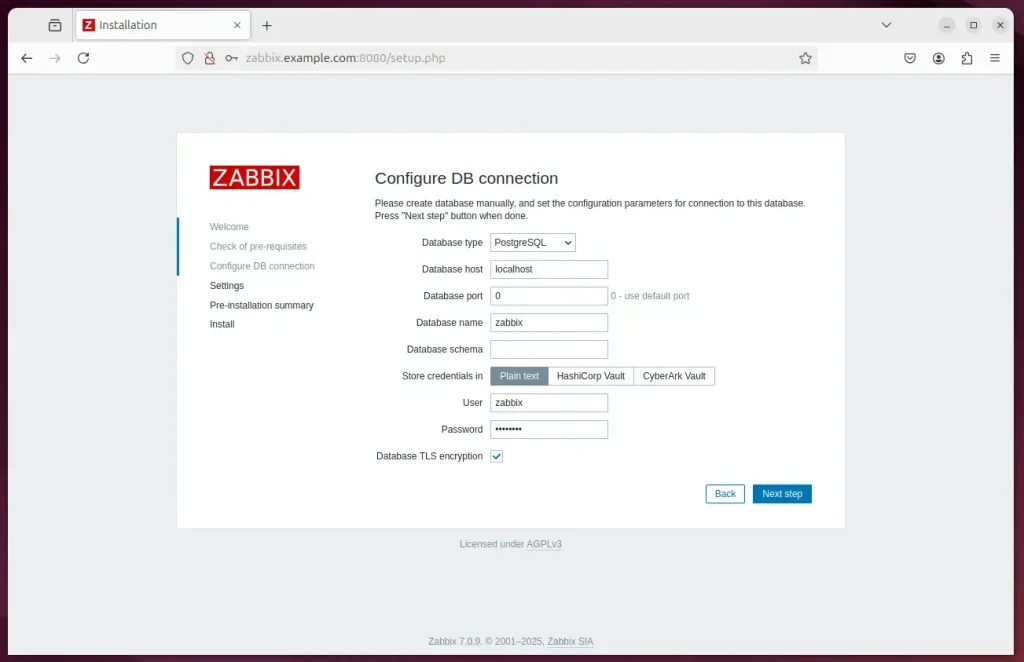
Configure the database
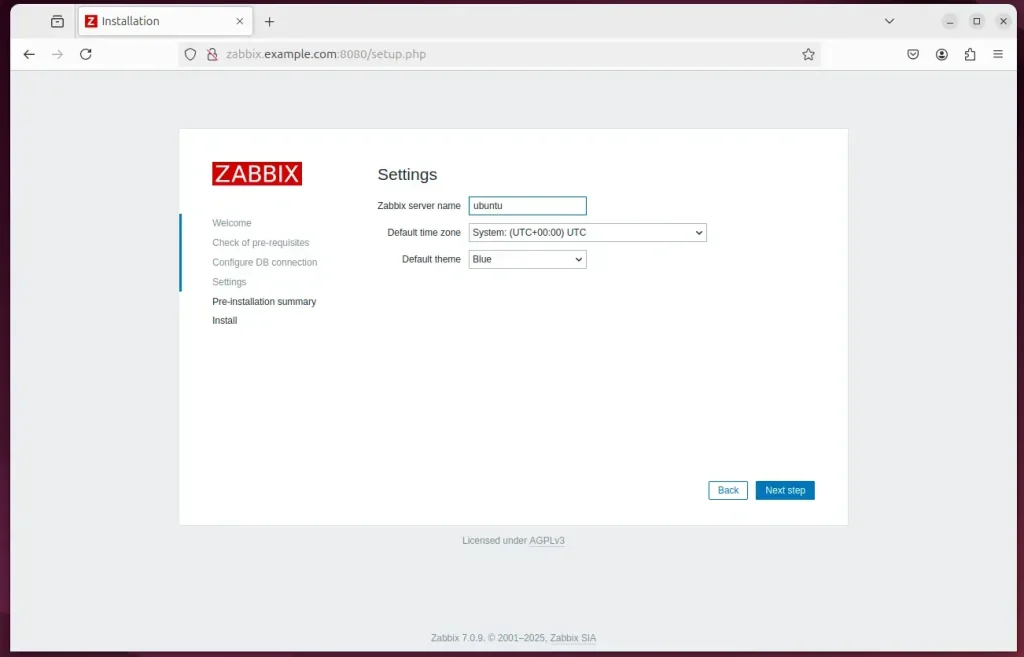
Enter your server name and continue.
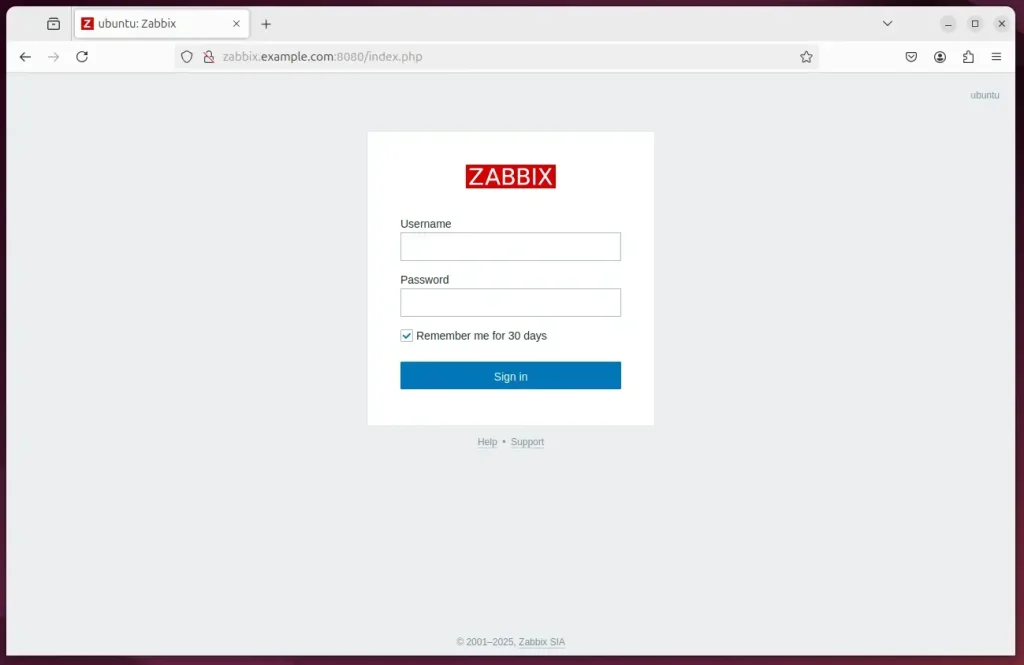
Zabbix should now be installed and ready for use.
Enter the default credentials below to sign in.
- Username: Admin
- Password zabbix
That should do it!
Conclusion:
To wrap up, installing Zabbix with Apache on Ubuntu 24.04 is a solid way to get a powerful monitoring solution up and running. Here’s what we covered:
- Open-source Solution: Zabbix is a robust, open-source tool for monitoring network services, servers, and hardware.
- Compatibility: Installing Zabbix on Ubuntu with Apache ensures compatibility and stability in your server environment.
- Database Support: The installation process involves setting up PostgreSQL as the database backend for Zabbix.
- Package Installation: Essential Zabbix packages and dependencies, such as the Zabbix server, frontend, and agent, are easily installed via the repository.
- Configuration Simplicity: Configuring the application is straightforward, including creating a PostgreSQL user and database.
- Access to Monitoring: Once setup is complete, you can access the Zabbix web interface through your browser, allowing easy monitoring and management.
- Default Credentials: Users can log in using default credentials, enabling quick access after installation.
By following the steps in this Zabbix installation guide, you can effectively monitor your systems on Ubuntu 24.04. This setup uses Apache as the web server, allowing you to access Zabbix's powerful monitoring features through your web browser.
Where is the Zabbix config file in Ubuntu?
A: Open the configuration file located at /etc/zabbix/zabbix_agentd. conf and update the Server, ServerActive, and Hostname parameters according to your monitoring setup.
Was this guide helpful?

About the Author
Richard
Tech Writer, IT Professional
Richard, a writer for Geek Rewind, is a tech enthusiast who loves breaking down complex IT topics into simple, easy-to-understand ideas. With years of hands-on experience in system administration and enterprise IT operations, he’s developed a knack for offering practical tips and solutions. Richard aims to make technology more accessible and actionable. He's deeply committed to the Geek Rewind community, always ready to answer questions and engage in discussions.


No comments yet — be the first to share your thoughts!