Install WordPress on Ubuntu with OpenLiteSpeed

Installing WordPress on Ubuntu with OpenLiteSpeed sets up a fast website hosting environment using the OpenLiteSpeed 1.8 web server and WordPress 6.5.1. OpenLiteSpeed is a high-speed web server that handles heavy traffic better than older servers like Apache while keeping setup simple.
Pairing this server with Ubuntu creates a lightweight platform that makes your pages load much faster. You manage the whole system through a built-in web control panel so you do not need advanced technical skills to run your site.
Install OpenLiteSpeed and the MariaDB server first. Then, download WordPress, move it to the OpenLiteSpeed directory, and set permissions. Create a WordPress database and user, then configure OpenLiteSpeed’s Virtual Hosts to point to your WordPress installation and enable rewrite rules.
How to install OpenLiteSpeed on Ubuntu Linux
Installing OpenLiteSpeed on Ubuntu Linux requires setting up the web server, the latest PHP version, and the MariaDB database (a system for storing website data). You need these three components to run WordPress OpenLiteSpeed Ubuntu setups smoothly. Follow the official repository steps to add the server keys, update your package list, and install the required software packages directly from your terminal.
This post below shows you how to install OpenLiteSpeed, the latest PHP version, and the MariaDB database server. Those three components are required to run WordPress.
How to Install OpenLiteSpeed on Ubuntu Linux – Website for Students
After installing OpenLiteSpeed, continue below.
How to download WordPress on Ubuntu Linux for OpenLiteSpeed
Downloading WordPress on Ubuntu Linux for OpenLiteSpeed involves grabbing the official archive file directly from the command line and extracting it into your web root directory. You use terminal commands to pull the latest source files so your server can access them. This ensures you have a fresh installation ready before you connect your database and run the setup wizard.
cd /tmp
wget https://wordpress.org/latest.tar.gz
tar -zxvf latest.tar.gz
After extracting the WordPress archive, move the WordPress content into the OpenLiteSpeed default VirtualHost directory.
sudo mv /tmp/wordpress /usr/local/lsws/Example/wordpress
Next, run the commands below to change the permissions of the WordPress folder to run on OpenLiteSpeed.
sudo chown -R nobody:nogroup /usr/local/lsws/Example/wordpress/
sudo chmod -R 755 /usr/local/lsws/Example/wordpress/
How to create a WordPress database on Ubuntu
Creating a WordPress database on Ubuntu requires logging into the MariaDB command-line tool with root privileges to set up a dedicated database and user. You run specific SQL queries to generate the storage container where your posts, pages, and settings will live. This step connects your WordPress OpenLiteSpeed Ubuntu installation to a secure backend database so the site can save and load content.
To create a database for WordPress, run the commands below:
sudo mysql -u root -p
Then, create a database called wpdb
CREATE DATABASE wpdb;
Next, create a database user called wpdbuser and set a password
CREATE USER 'wpdbuser'@'localhost' IDENTIFIED BY 'new_password_here';
Then, grant the user full access to the database.
GRANT ALL ON wpdb.* TO 'wpdbuser'@'localhost' WITH GRANT OPTION;
Finally, save your changes and exit.
FLUSH PRIVILEGES;
EXIT;
How to configure OpenLiteSpeed to support WordPress
Configuring OpenLiteSpeed to support WordPress involves opening the server administration panel in your web browser and updating the Document Root path. You point the virtual host settings directly to your WordPress folder so the server knows where to find your website files. This setup is essential for your pages to load correctly when visitors navigate to your domain.
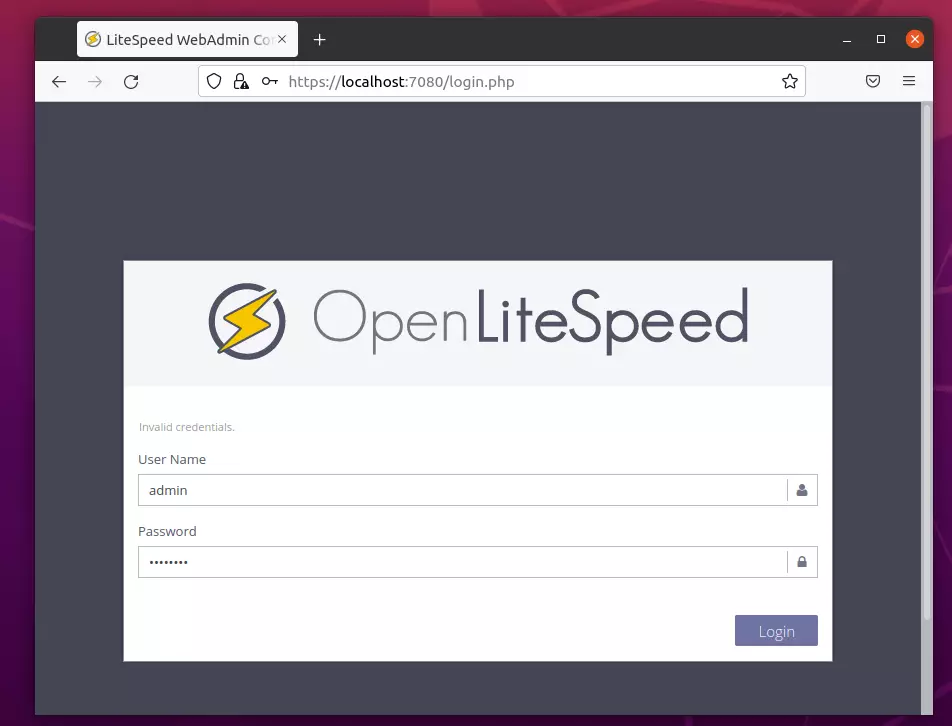
https://localhost:7080/login.php
Login using the admin login details above.
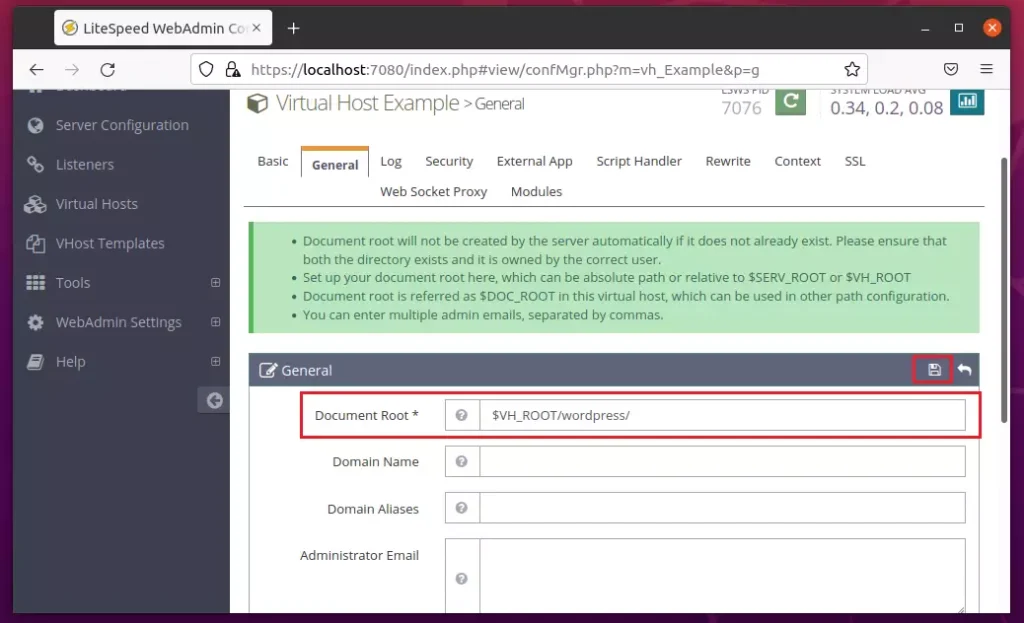
After logging on, go to the Virtual Hosts ==> General tab and edit the Document Root location section.
Then, edit the Document Root to point to the WordPress folder created above.
$VH_ROOT/wordpress/
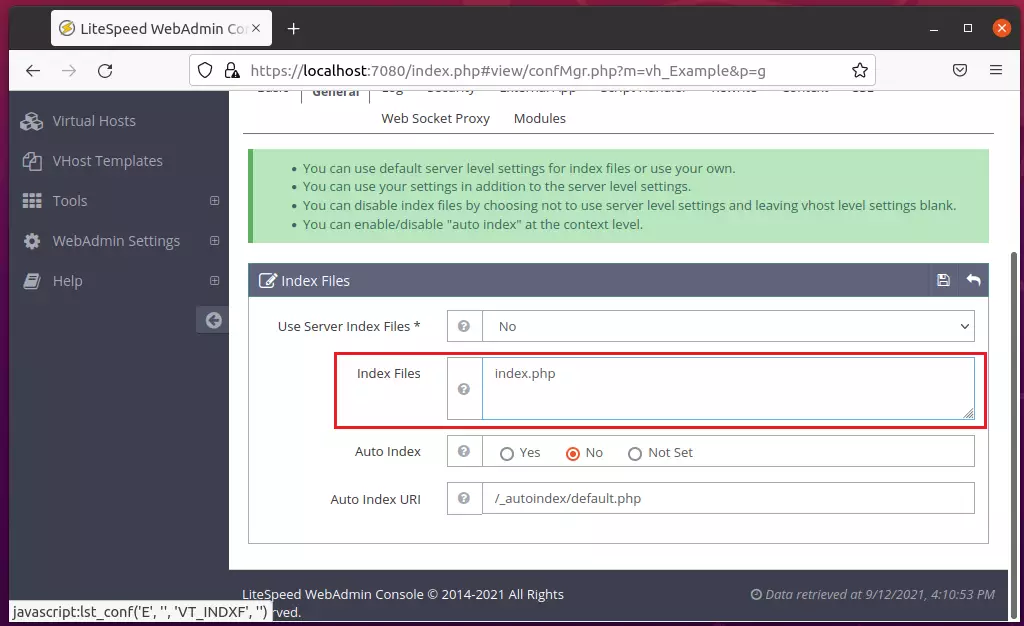
On the same General tab, edit the Index Files section and replace index.html with index.php, as shown below.
index.php
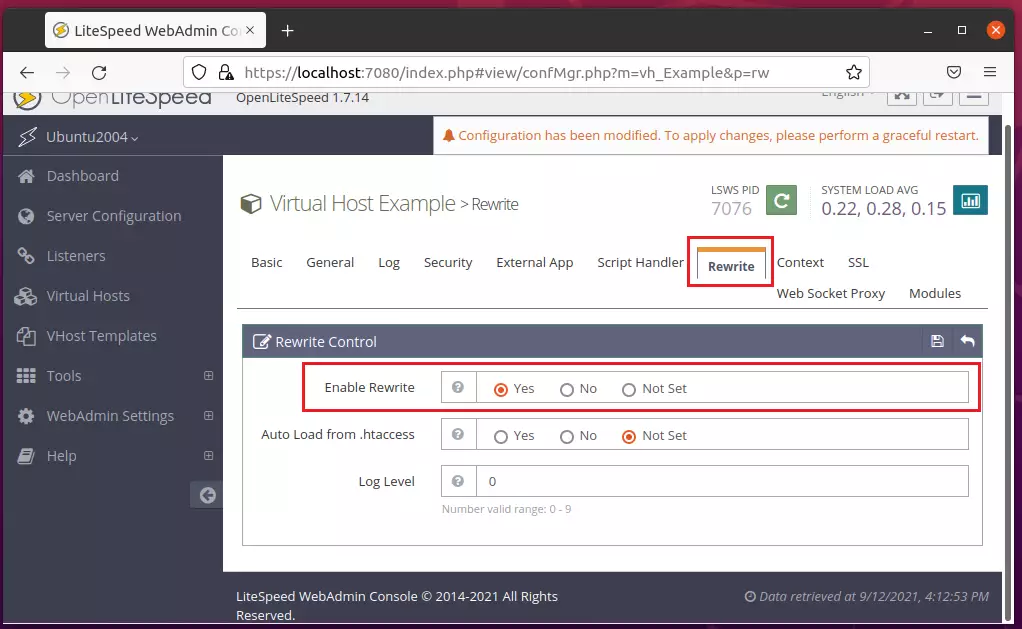
Next, go to Virtual Hosts ==> Rewire Rules, edit Rewrite Control, then choose Yes to enable rewrite.
Save your change.
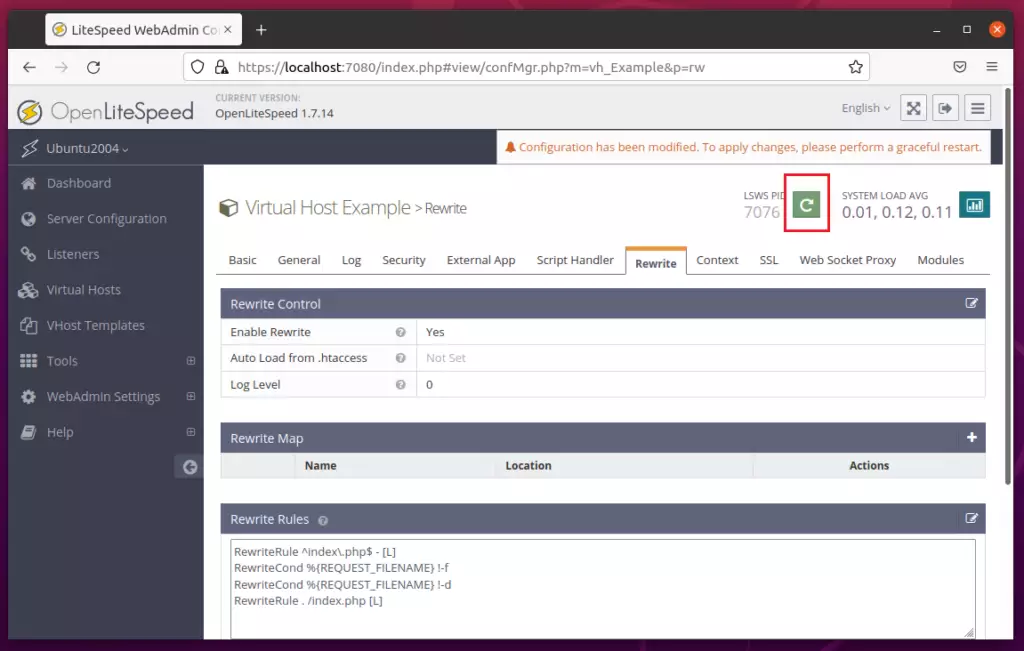
Next, under Virtual Hosts ==> Rewrite, edit the Rewrite Rules. Copy and paste the lines below into the rules box and save.
RewriteRule ^index.php$ - [L]
RewriteCond %{REQUEST_FILENAME} !-f
RewriteCond %{REQUEST_FILENAME} !-d
RewriteRule . /index.php [L]
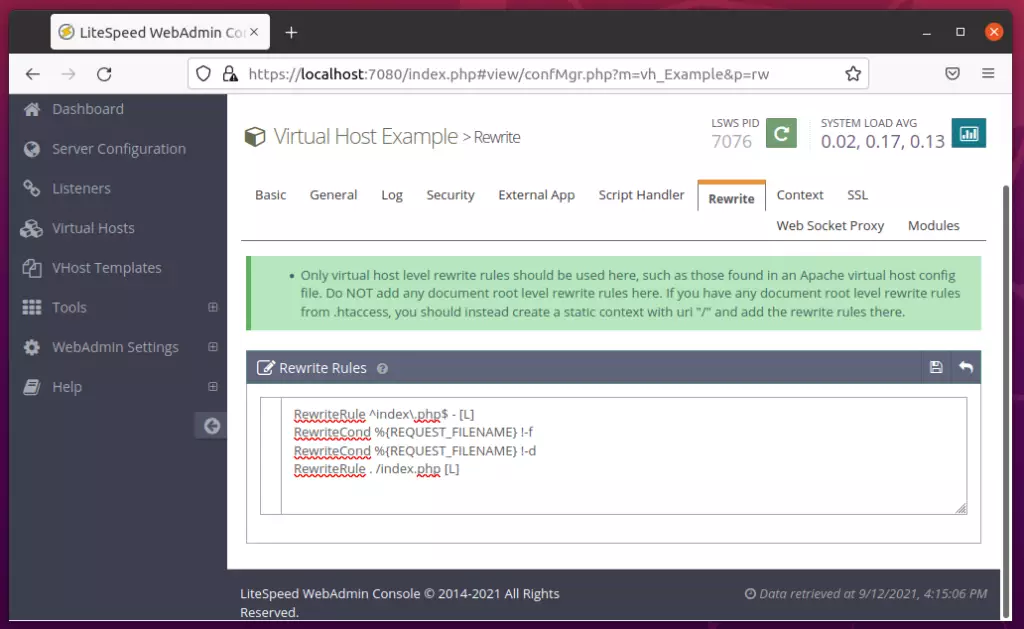
After making all the changes above, reload OpenLiteSpeed.
Finally, open your web browser and browse to the server hostname or IP address.
http://localhost
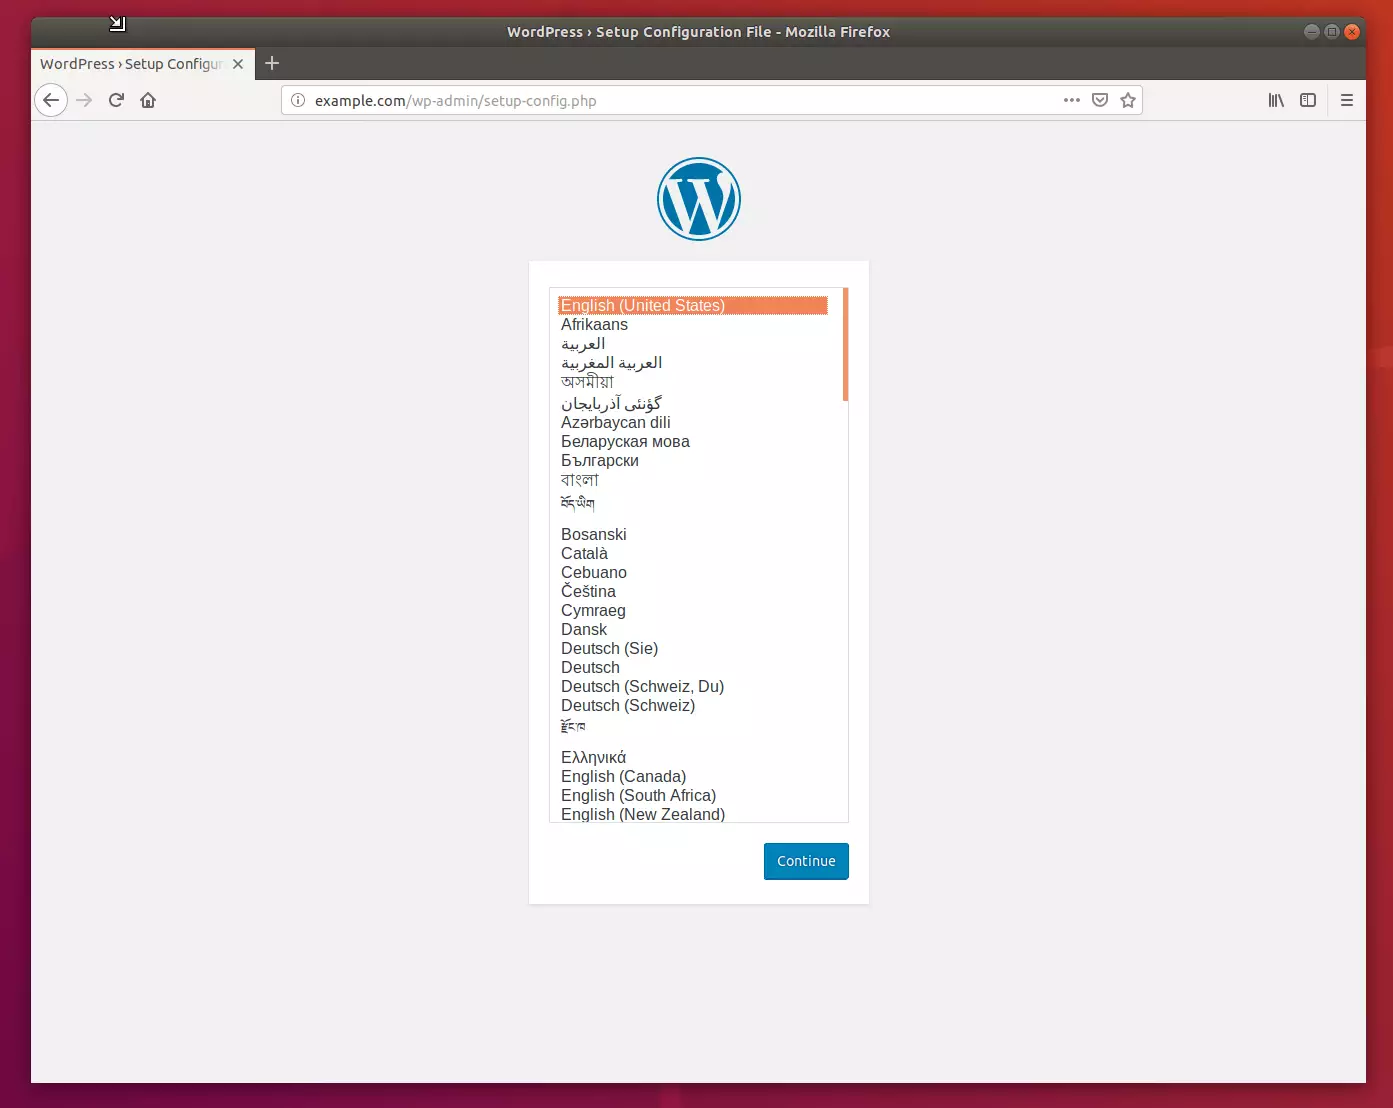
A WordPress setup wizard should appear. Follow the wizard to complete the setup.
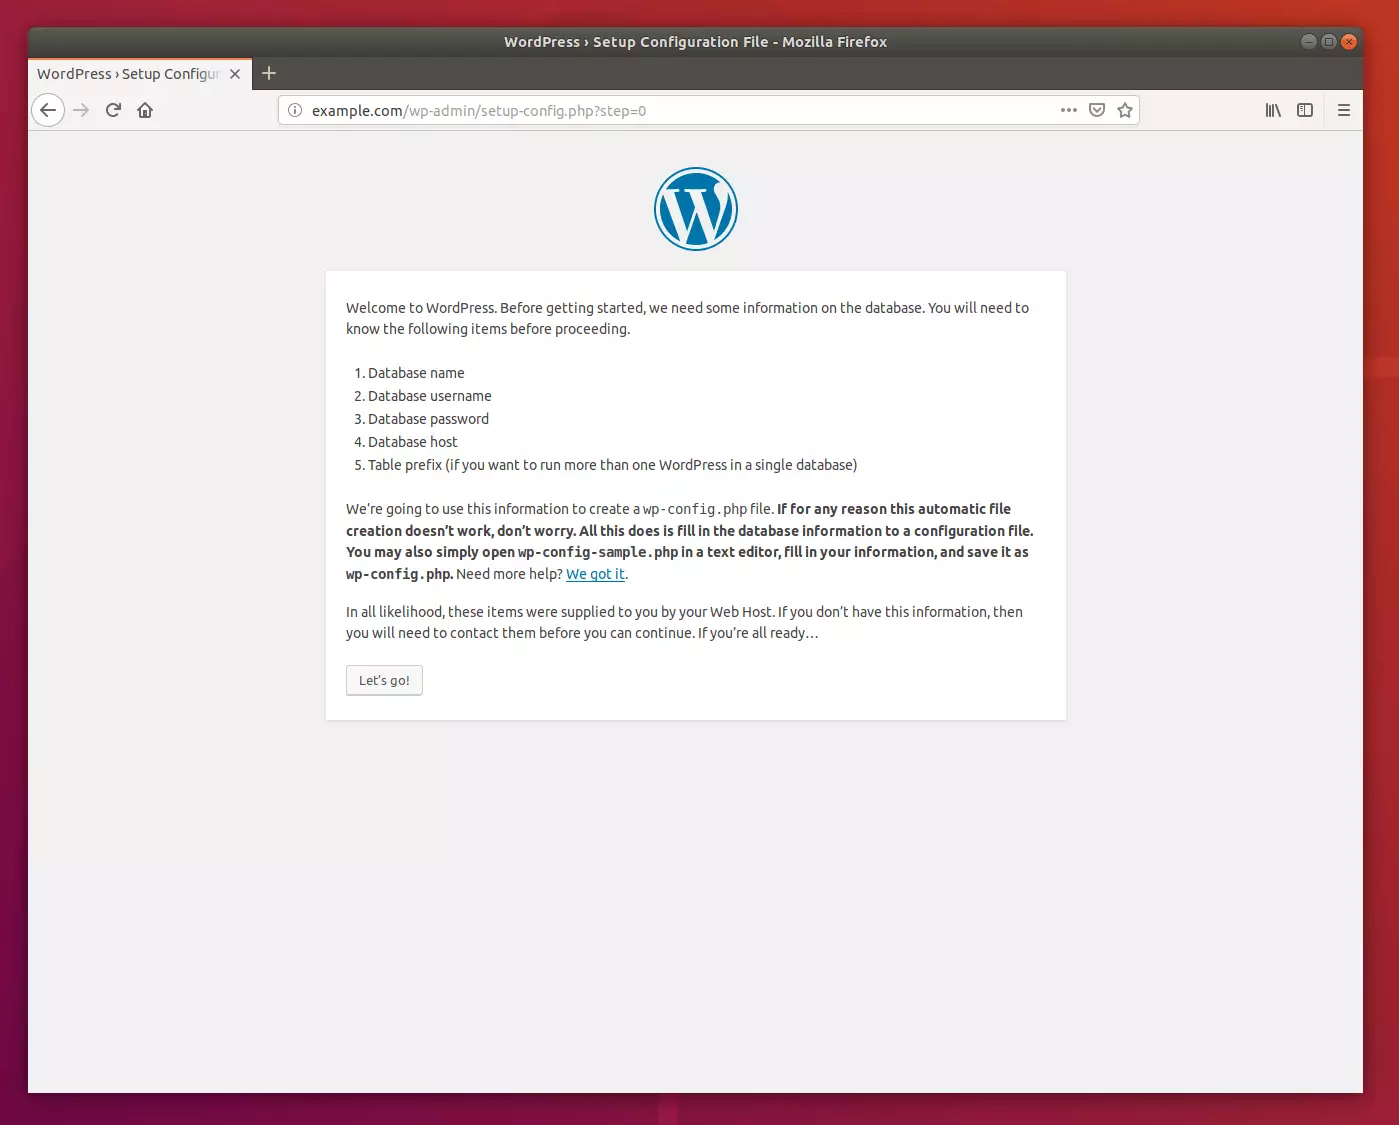
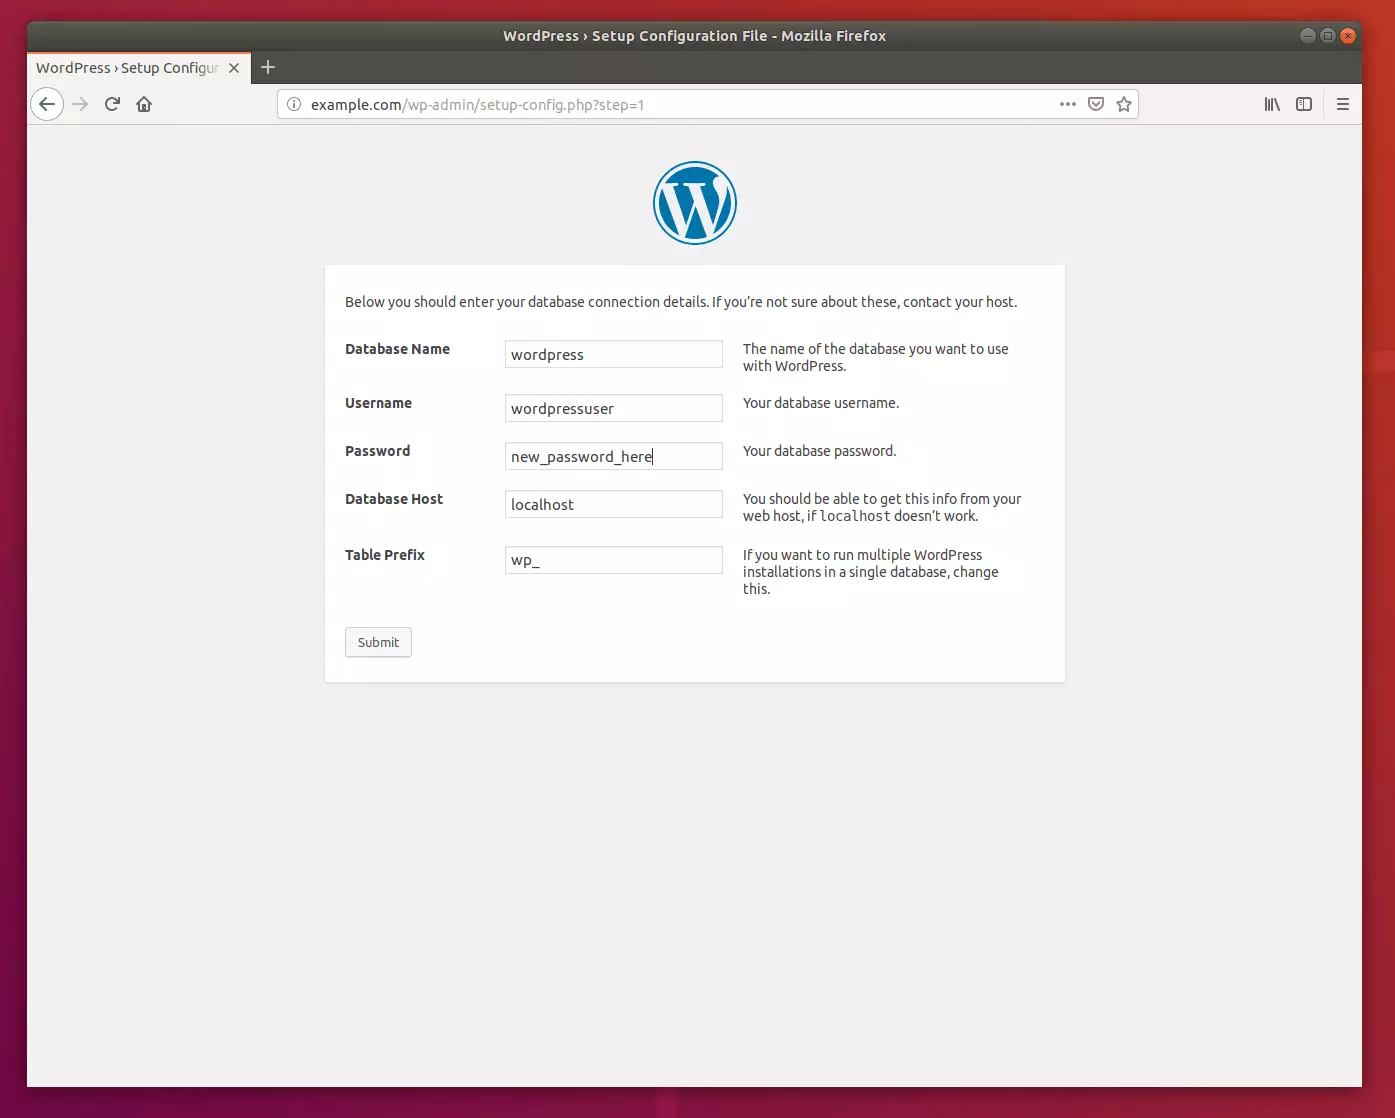
You will need to know the following items before proceeding. Use the database connection info you created above.
- Database name
- Database Username
- Database password
- Database host
- Table prefix (if you want to run more than one WordPress in a single database)
The wizard will use the database information to create a wp-config.php file in the WordPress root folder.
Users can manually open the `wp-config-sample.php` file in a text editor, input their specific database details, and then save the file as `wp-config.php` to complete the setup.
Next, type in the database connection info and click Submit
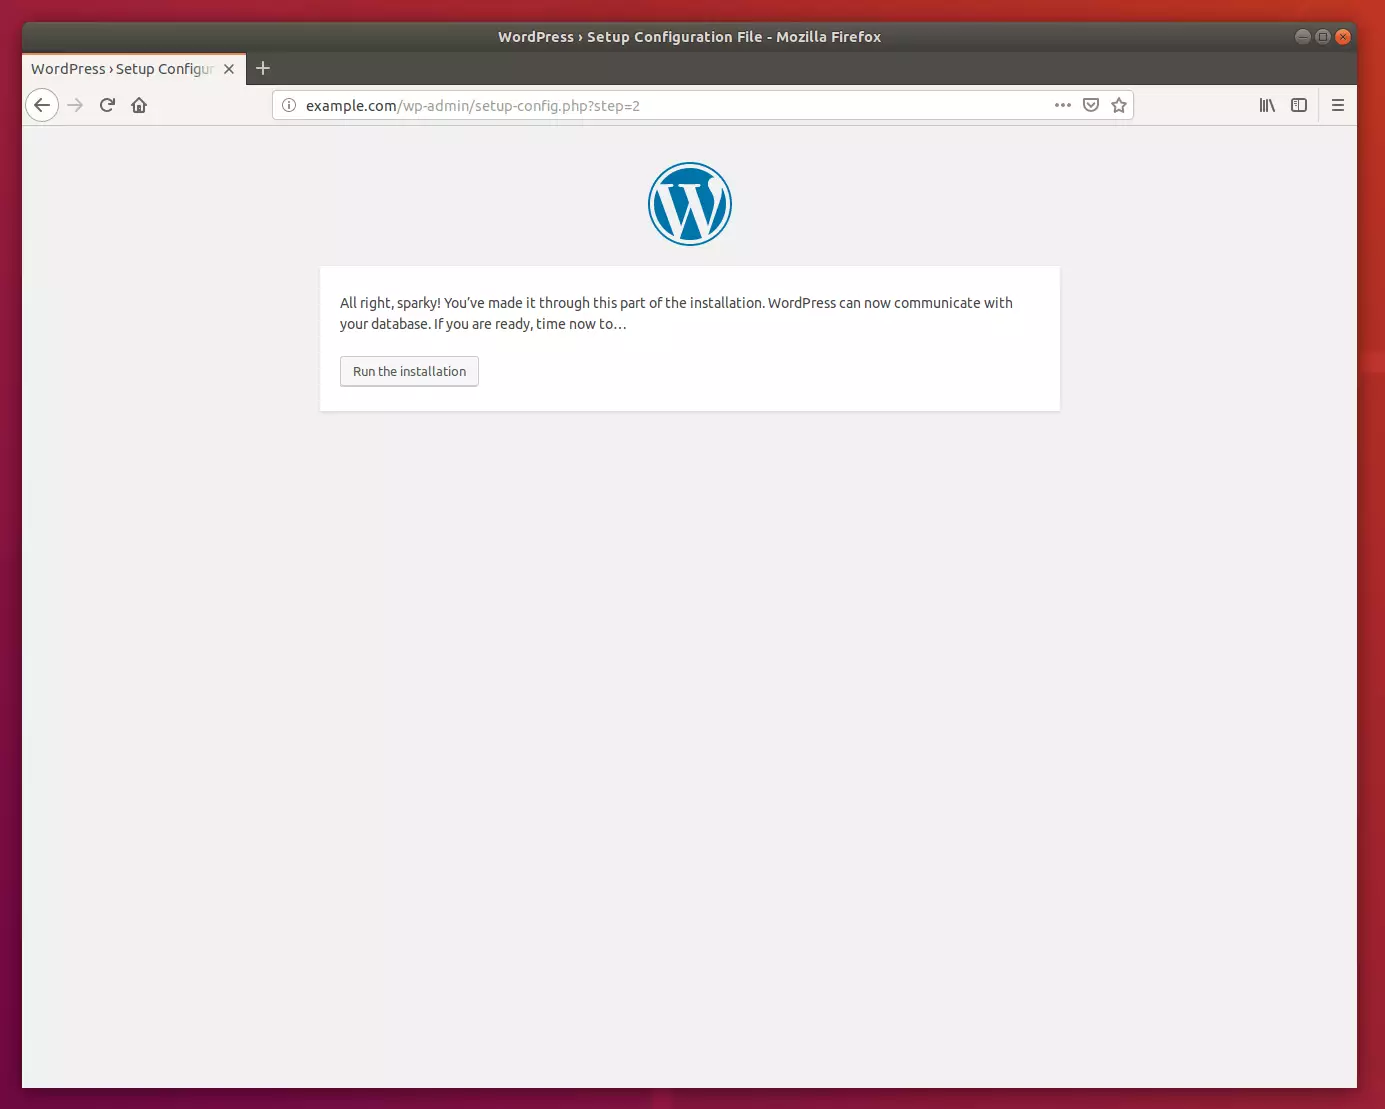
After that, click the Run the Installation button to have WordPress complete the setup.
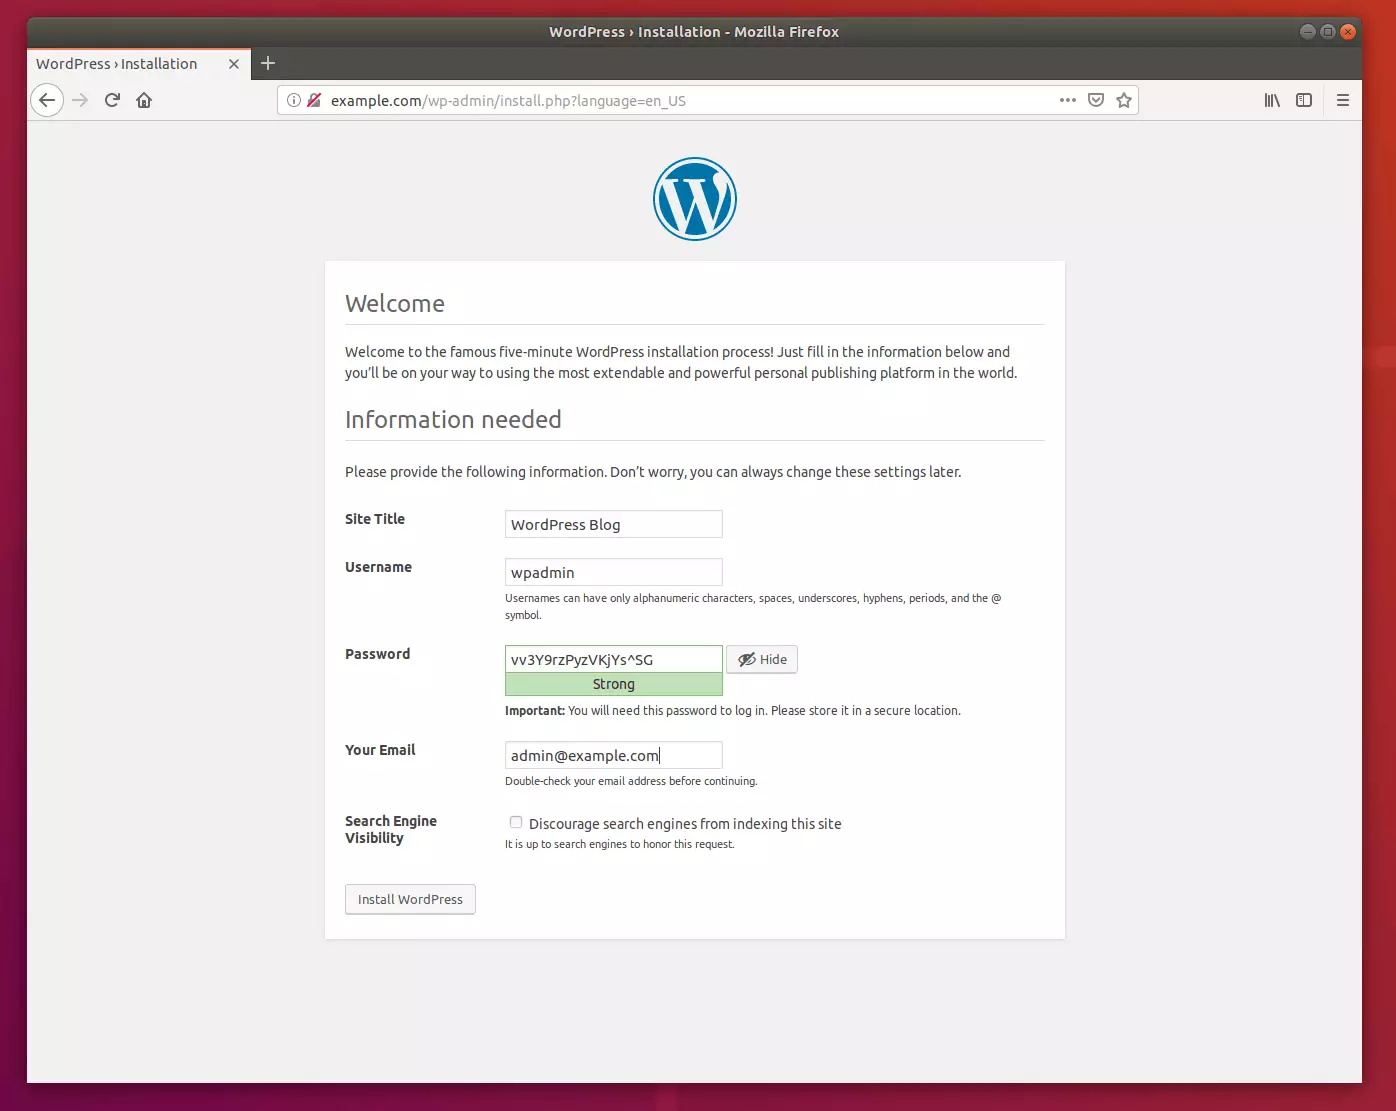
Next, create the WordPress site name and the backend admin account, then click Install WordPress.
When you're done, WordPress should be installed and ready to use.
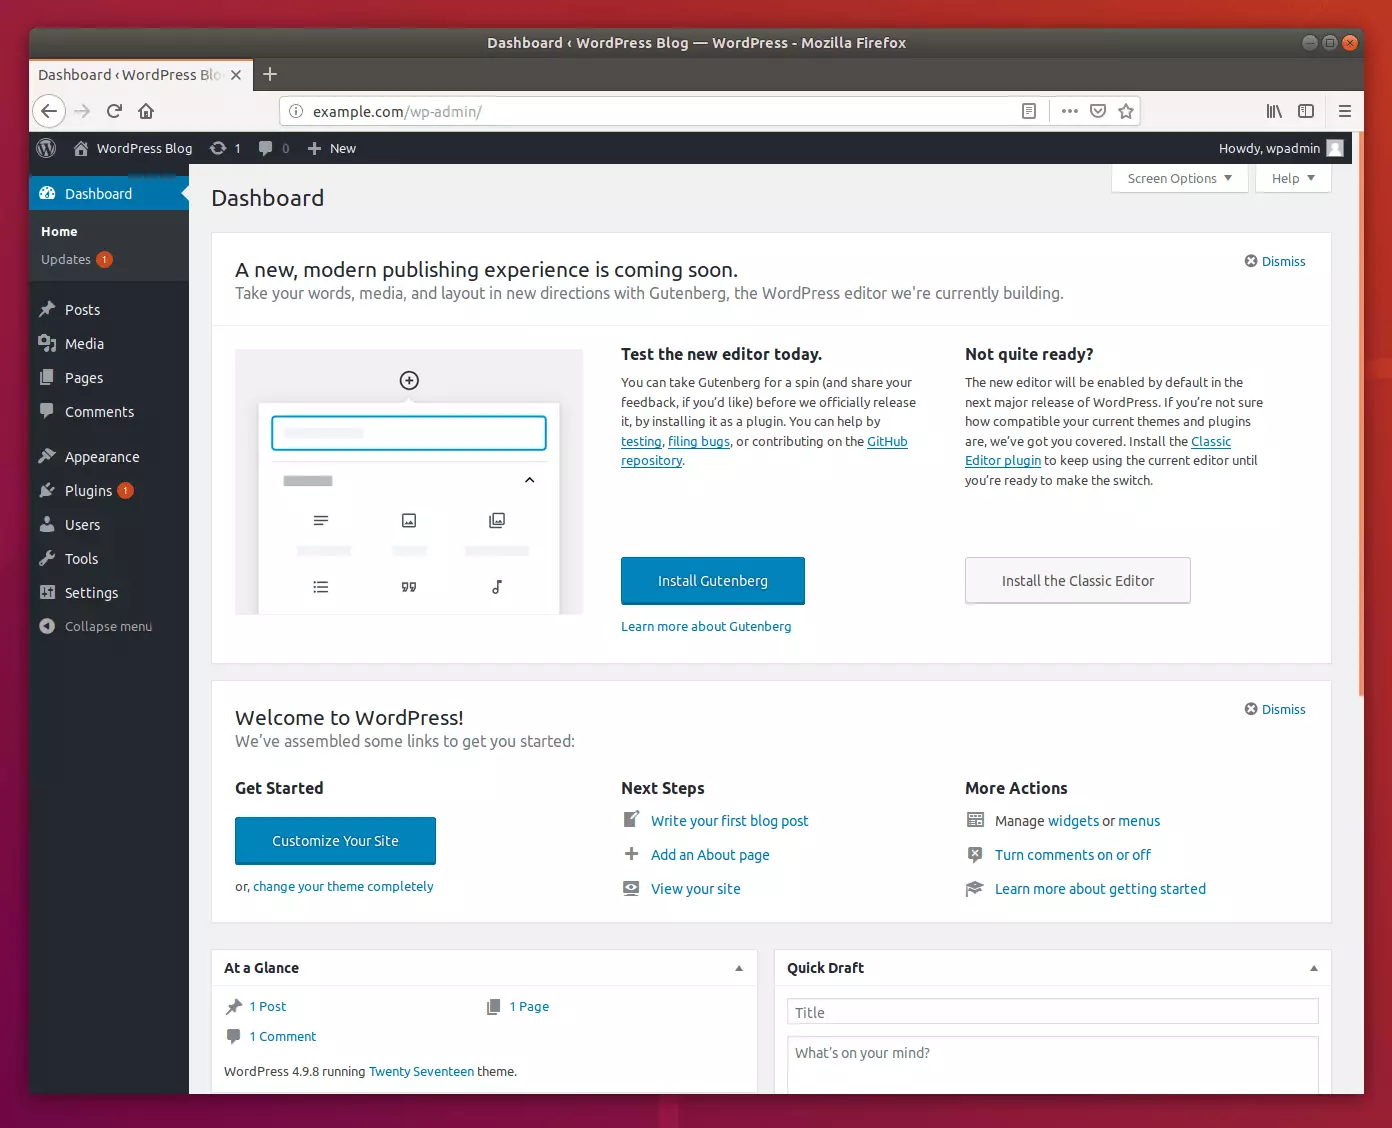
That should do it!
Conclusion:
This guide explains installing WordPress on Ubuntu Linux with the OpenLiteSpeed web server. Report errors or share information about the WordPress installation process using the comment form below this page.
Was this guide helpful?

About the Author
Richard
Tech Writer, IT Professional
Richard, a writer for Geek Rewind, is a tech enthusiast who loves breaking down complex IT topics into simple, easy-to-understand ideas. With years of hands-on experience in system administration and enterprise IT operations, he’s developed a knack for offering practical tips and solutions. Richard aims to make technology more accessible and actionable. He's deeply committed to the Geek Rewind community, always ready to answer questions and engage in discussions.



I’m with CyberPanel. A useful final check after the installation wizard is to test a normal post permalink, then verify caching separately. Installing WordPress on OpenLiteSpeed does not by itself prove that a page is coming from LSCache. Check a logged-out request for the cache response header and repeat it after the first request. Readers using CyberPanel can find the LSCache control in the WordPress Manager guide: https://cyberpanel.net/KnowledgeBase/home/wordpress-manager-cyberpanel/ That gives them separate checks for routing, WordPress execution, and caching.