How to Install Django 5 on Ubuntu 24.04


Django 5 is a Python web framework. It handles database access, URL routing, templates and an admin interface, so you don’t have to write that plumbing yourself. Ubuntu 24.04 ships with Python 3.12, which Django 5 supports, so you don’t need to add extra repositories or build Python from source.
Before you install Django 5, create a private workspace called a virtual environment with Python’s built-in venv tool. It keeps Django and its dependencies in one folder, separate from the system Python that Ubuntu’s own tools rely on. It also avoids the “externally-managed-environment” error that Ubuntu 24.04 gives when you run pip against the system Python.
Install Django 5 on Ubuntu 24.04 by first installing Python 3.12 and python3.12-venv. Then, create and activate a virtual environment with `python3 -m venv ~/django5` and `source ~/django5/bin/activate`. Finally, install Django using `pip3 install ‘Django>=5,
Install Python
Django is a Python framework, so Python has to be installed first. Ubuntu 24.04 usually has Python 3 already, but a minimal or server install may not have all the pieces. Run the command below. It is safe to run if Python is already there, because apt will just tell you the packages are up to date.
- Open a terminal and run the command below to install Python. Enter your password if prompted, and confirm with Y if apt asks. When it finishes, you should be back at the shell prompt with no errors.
sudo apt update
sudo apt install python3.12 python3.12-venv
- Check the Python version with the command below. On Ubuntu 24.04 you should see a 3.12 release.
python3 -V
Install Django 5
To install Django 5 on Ubuntu 24.04, first create a virtual environment so your project files stay separate from the rest of the system. Once the environment is created and active, use pip, Python’s package manager, to download and install Django 5 into it. Because the packages go into the environment’s own folder, you don’t need sudo for any of these steps.
If creating the environment fails with an error saying venv or ensurepip is not available, the venv support package for Python is missing. On Ubuntu it is a separate package called python3-venv. Install it with apt, then repeat the step.
- From your home directory, run the command below to create the Python environment. It creates a new folder named after the environment, which holds its own copy of Python and pip. Nothing is printed when it succeeds.
python3 -m venv --system-site-packages ~/django5
- Activate the environment with the command below. The shell prompt should now start with the environment name in parentheses. That tells you pip and python now point to the environment and not to the system.
source ~/django5/bin/activate
- Install Django 5 with the command below. pip downloads Django and its small set of dependencies, then ends with a message saying the packages were successfully installed. This needs an internet connection.
pip3 install 'Django>=5,<6'
- Check the Django version with the command below. The output should start with 5. If the command isn’t found, the environment is probably not active. Repeat the activation step and try again.
django-admin --version
- When you finish working, run the command below to leave the virtual environment. The name in parentheses disappears from your prompt. Django stays installed in the environment, and you can activate it again at any time. To remove it completely, delete the environment folder.
deactivate
Create your project
You create a Django 5 project with the django-admin command-line tool. It generates the folder structure and the configuration files for your site. With the virtual environment active, you run one command to create the project folder and another to prepare the default database. After that you can start building.
- Activate the Django 5 environment with the command below, unless it is still active from the previous section. Check that the environment name appears at the start of your prompt.
source ~/django5/bin/activate
- Create a project folder called myproject with the command below. Django fills it with the starter files, including the management script and the project settings. You can pick another name if you like, but use the same name in the next step. Avoid names that clash with Python or Django modules, such as django or test.
django-admin startproject myproject
- Change into the myproject folder with the command below. Run the remaining project commands from here, because they need to find the management script in this folder.
cd myproject
- Configure the database with the command below. The default is SQLite, which needs no separate server and is fine for development. The command applies Django's built-in migrations and creates the database file in the project folder. You should see a list of migrations, each ending in OK. You can switch to PostgreSQL or MySQL later in the project settings.
python manage.py migrate
- Create an admin user with the command below. This gives you an account for Django's built-in admin site.
python manage.py createsuperuser
- When prompted, enter a username, a password and an email address. The password is not shown as you type, which is normal. The email address can be left blank. If you choose a short or common password, Django warns you and asks whether to continue. A confirmation message appears when the user is created.
Username (leave blank to use 'richard'):
Email address: richard@example.com
Password:
Password (again):
Superuser created successfully.
- Start the project with the command below. The terminal prints the Django version and the address the development server is listening on, and then stays busy. Leave it running. Press Ctrl+C to stop it.
python manage.py runserver 0.0.0.0:8000
- Open your browser and go to the localhost name, followed by port 8000. You should see Django's default welcome page. To reach the admin site, add /admin to the same address and sign in with the user you just created.
http://localhost:8000
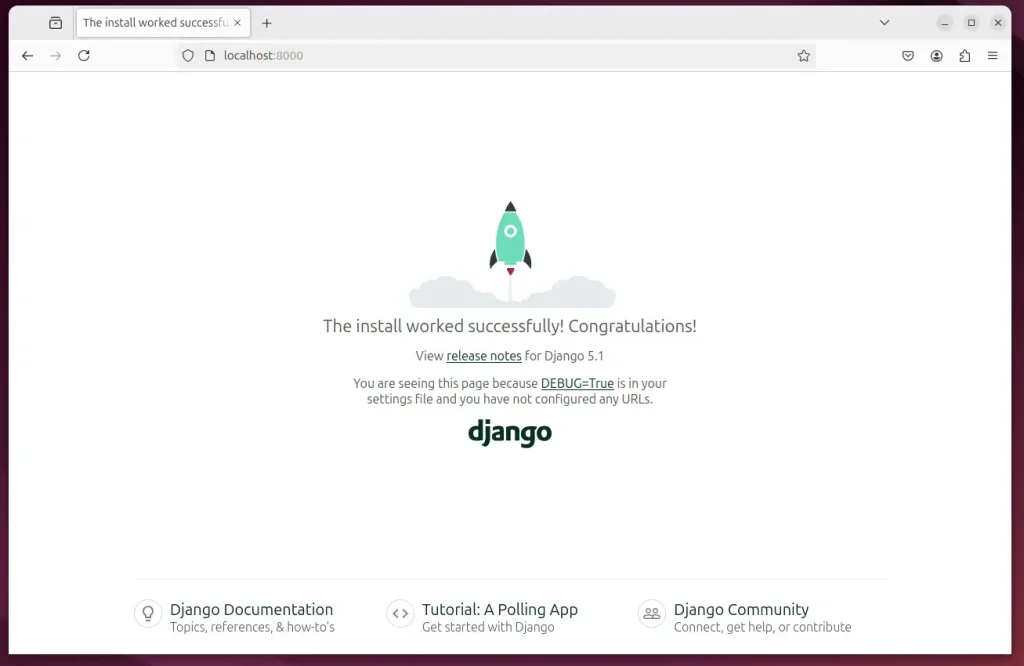
By default, Django only accepts requests addressed to localhost. To reach it from another machine, you have to change the networking settings in your project's settings file. The development server also listens on the local machine only unless you tell it to use another address. If Ubuntu's firewall (ufw) is enabled, allow port 8000 as well. Use this setup only on a trusted network, because the development server is not meant for production.
- Open the project's settings file in a text editor. You will find it inside the project folder you just created.
vi myproject/settings.py
- Add the line below. It lets Django accept requests from any host. That is convenient for testing, but for anything beyond a lab you should list only the specific host names or IP addresses you use. If the setting already exists in the file, edit it and don't add a second copy.
# SECURITY WARNING: don't run with debug turned on in production!
DEBUG = True

ALLOWED_HOSTS = ['*']
- Save the file and exit the editor. If the development server is running, it picks up the change and restarts on its own.
Within your project folder, you can start creating your apps. Each app is a self-contained part of the site, such as a blog or a store. Remember to register each new app in the project settings before you use it.
That should do it! Django 5 is now installed in its own environment and your first project is running.
Conclusion:
In summary, installing Django on Ubuntu 24.04 using a Python virtual environment is a straightforward process that gives you a clean workspace for your projects. Here are the key takeaways:
- Django Framework: Enables rapid development and follows the DRY principle for efficient coding.
- Virtual Environment: Keeps your project's dependencies isolated, avoiding conflicts with the global Python installation and with Ubuntu's own tools.
- Installation Steps: Installing Python and setting up Django in a virtual environment is simple and manageable. Activate the environment each time you open a new terminal.
- Creating Your First App: You can quickly start developing your first app with the provided commands and configurations.
- Accessing Your Project: Adjust the network settings to access your Django application from other machines, and keep that to trusted networks.
This guide helps you start developing with Django, a web framework that provides powerful features for your web applications. Using Django enables faster and more efficient project creation.
Have a question about this guide?
Answered by AI from this guide. Good questions may be added to this page — please don't include personal details.
Did this guide fix your problem?

About the Author
Richard
Tech Writer, IT Professional
Richard is a writer at Geek Rewind who turns complex IT tasks into clear, step-by-step guides. He draws on years of hands-on experience in system administration and enterprise IT operations, focusing on Windows, Linux and WordPress: the problems people actually run into, and the fixes that work. His server and WordPress guides come from systems he runs himself. Richard builds and maintains the platform behind Geek Rewind, from its Ubuntu servers and Nginx configuration to its custom WordPress plugins. Many new tutorials start with readers' questions, and he's always glad to answer them in the comments.
No comments yet — be the first to share your thoughts!