Manage Kids Mode Websites in Microsoft Edge


Kids Mode in Microsoft Edge is a built-in browser setting for Windows that blocks adult content, ads, and unapproved pages so children ages 5 to 12 can browse the web safely. It is free, and by default it limits browsing to a pre-approved list of websites.
That list can be managed in two places: inside your own Edge profile, or on the Microsoft Family Safety website. Adding a site takes a few clicks. A child cannot get past a blocked page unless you confirm it is you with your sign-in password or PIN.
Kids Mode in Microsoft Edge lets you approve or remove websites from your child’s allowed list. When a child reaches a blocked page, select Get permission, verify with your Windows sign-in password or PIN, then choose Allow for this session or Add to allowed list. To review the full list, open Settings and more in your regular Edge window, select Family, then Manage allowed sites.
Add or remove websites from the allowed list in Microsoft Edge
There are two ways to let your child onto a site. You can add the page to the approved list, or you can give temporary access for a single browsing session. The list can be changed at any time in Edge settings, so your child only reaches pages you are happy with.
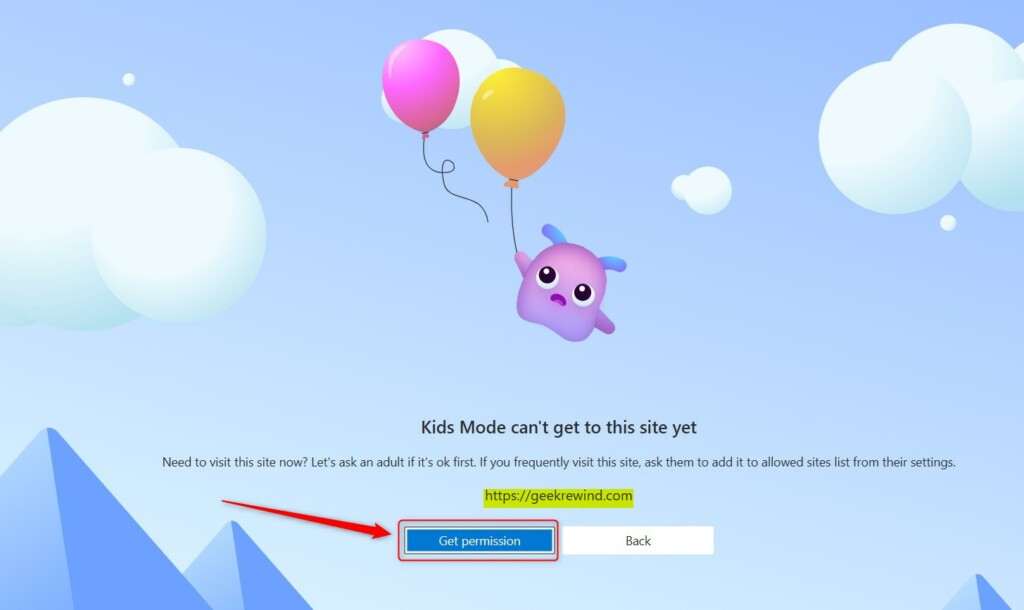
When your child opens a page that is not on the list, Edge shows a block screen. That screen is where you start. The two options behave differently, so it helps to know which one to pick before you click.
- Allow for this sessionThis gives your child one-time access to the site. It does not save the site to the permanent list, so the page is blocked again next time. Use it for something you only need once, such as a page for a single school task.
- Add to allowed listThis permanently adds the site to your child’s approved list so they can visit it again later. Use it for sites your child will return to, such as a favorite learning site.
Approved websites are added by selecting Get permission on any blocked page. Edge then asks you to prove who you are, which stops children from bypassing the filters on their own.
Do this while your child is in Kids Mode and has landed on a blocked page. These steps approve a blocked site in Microsoft Edge Kids Mode, either once or for good.
- Launch open Kids Mode in Edge. Use the Edge window your child is browsing in.
- Open the blocked page in Kids Mode. Edge shows the block screen instead of the site.
- Click Get permission. A permission prompt appears on the block screen.
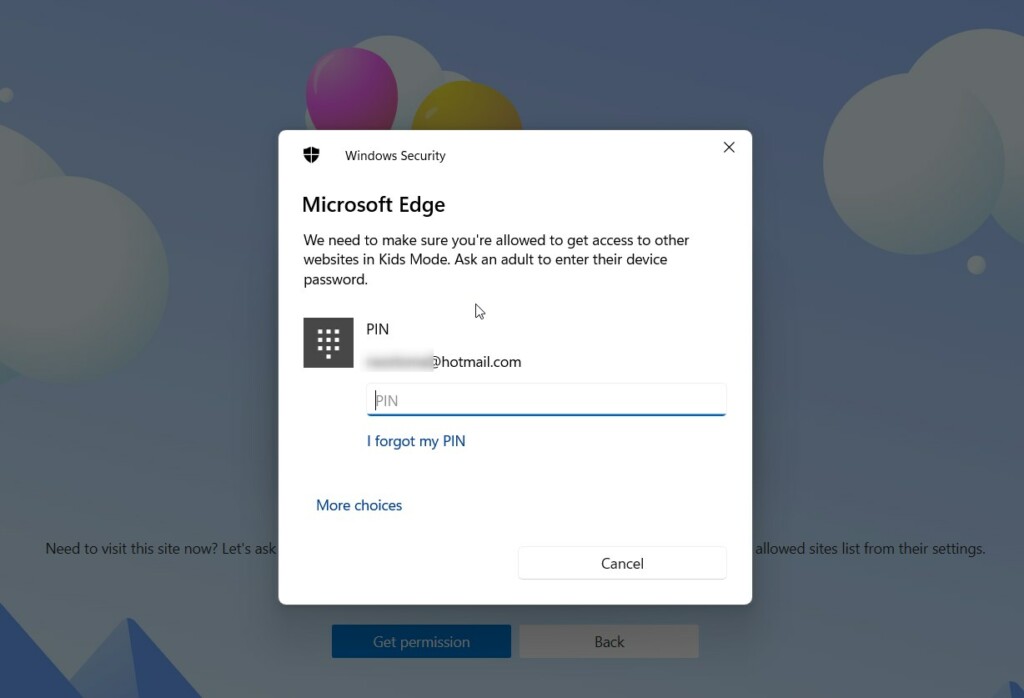
- Verify your identity when Edge asks. This is normally your Windows sign-in password or PIN. A child who does not know it cannot approve the site.
- Choose Allow for this session or Add to allowed list. Pick the first for one-time access and the second for permanent access.
Once you confirm, the page should load in Kids Mode. If you chose the permanent option, the site is now on the approved list and stays unblocked until you remove it.
Managing the list
To manage the approved list as a whole, open Edge settings, go to the Family section, and use the manage allowed sites option. From there you can add or remove web addresses.
The Kids Mode window does not give access to these settings.
These steps open the allowed-sites list for Microsoft Edge Kids Mode so you can review it.
- Open your regular Edge window. Do not use the Kids Mode window.
- Click Settings and more. This is the three dots at the top right of the window.
- Select Settings. The Settings page opens.
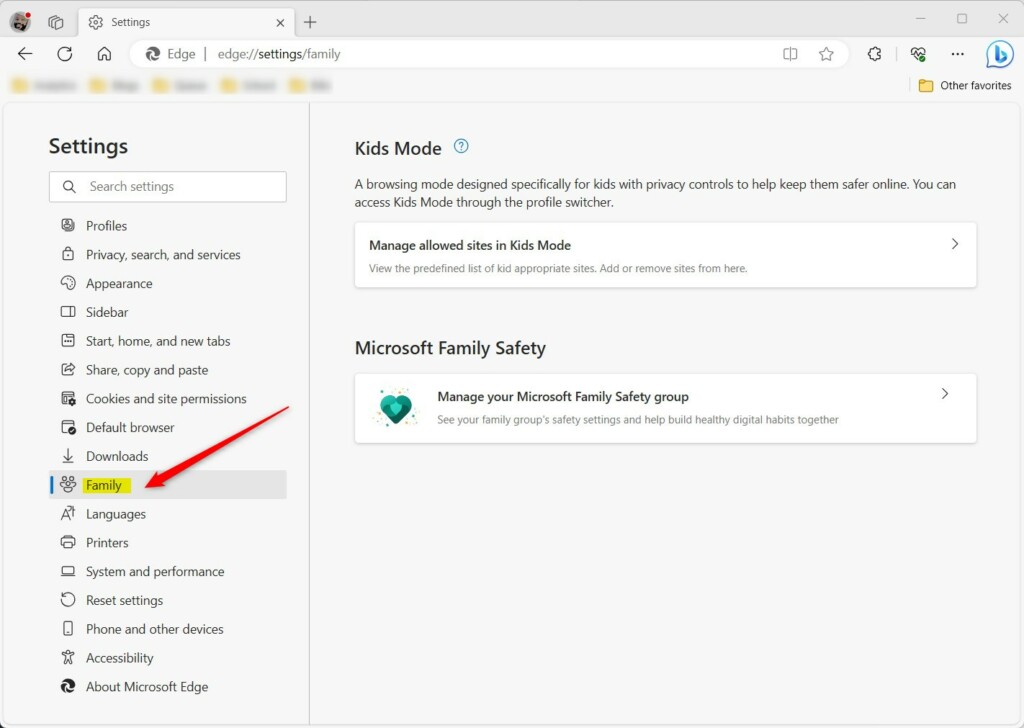
- Click Family on the left menu. The Family options appear on the right.
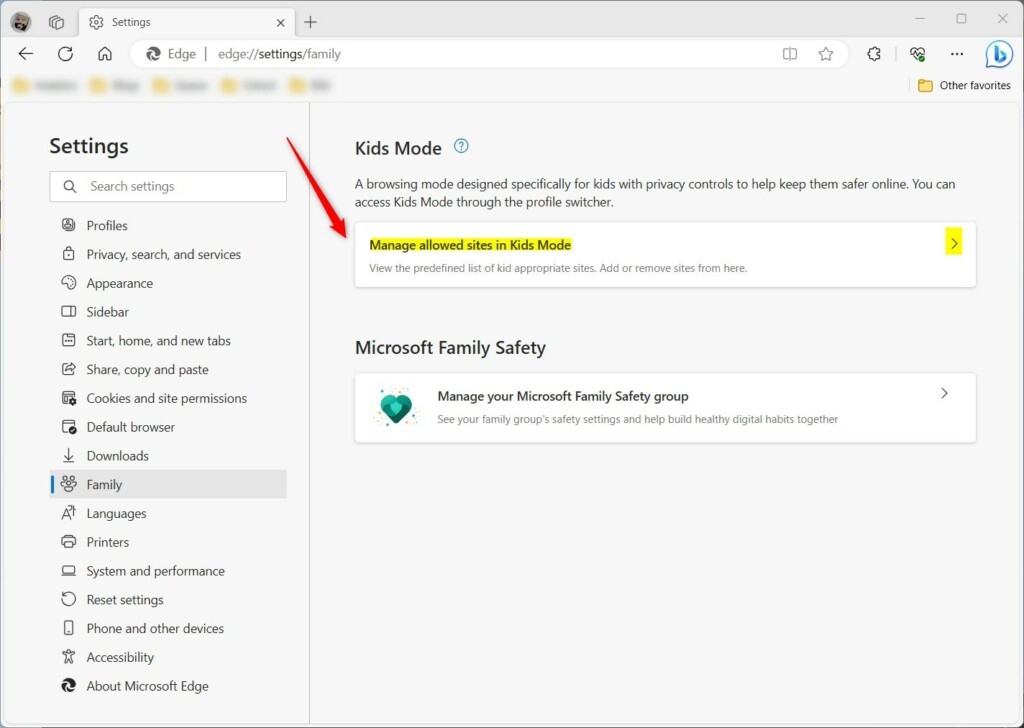
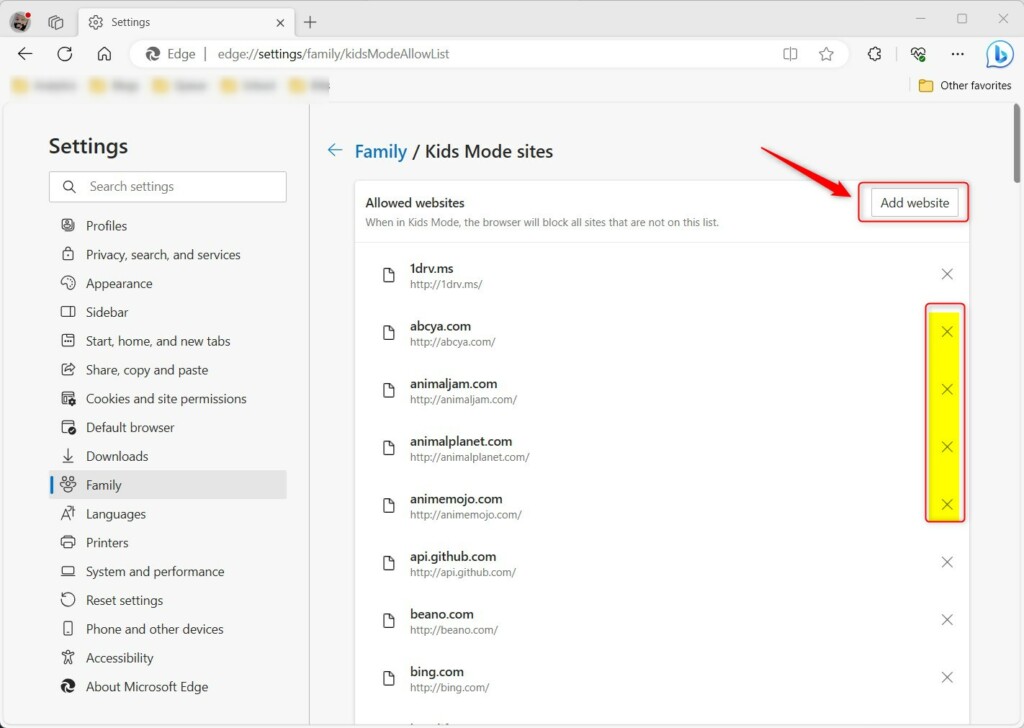
- Click Manage allowed sites in Kids Mode. This opens the configuration panel, which shows the current list of approved sites.
- To add a site, type the new URL into the Add website field. It is added to the approved list.
- To remove a site, click the X next to its address. Your child will be blocked from that page again, so this also works as an undo for a site you approved by mistake.
- To change how strict the automatic filtering is, switch between the age-appropriate content levels, such as 9-12 and the younger level, in these same options.
Changes apply the next time your child opens a page in Kids Mode. If a change does not seem to take effect, close the Kids Mode window and start it again.
Review the list every few months. Remove sites your child has outgrown and add new ones as their interests change.
A tidy list keeps browsing safe without constantly interrupting your child with block screens.
Reference: Microsoft.com
Conclusion
Managing the allowed website list gives you control over what your child sees online and keeps them to age-appropriate content. Use Allow for this session for one-off visits, add trusted sites permanently, and revisit the list in Edge settings whenever your child's needs change.
Have a question about this guide?
Answered by AI from this guide. Good questions may be added to this page — please don't include personal details.
Did this guide fix your problem?

About the Author
Richard
Tech Writer, IT Professional
Richard is a writer at Geek Rewind who turns complex IT tasks into clear, step-by-step guides. He draws on years of hands-on experience in system administration and enterprise IT operations, focusing on Windows, Linux and WordPress: the problems people actually run into, and the fixes that work. His server and WordPress guides come from systems he runs himself. Richard builds and maintains the platform behind Geek Rewind, from its Ubuntu servers and Nginx configuration to its custom WordPress plugins. Many new tutorials start with readers' questions, and he's always glad to answer them in the comments.
No comments yet — be the first to share your thoughts!