
This article explains how to change how the ‘All‘ apps are listed on the Start menu in Windows 11.
The Start menu is a central hub for accessing applications, settings, and system features on Windows 11. The Start menu opens when you click the Windows icon on the taskbar or press the Windows key on your keyboard.
The start menu has three sections: Pinned Apps, Recommended, and All Apps.
With Windows 11 build 22635.4950, Microsoft has introduced two new views to the “All” page in the Start menu: grid and category view.
Grid and list view shows your apps alphabetically, and category view groups all your apps into categories, ordered by usage.
To try this experiential feature, use the ViVeTool and enable it with the command below.
vivetool /enable /id:48433719,47205210,49221331
Change the ‘All’ page view on the Start menu
As mentioned, the latest Windows build added a new experiential feature that allows users to change how apps are listed on the ‘All‘ view page on the Start menu.
Here’s how to do it.
First, learn how to download and use the ViVeTool in Windows.
Then, open ViVeTool using the Command Prompt or Windows Terminal. Run the command below to enable it and restart your computer.
vivetool /enable /id:48433719,47205210,49221331
Once enabled, click the Start menu and select the ‘All‘ button.
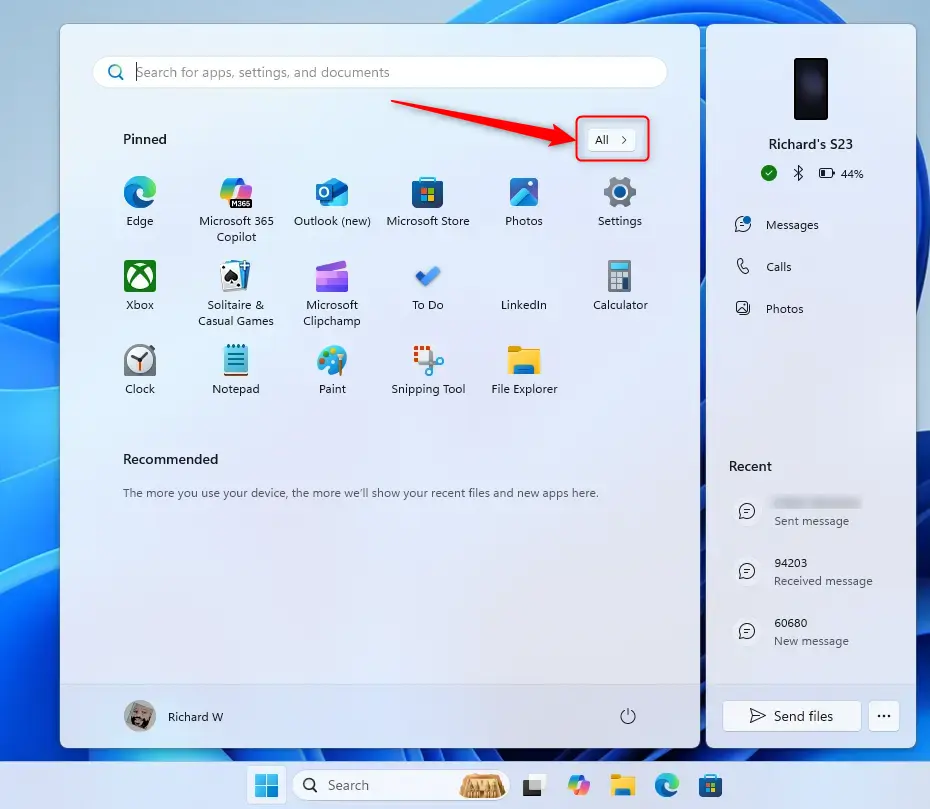
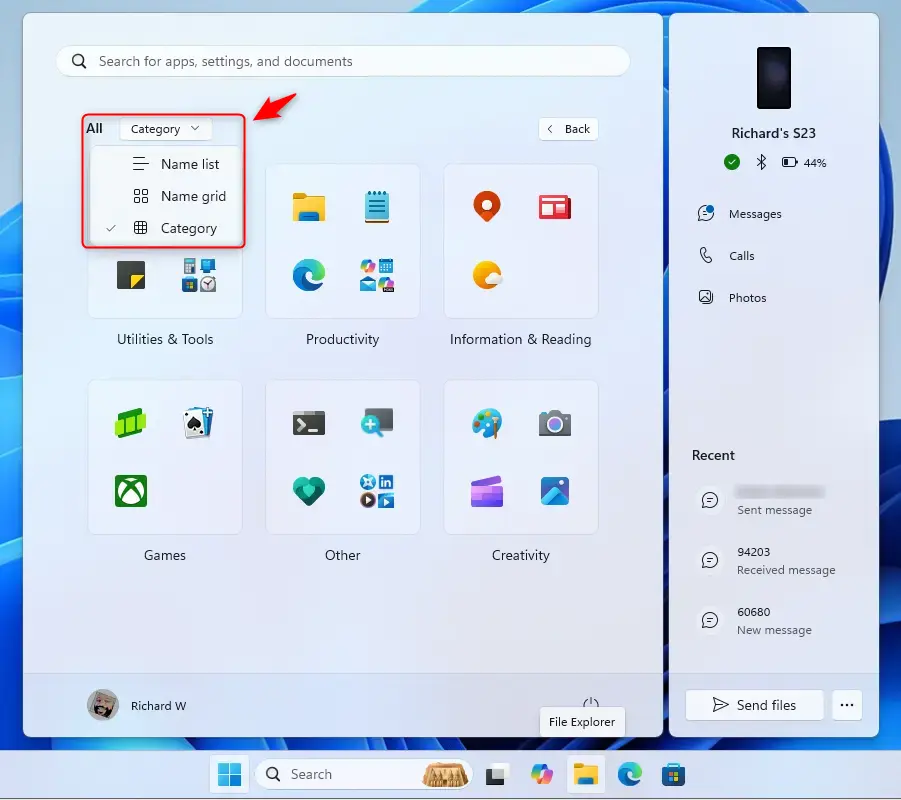
On the ‘All’ page view, use the drop-down menu to customize the view. You can select one of the following:
- Name list (default)
- Name grid
- Category
That should do it!
Reference:
Conclusion:
- The Windows 11 Start menu offers flexibility in displaying apps with the new grid and category views.
- Users can easily switch between default name lists, name grids, and category views for better app organization.
- Enabling these features requires downloading and using ViVeTool, a straightforward process.
- Customizing the ‘All’ page enhances user experience by tailoring app access to individual preferences.
- Stay updated with Windows builds to take advantage of new features and improvements as they become available.


Leave a Reply