
This article explains how to create custom power plans in Windows 11.
A power plan is also known as a power scheme. It is a collection of hardware and system settings that manage how computers use and conserve power.
In our previous post, we showed you how to view active power plans and change power plans for your Windows 11 devices.
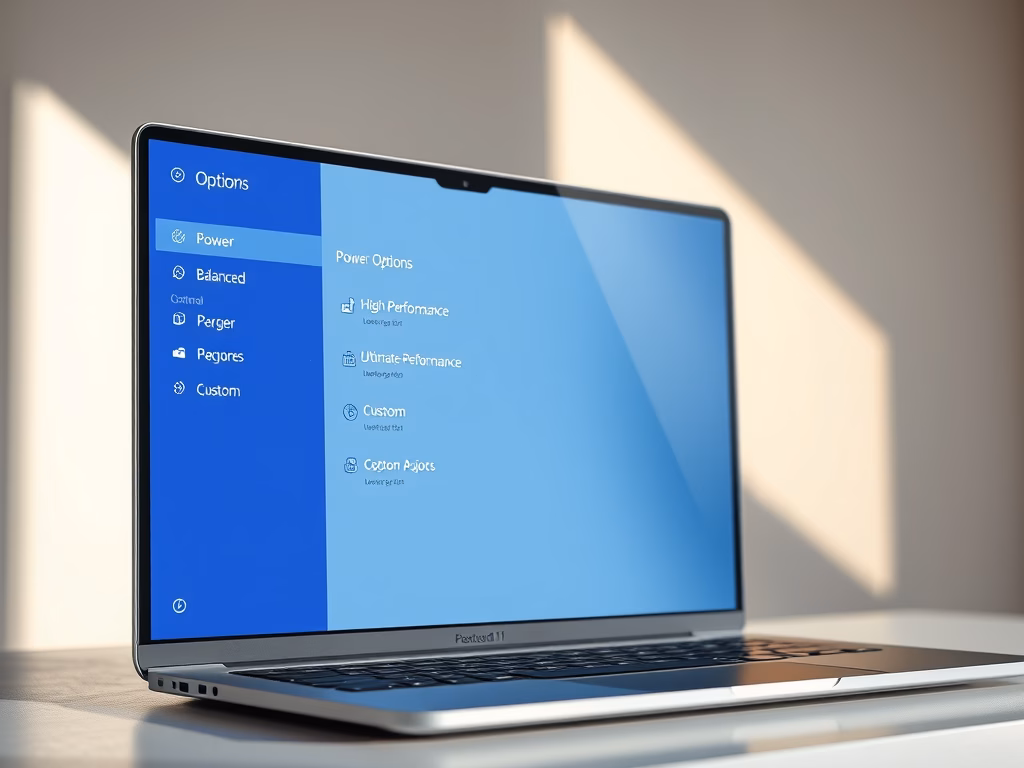
Windows 11 has multiple power plans. For example, you’ll find Balance, Power saving, High Performance, and Ultimate Performance on some laptops. Each plan provides performance benefits and other savings, including improved laptop battery life, reduced power consumption, and more.
How to create custom power plans in Windows 11
As mentioned above, Windows 11 comes with multiple power plans. Each plan provides performance benefits and other savings, including improved laptop battery life, reduced power consumption, and more.
You can also create custom power plans if the default plans do not meet your needs.
Below is how one can customize power plans to optimize device performance or save battery life.
Here is a quick overview of the different power plans available in Windows 11:
- Balanced = This plan may be the default setting in most environments.
- Power saver = Saves power by reducing PC performance and screen brightness to help prolong battery life and consume less energy.
- High Performance = Maximizes screen brightness and might increase PC performance. This plan consumes a lot of power and may reduce battery life.
- Ultimate Performance = Only available in the Windows 11 Pro for Workstations edition by default.
- Custom = Plans created by users.
To change your device power plan, first, open the classic Control Panel in Windows 11.
Or click Start and search Control Panel. Then, under best results, select and open the Control Panel App.

Next, click Hardware and Sound, and then select Power Options.

The Power Options Control Panel opens, and the power plans appear. Review each power plan.
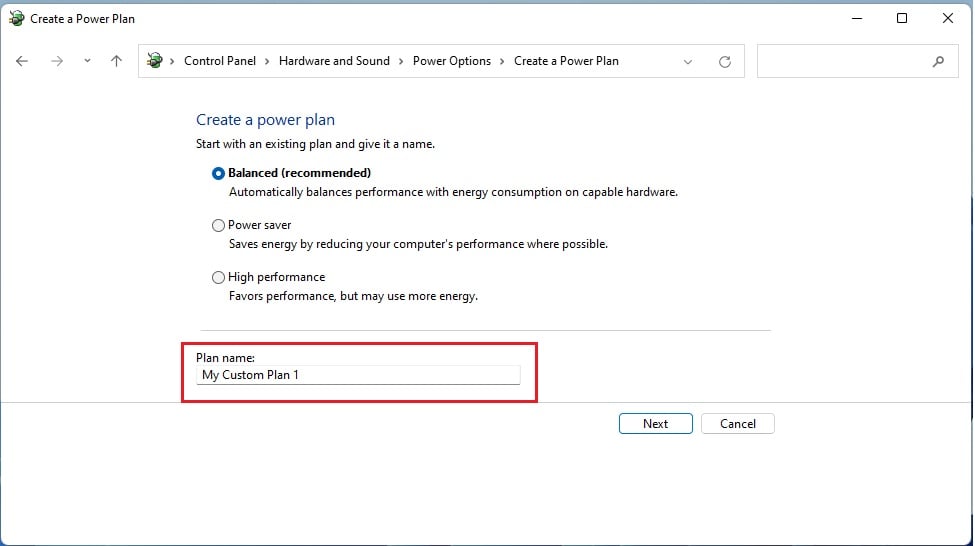
On the Power Options window, click the link on the left to Create a power plan.

Next, choose an existing plan and give it a name. Balanced is recommended.
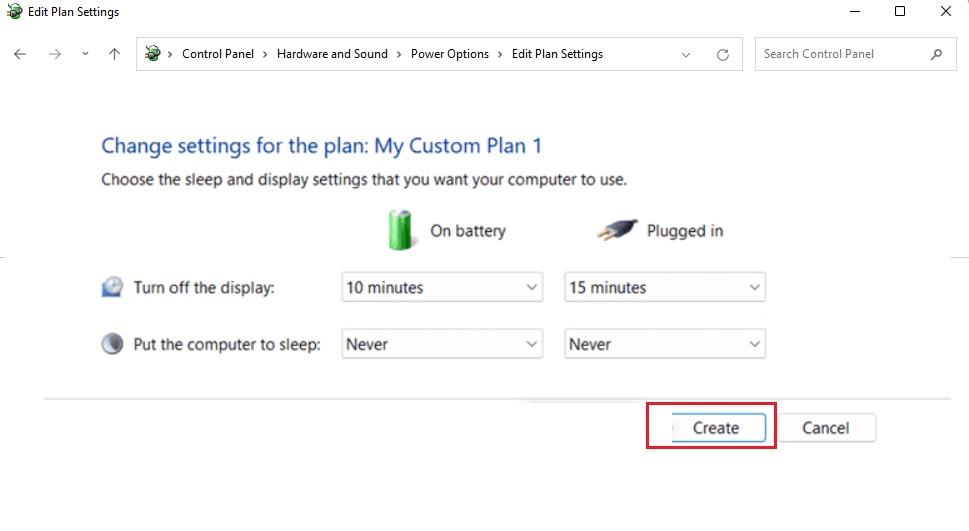
Choose the settings you want for your plan and click Create.
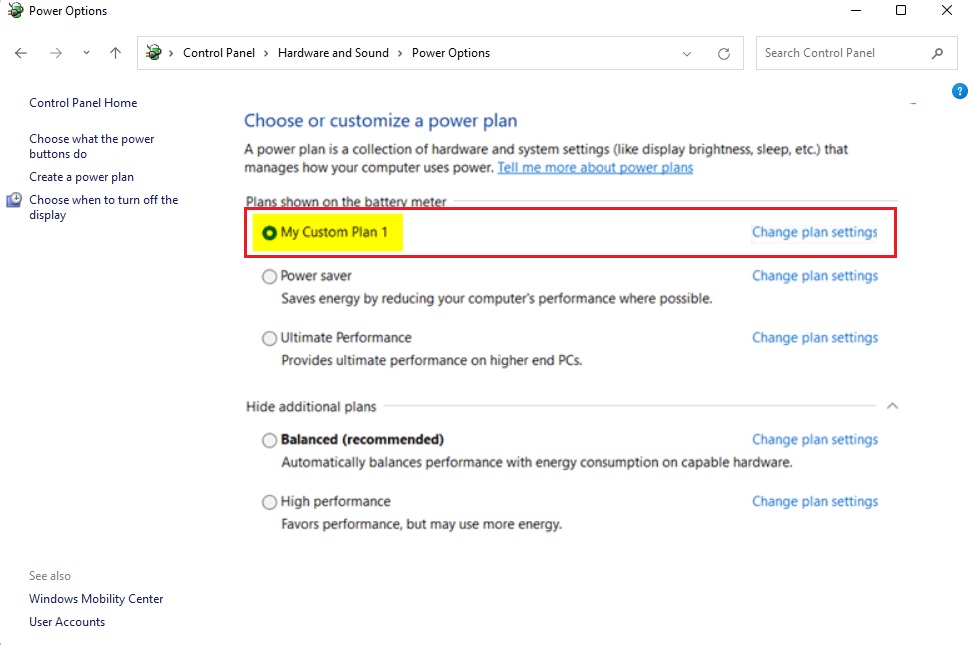
When you’re done, a new custom power plan should be available to choose from the list in the Power Options window.
This is how one creates a custom power plan in Windows 11.
That should do it!
Related post:
Conclusion:
- Understanding how to create custom power plans in Windows 11 empowers users to optimize device performance or save battery life according to their specific needs.
- By following the simple steps outlined in this guide, users can access additional power plan options beyond the default settings provided by Windows 11.
- Creating custom power plans is particularly beneficial for individuals seeking to fine-tune their power usage and enhance their overall computing experience.
- Being able to customize power plans not only contributes to improved energy conservation but also allows users to tailor their device’s performance to suit their unique requirements.
- We encourage users to explore these steps and consider creating custom power plans to maximize the efficiency and longevity of their Windows 11 devices.


Leave a Reply