How to Connect Your Bluetooth Printer or Scanner to Windows 11

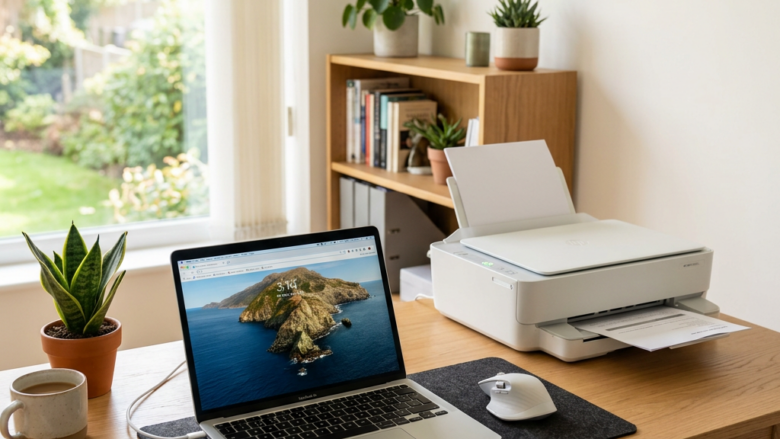
Connecting a Bluetooth printer or scanner to Windows 11 lets you print and scan wirelessly over short-range radio instead of a USB cable. The device links directly to your computer, so you can put it anywhere in the room, as long as it stays within Bluetooth range. That is usually about 10 meters (30 feet) with no walls in the way, and less in practice.
Windows 11 supports most modern wireless printers and scanners out of the box. You turn on pairing mode on the device, then finish the setup from the Bluetooth settings on your PC. This guide covers each step, what you should see on screen, and what to check if the device does not show up.
Ensure your printer or scanner is in pairing mode. Then, go to Windows Settings Bluetooth & devices Printers & scanners and click “Add device” to find and connect your Bluetooth peripheral. Follow any on-screen prompts to complete the setup.
Why Connect a Bluetooth Printer or Scanner?
Bluetooth connects devices without physical cords. Pairing a printer or scanner this way removes the USB cable between the device and your Windows 11 computer. The hardware can sit wherever is convenient, which leaves your desk tidier.
One thing to check first: many “wireless” printers use Wi-Fi , not Bluetooth . Look for the Bluetooth logo on the device or in its manual. Your PC also needs Bluetooth. Most laptops have it built in. A desktop may need a USB Bluetooth adapter.
What Happens When You Connect It?
Once the device is connected, Windows recognizes it as a printer or scanner. You can then send documents to print or scan photos and papers straight from the PC, the same way you would with a cabled device.
Step 1Get Your Printer or Scanner Ready
Turn on your Bluetooth printer or scanner and put it into pairing mode so your computer can detect it. Pairing mode makes the device discoverable to nearby Windows 11 computers. The way you start it differs by model. It is often a dedicated Bluetooth button, or a menu on the device’s small display. Check the manual if you do not know how to do this on your model.
- Turn on your Bluetooth printer or scanner.
- Put it into "pairing mode" or "discoverable mode." Check your printer or scanner's manual if you're not sure how to do this. You should see a blinking Bluetooth light or a message on the device's display.
Many devices stay discoverable for only a few minutes. If yours stops blinking before you finish the PC-side steps, start pairing mode again. Keep the device close to the PC, ideally within a meter or two, while you pair.
Step 2Turn on Bluetooth in Windows
Turn on Bluetooth in Windows 11 so your computer can find and connect to wireless hardware. You do this in Settings, in the Bluetooth & devices section. This allows your PC to communicate with your printer or scanner.
- Click the Start button. It looks like the Windows logo and is usually in the bottom-left corner of your screen (or in the center of the taskbar, depending on your settings).
- Click the Settings gear icon. You can also press the Windows key + I to open Settings directly.
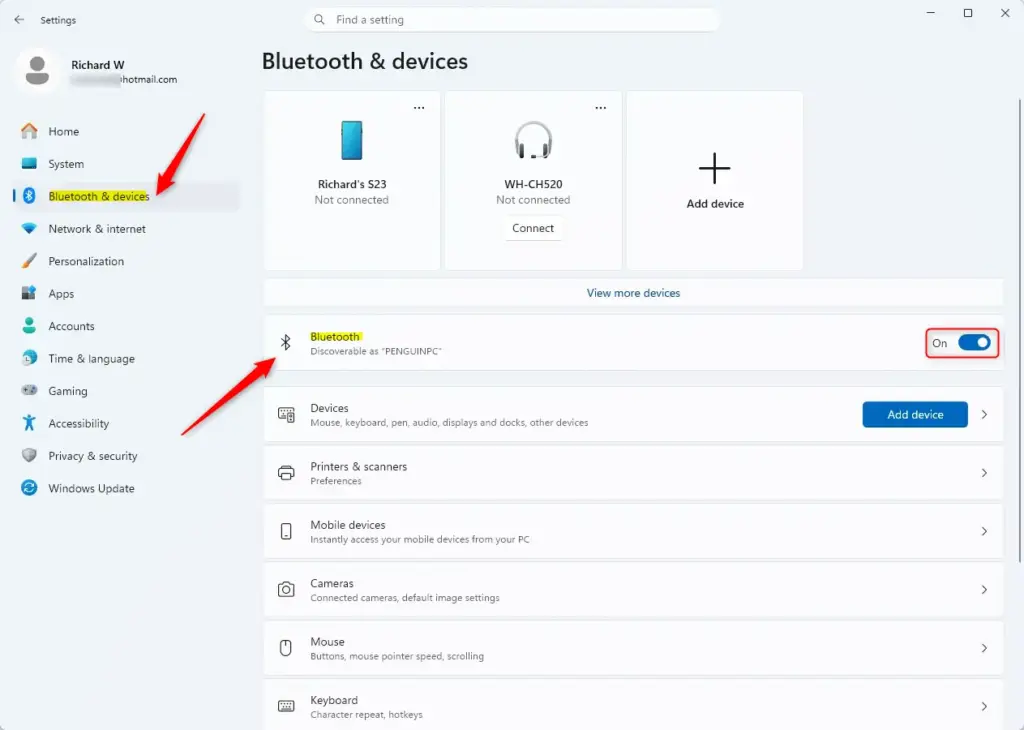
- In the Settings window, click on Bluetooth & devices. It is in the left-hand menu.
- Find the Bluetooth toggle switch. Make sure it is turned On. The label next to the switch should read "On", and the page will list any devices already paired.
If there is no Bluetooth toggle at all, Windows does not see a Bluetooth adapter. Check that your PC has one, plug in a USB adapter if it does not, and look in Device Manager for a Bluetooth entry. If the toggle is greyed out or off, check that Airplane mode is not on. You can see this in the taskbar quick settings.
Step 3Add Your Printer or Scanner in Windows Settings
Add your printer or scanner through the Windows 11 settings after Bluetooth is on and the device is in pairing mode. You will go to Printers & scanners and start a search for nearby devices.
- Go back to the Settings window.
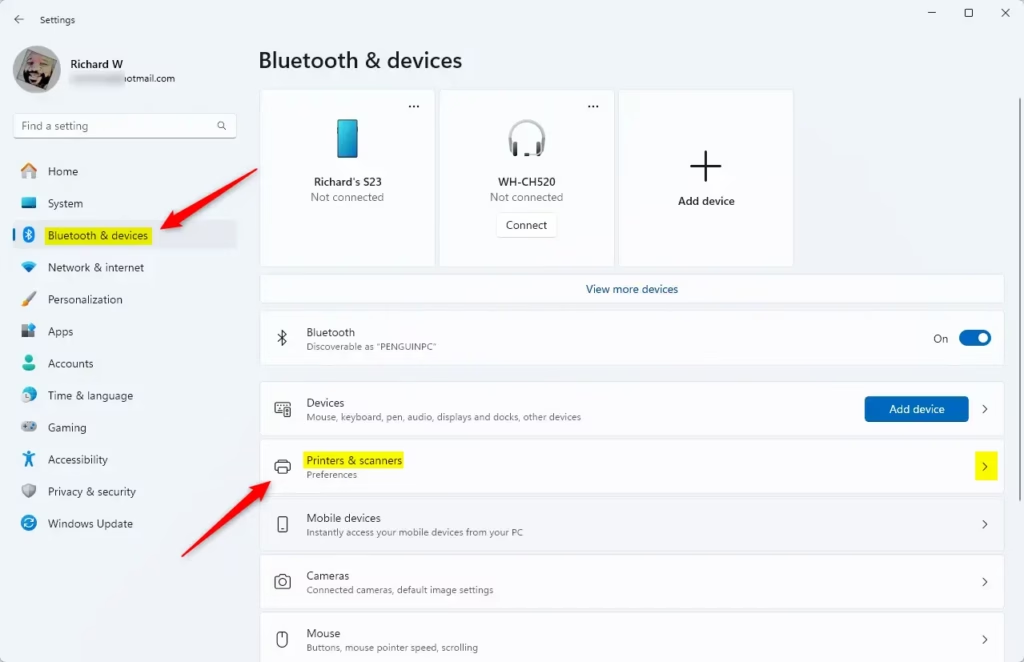
- Go to Bluetooth & devices.
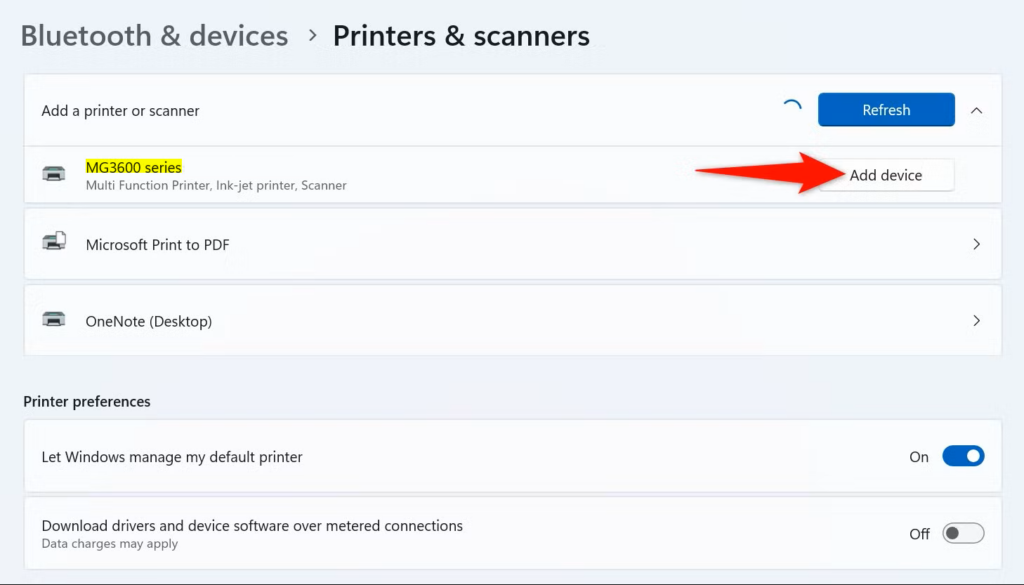
- Click on Printers & scanners. You should see a list of printers already installed on this PC.
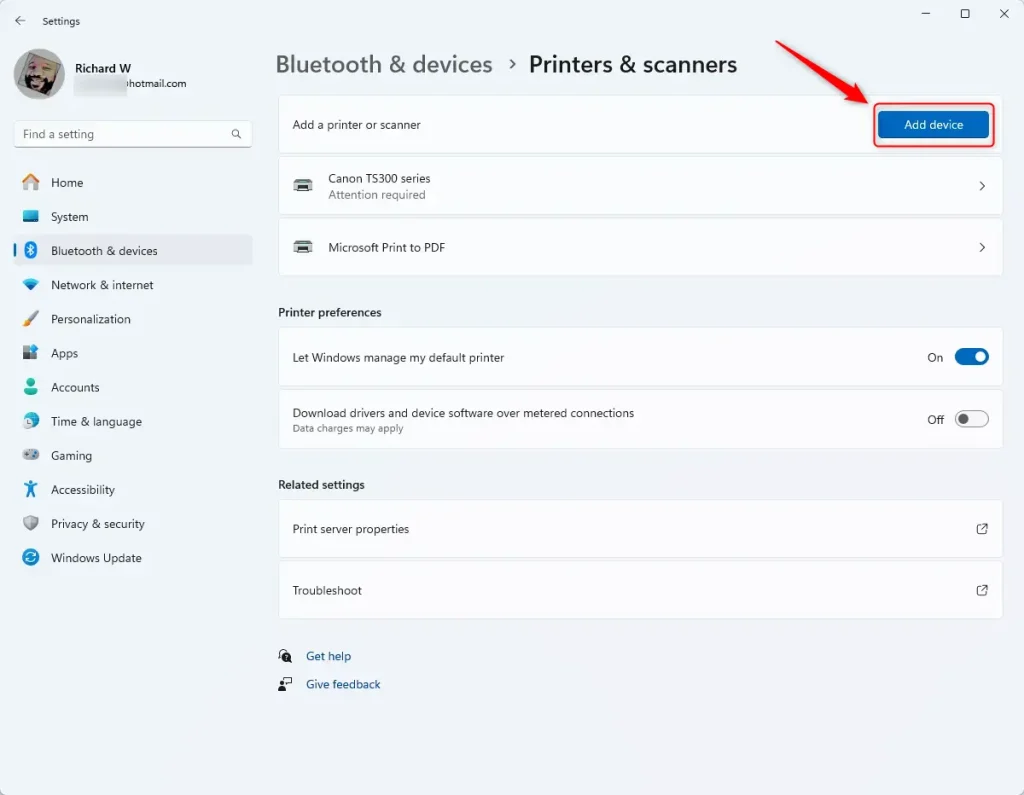
- Click the button that says Add device or Add printer or scanner. The exact wording depends on your Windows 11 build.
- Wait while Windows looks for nearby printers and scanners. This might take a minute or two.
- When your Bluetooth printer or scanner shows up in the list, click on it. Then, click the Add device button that appears.
If your device does not appear, go through these checks:
- Confirm the device is still in pairing mode. Many time out after a few minutes.
- Move the device closer to the PC and remove obstacles between them.
- Turn the device off and on again, then repeat the search.
- Some devices appear only as a Bluetooth device, not as a printer. In that case, go to Settings Bluetooth & devices > Devices, click Add device, choose Bluetooth, and pair it from there. Once paired, it should also show up under Printers & scanners.
Step 4Follow Any On-Screen Prompts
After you select your device, Windows 11 may show more prompts. Setup often asks you to confirm a PIN on the printer or the computer screen, and then Windows installs the drivers it needs.
- After you click "Add device" for your printer or scanner, Windows might show you more instructions.
- Follow these instructions carefully. You might need to confirm a PIN on your printer/scanner, enter a code, or just wait for the installation to finish. If a PIN or passkey is shown on one screen, make sure it matches on the other before you confirm. If you are asked for a PIN and none is shown, check the manual. Some devices use a default code, often 0000 or 1234.
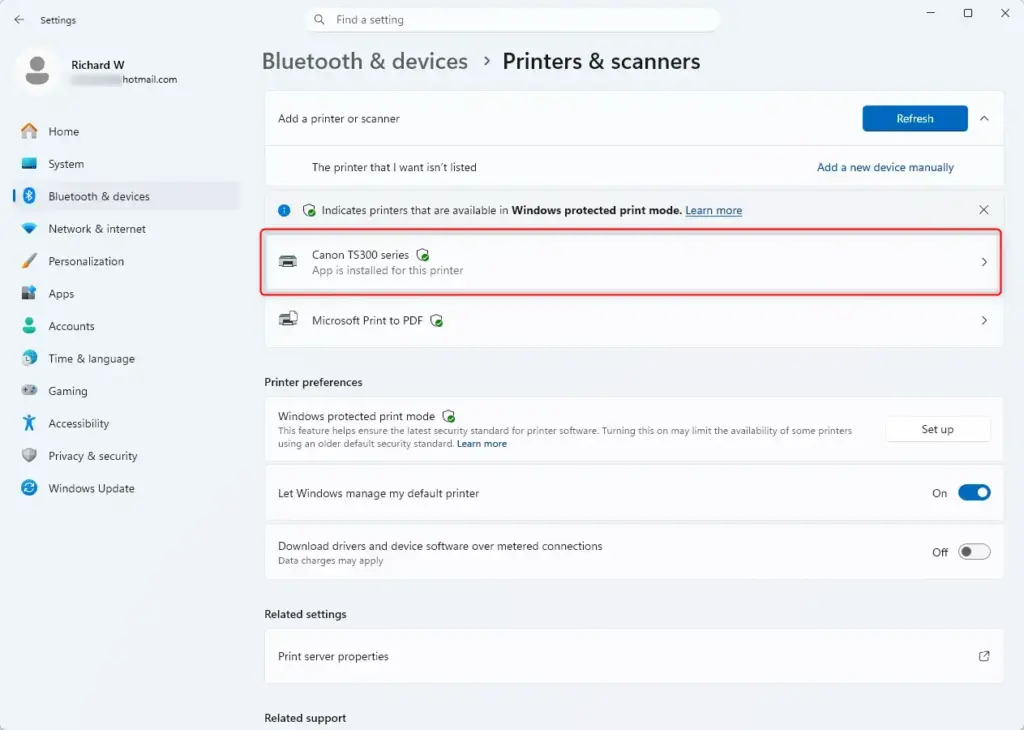
- When it's done, you should see your printer or scanner listed under Printers & scanners in Windows Settings.
Driver installation needs no restart in most cases. If Windows cannot find a driver by itself, download one from the manufacturer's website for your exact model and run its installer. A PC with no internet connection may also fail at this step.
To undo the setup, go to Settings Bluetooth & devices > Printers & scanners, click the device, and choose Remove. You can then pair it again from the start.
Step 5Test Your Connection
Test the connection by printing a document or scanning a test page. Open any file, choose Print or Scan, pick your new wireless device, and confirm it works. Do this right after setup, so you know any problem comes from the connection and not from a later change.
- Open a document or picture you want to print or scan.
- For printing: Click File, then Print. Or press Ctrl + P. Make sure your new Bluetooth printer is chosen from the list of printers. Then, click Print. The page should come out of the printer within a few seconds. Bluetooth is slower than USB or Wi-Fi, so a large file may take longer.
- For scanning: Open the Windows Scan app. You can search for it in the Start menu. If it is not installed, you can get it free from the Microsoft Store. Pick your Bluetooth scanner from the list, set up your scan options, and click Scan. The scanned page should appear as a preview in the app.
If the printer is listed but nothing prints, check that it is set as the selected printer, that it has paper and ink or toner, and that it is still connected. Bluetooth devices can disconnect to save power, so wake the device and try again.
Reference:
Summary
Connecting a Bluetooth printer or scanner to Windows 11 involves making the device discoverable, turning on Bluetooth in Windows, adding the device through Settings, and following any prompts. If the device does not show up, check pairing mode, distance, and whether the device really supports Bluetooth. Then run a test print or scan to confirm it works.
Have a question about this guide?
Answered by AI from this guide. Good questions may be added to this page — please don't include personal details.
Did this guide fix your problem?

About the Author
Richard
Tech Writer, IT Professional
Richard is a writer at Geek Rewind who turns complex IT tasks into clear, step-by-step guides. He draws on years of hands-on experience in system administration and enterprise IT operations, focusing on Windows, Linux and WordPress: the problems people actually run into, and the fixes that work. His server and WordPress guides come from systems he runs himself. Richard builds and maintains the platform behind Geek Rewind, from its Ubuntu servers and Nginx configuration to its custom WordPress plugins. Many new tutorials start with readers' questions, and he's always glad to answer them in the comments.
No comments yet — be the first to share your thoughts!