Connecting to Hidden WiFi on Ubuntu


Connecting to a hidden WiFi network on Ubuntu requires manual setup because hidden routers do not broadcast their name, known as an SSID, to nearby devices. Standard network scans miss these invisible connections in your desktop wireless list.
You can join any hidden network on Ubuntu 22.04, 24.04, and newer releases by opening your network settings, typing the exact network name and security type, and entering your password.
Open Settings , click WiFi , then click the three-dot menu and select “Connect to Hidden Network…”. Enter the network name (SSID) and password, then click Connect.
How to connect to hidden WiFi networks with Ubuntu Linux
Connecting to hidden WiFi Ubuntu networks requires you to manually enter the network name and password through the system settings. Open the Settings app from your system menu, select Wi-Fi, and choose the option to connect to a hidden network so you can type your router details by hand.
Entering the correct details connects your computer right away. To start, open the Settings app from your desktop menu.
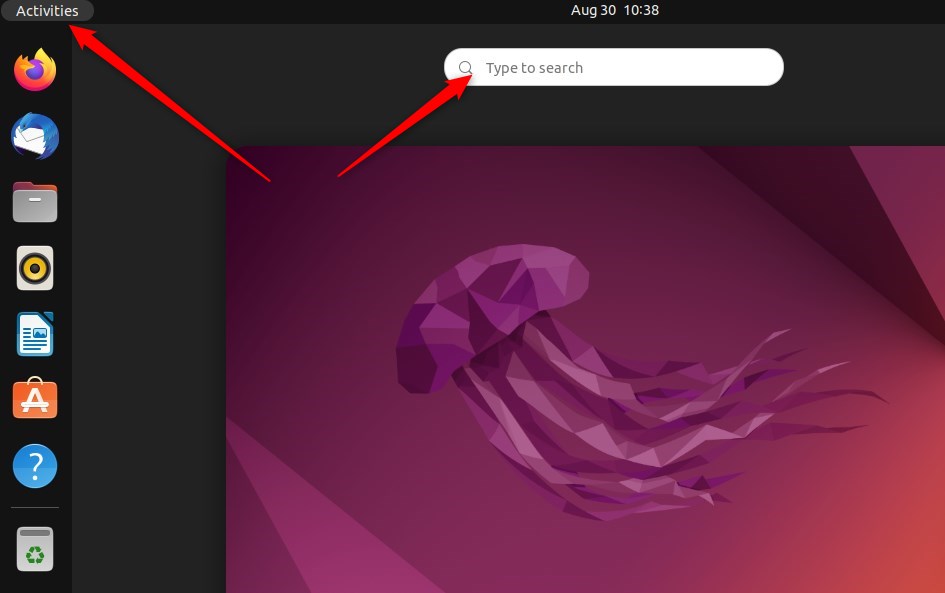
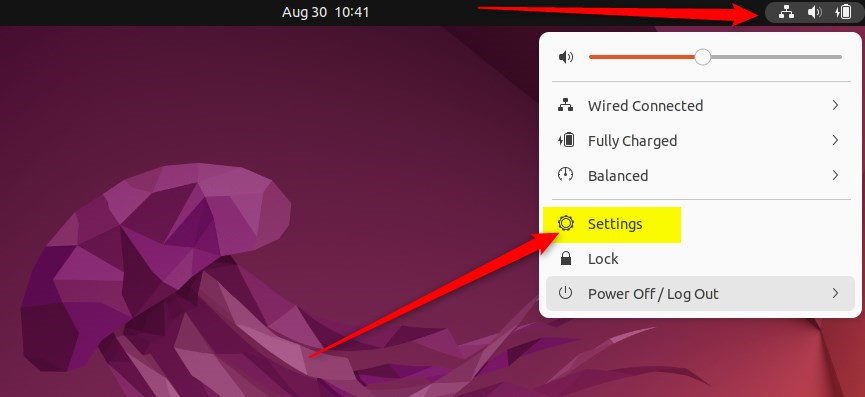
Alternatively, click the System menu at the top-right of your screen and select Settings.
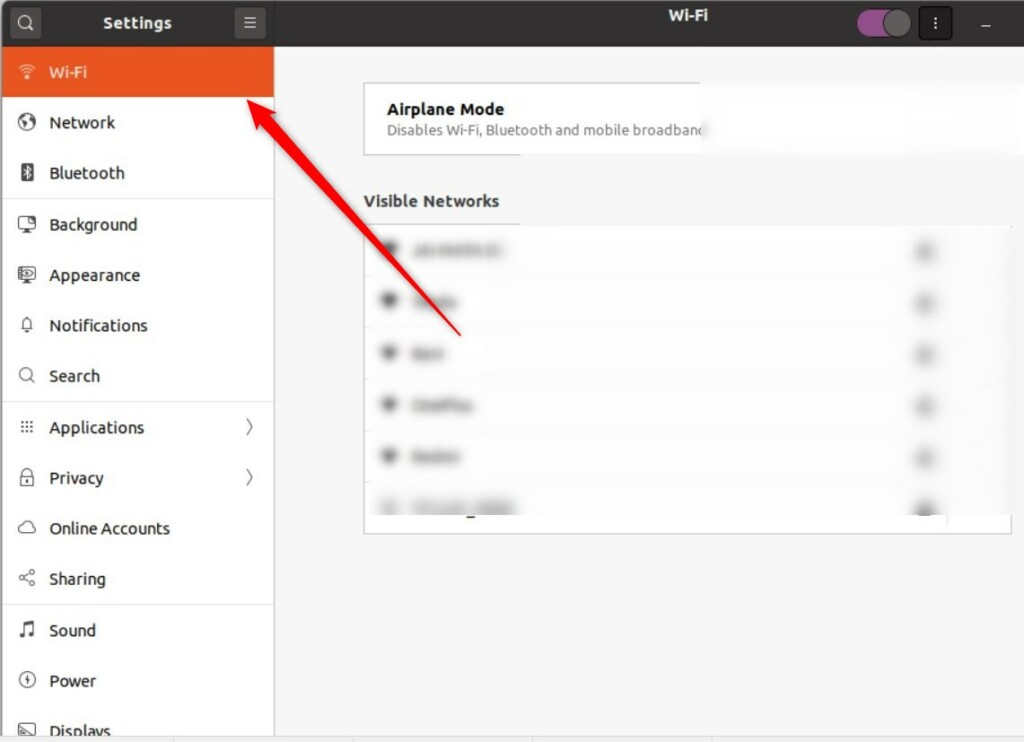
Click the WiFi tab on the left side of the window.
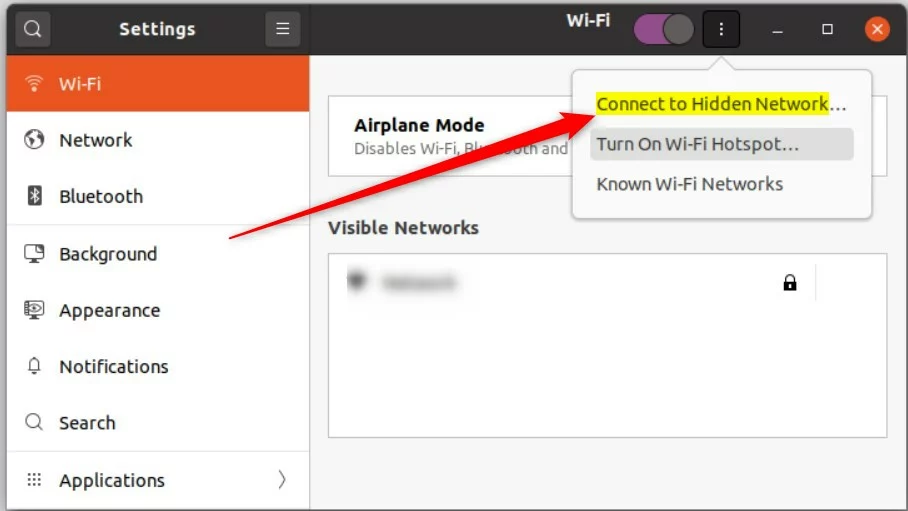
Click the three-dot menu icon and select Connect to Hidden Network...
Type the hidden WiFi SSID
Entering the hidden WiFi SSID (the technical name for your wireless network) is necessary because hidden networks do not broadcast their identity automatically. Type the exact network name into the SSID field, pick the correct security type used by your router, and enter your wireless password to join the network.
- Network name: Type the hidden SSID here. It must be exact.
- Security type: Select your security protocol. Use WPA3-Personal if your router supports it, as it is the modern standard.
- Password: Enter your security key.
Click the Connect button when finished.
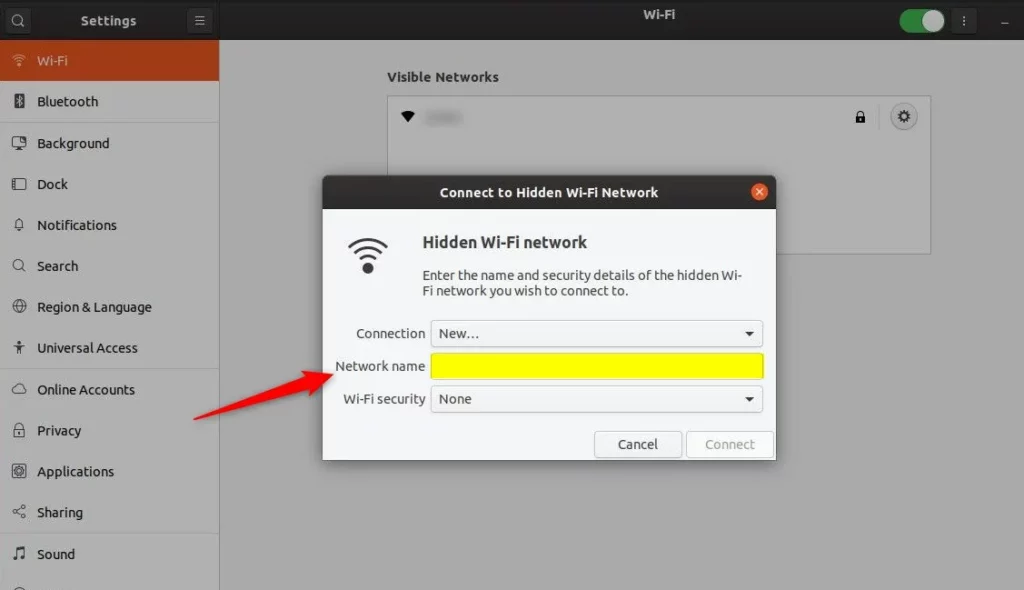
If the information is correct, your computer will join the network.
Using the Command Line
Connecting via the Command Line
Conclusion
Keep in mind that hiding an SSID offers zero actual encryption. Always use WPA3 encryption to keep your data secure. Using the Settings panel makes managing these connections possible for every Ubuntu user.
Was this guide helpful?

About the Author
Richard
Tech Writer, IT Professional
Richard is a writer at Geek Rewind who turns complex IT tasks into clear, step-by-step guides. He draws on years of hands-on experience in system administration and enterprise IT operations, focusing on Windows, Linux and WordPress: the problems people actually run into, and the fixes that work. His server and WordPress guides come from systems he runs himself. Richard builds and maintains the platform behind Geek Rewind, from its Ubuntu servers and Nginx configuration to its custom WordPress plugins. Many new tutorials start with readers' questions, and he's always glad to answer them in the comments.




No comments yet — be the first to share your thoughts!