How to Change Icon Position on Ubuntu Desktop

Ubuntu’s desktop icon position setting controls where new files, folders and app shortcuts land on your screen. You can send new items to any of the four corners, such as the top-left or bottom-right, so they don’t pile up wherever there happens to be space.
The change takes effect right away and needs no restart or logout. It only affects items you create or add after you change it. Icons already on the desktop stay where they are until you drag them.
Open Settings , navigate to Extensions, and select the Desktop Icons extension. Under Desktop Icons settings, choose your preferred position from Top Left, Top Right, Bottom Left, or Bottom Right to change where new icons appear.
Choose a new icon position on Ubuntu Linux
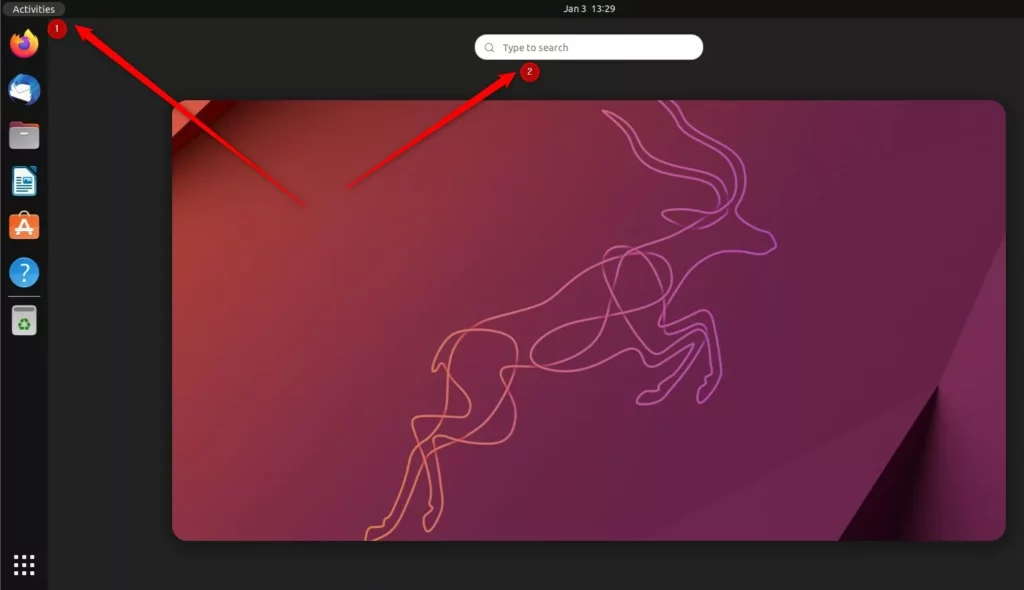
You change the icon position from the main Settings app . You can reach it from the application grid or from the system menu in the top-right corner. Use whichever is faster for you.
- Click Show Applications (the grid of dots) at the bottom of the dock, or press the Super (Windows) key.
- Type “Settings” in the search box, or find the gear icon in the grid.
- Click Settings. The Settings window opens with a list of categories on the left.
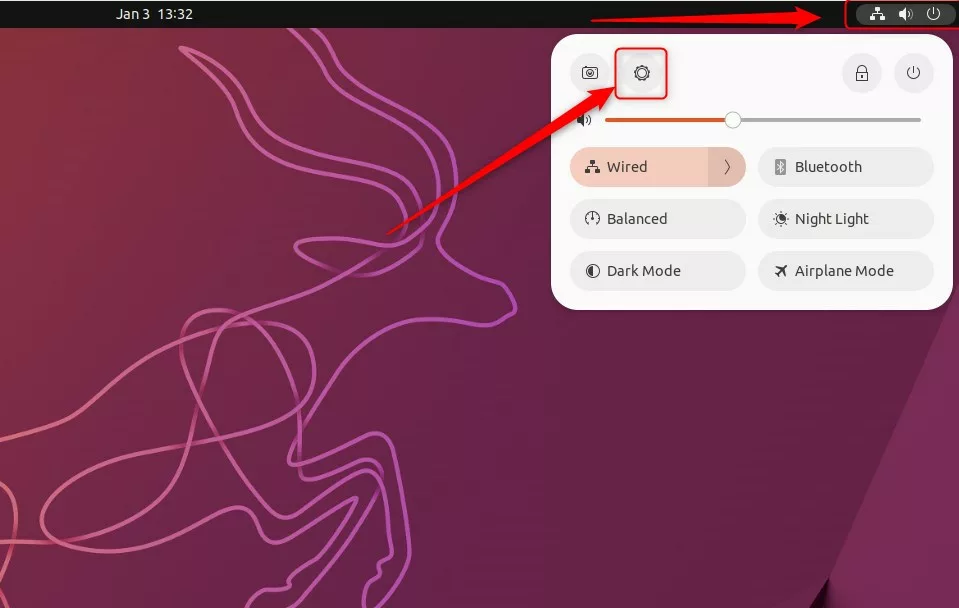
You can also open Settings from the top bar. This is quicker if you already have other windows open.
- Click the System menu at the top-right corner of the screen. This is the area with the network, volume and battery icons.
- Select Settings from the menu that drops down. The same Settings window opens.
The position option belongs to the “Desktop Icons” extension, which is built into Ubuntu’s desktop. Its settings are in the Extensions manager.
- Open the Extensions app. Search for it in the application grid if you don’t see it in Settings.
- Find Desktop Icons in the list of extensions.
- Click the gear icon next to it. The Desktop Icons settings window opens.
If you can’t find the Extensions app, your Ubuntu version may keep these options elsewhere. In recent releases such as 22.04 and 24.04, the same desktop icon options also appear under Settings Appearance
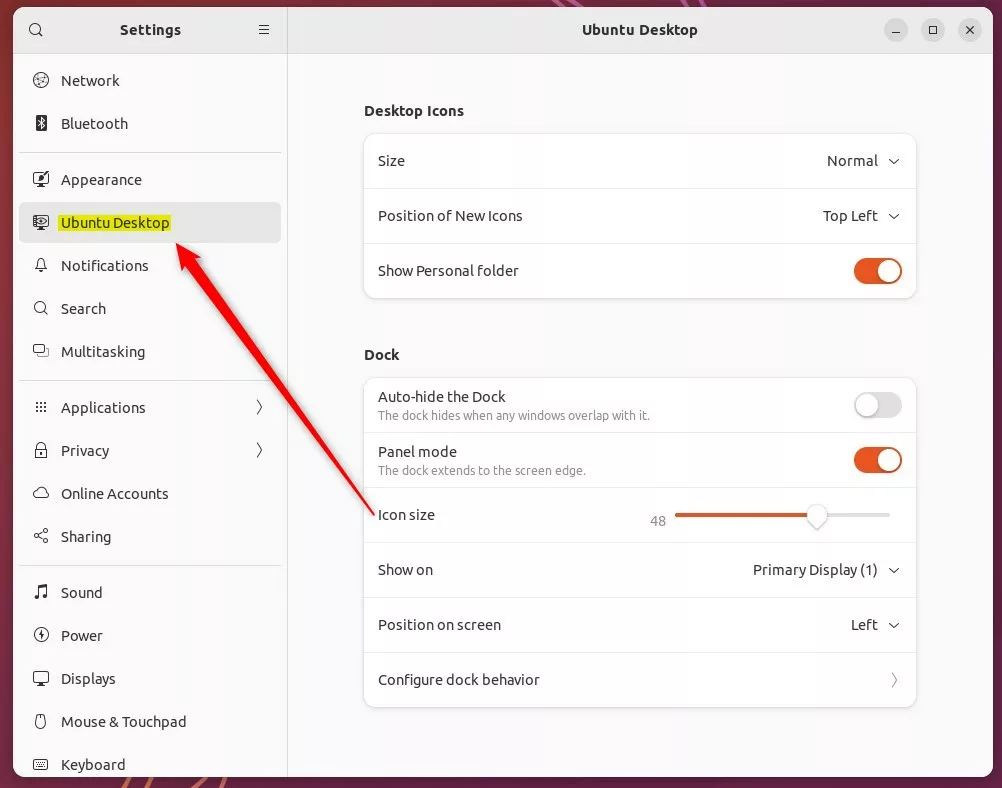
In the Desktop Icons settings, find the option for the position of new icons. Pick the corner where you want new items to appear:
- Top Left
- Top Right
- Bottom Left
- Bottom Right
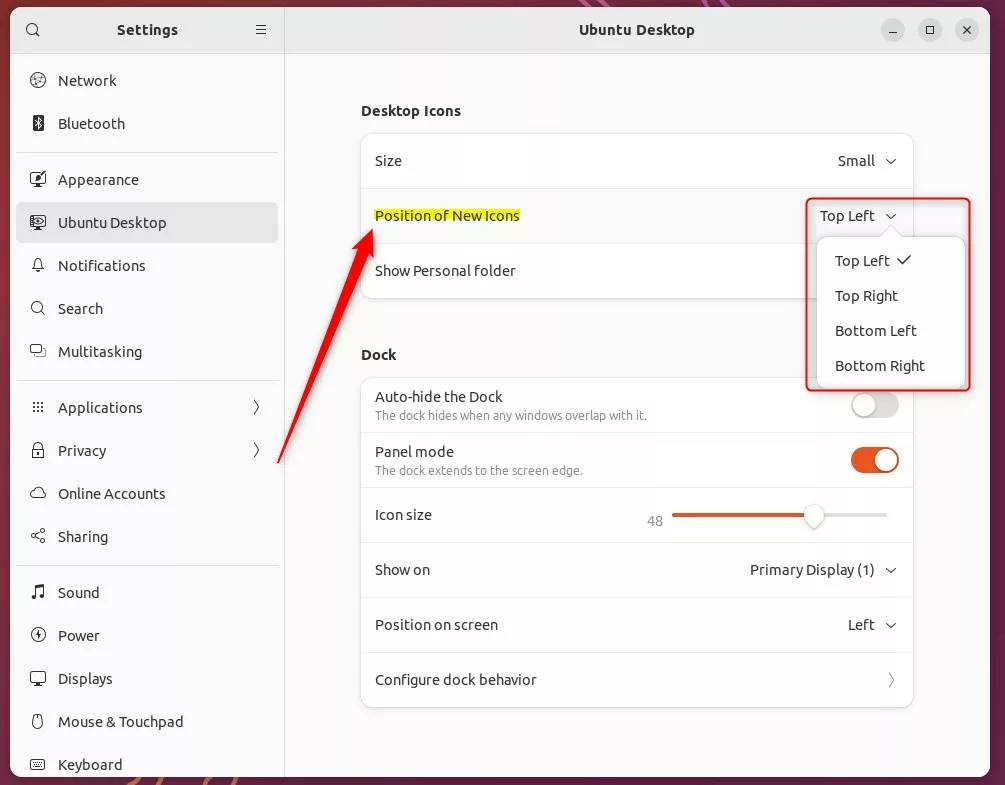
The change applies as soon as you click your choice. There is no Apply or Save button.
- Click the corner you want.
- Close the settings window.
- Create a test folder on the desktop. It should appear in the corner you picked.
To undo the change, open the same settings and choose a different corner. If you want the old icons to move too, drag them by hand. Next, we'll look at how to add application icons to your desktop.
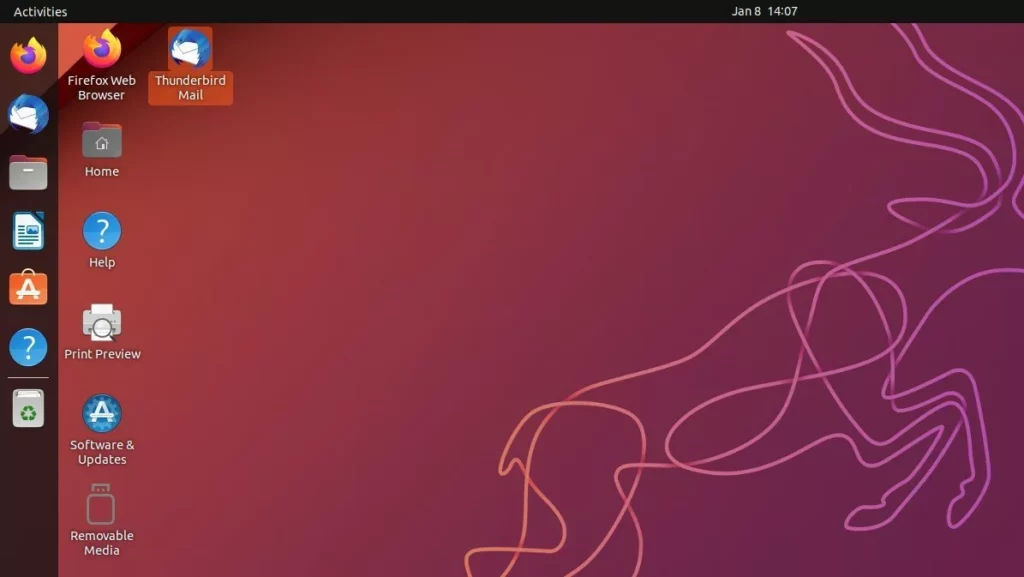
How to add application icons on the desktop on Ubuntu Linux
Application icons on the desktop let you open your favorite programs with a single click. When you copy a program's launcher file to the desktop, Ubuntu first treats it as a plain file. You have to right-click it and select Allow Launching before it works as a real shortcut.
New icons also follow the corner you chose above, so they land where you expect them.
- Right-click the new icon on your desktop. A context menu opens.
- Select Allow Launching.
The icon should now show the program's proper name and picture, and double-clicking it starts the app. If Allow Launching doesn't appear in the menu, the file is probably already trusted, or it isn't a launcher file.
That is all it takes. If you want to remove a shortcut later, right-click it and move it to the Trash. This does not uninstall the program.
Conclusion
Setting your icon position is a quick way to clean up your Ubuntu desktop. You can pick any of the four corners to keep new files neat, and you can change your mind at any time. Using Allow Launching also keeps your favorite apps one click away.
Have a question about this guide?
Answered by AI from this guide. Good questions may be added to this page — please don't include personal details.
Did this guide fix your problem?

About the Author
Richard
Tech Writer, IT Professional
Richard is a writer at Geek Rewind who turns complex IT tasks into clear, step-by-step guides. He draws on years of hands-on experience in system administration and enterprise IT operations, focusing on Windows, Linux and WordPress: the problems people actually run into, and the fixes that work. His server and WordPress guides come from systems he runs himself. Richard builds and maintains the platform behind Geek Rewind, from its Ubuntu servers and Nginx configuration to its custom WordPress plugins. Many new tutorials start with readers' questions, and he's always glad to answer them in the comments.
No comments yet — be the first to share your thoughts!