How to Change Primary Mouse Button in Windows 11

This tutorial will show you how to change which mouse-scrolling-direction-in-windows-11/" class="sal-link" rel="noopener" target="_blank" data-sal-id="17930">mouse button is your primary button in Windows 11.
Your primary mouse button is the one you use most often. It handles tasks like selecting items and dragging files.
You can set your primary mouse button to be either the left or right button. Here are three easy ways to do it.
Option One
Change Primary Mouse Button in Settings
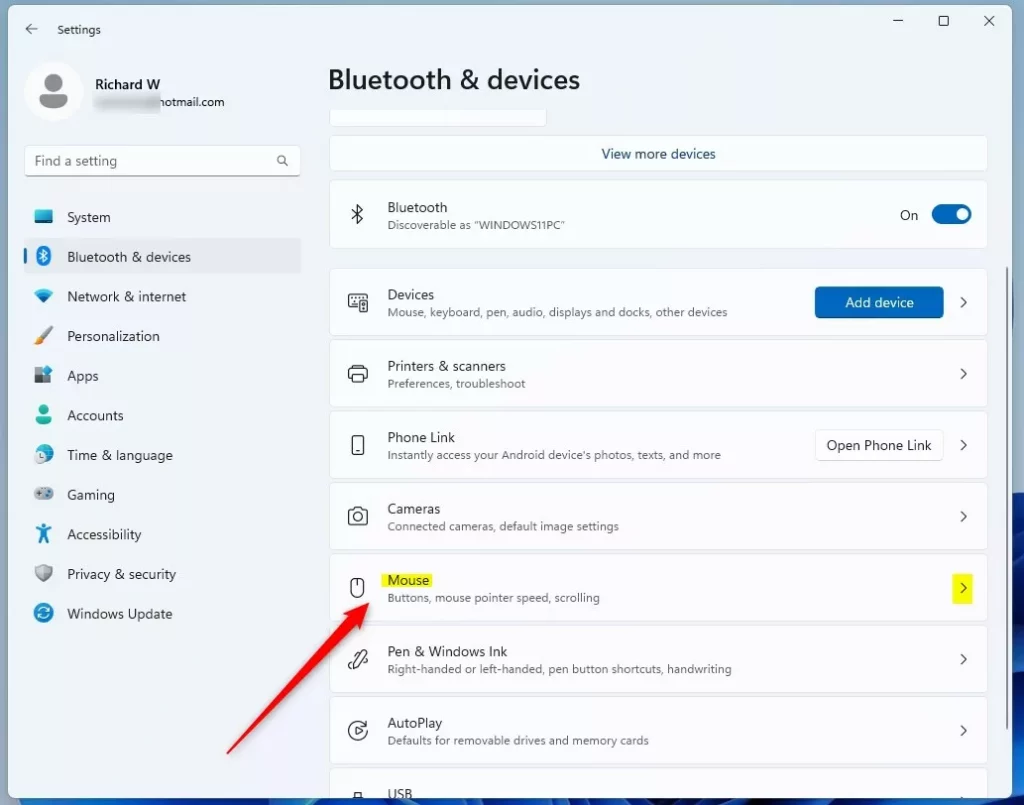
- Open Settings by pressing Win+I on your keyboard.
- Click on Bluetooth & devices on the left side. Then click on Mouse on the right side. (see screenshot below)
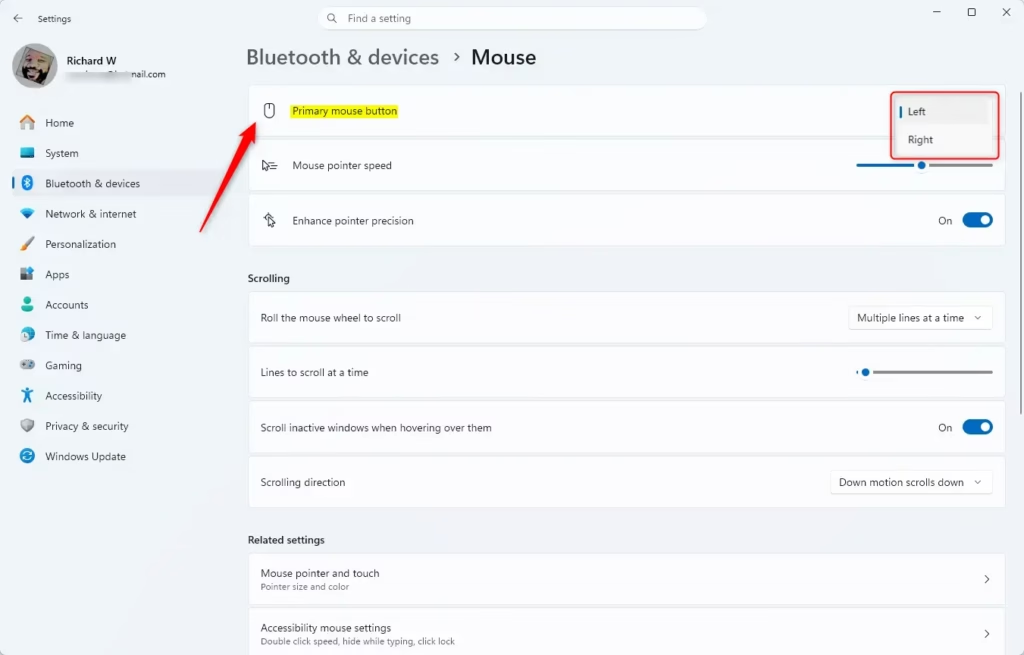
- Find the Primary mouse button drop-down menu. Choose either Left (this is the default) or Right. (see screenshot below)
- You can now close the Settings window.
Option Two
Change Primary Mouse Button in Control Panel
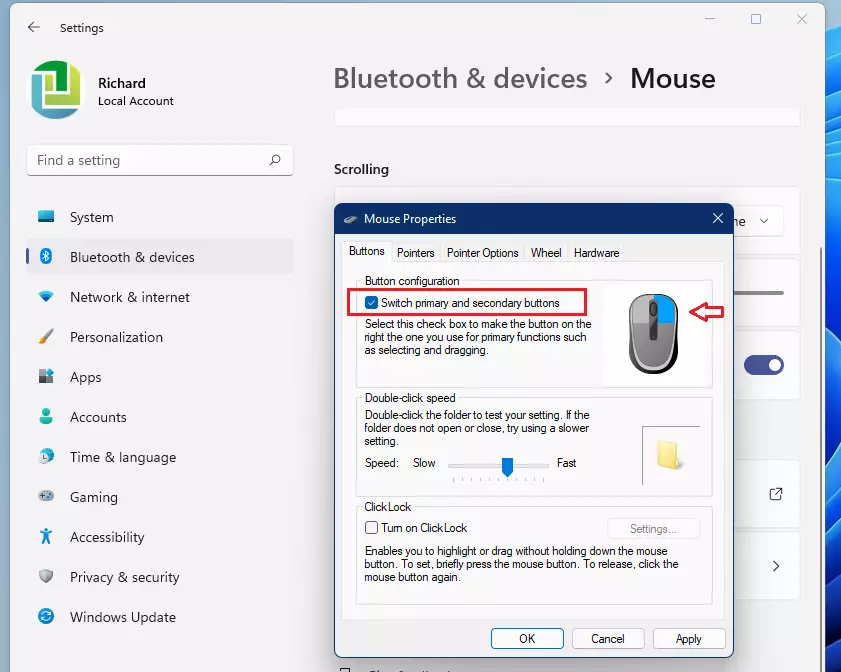
- Open Control Panel and switch to icon view. Click on the Mouse icon.
- Go to the Buttons tab. You will see a checkbox for Switch primary and secondary buttons. Check this box to use your right button as primary. Leave it unchecked to use your left button as primary (the default). (see screenshot below)
- Click OK to save your changes.
Option Three
Change Primary Mouse Button Using Registry
⚠️ Admin privileges required
Change Primary Mouse Button to Left
This is the default setting.
reg add "HKEY_CURRENT_USERControl PanelMouse" /v SwapMouseButtons /t REG_SZ /d 0 /f
Change Primary Mouse Button to Right
reg add "HKEY_CURRENT_USERControl PanelMouse" /v SwapMouseButtons /t REG_SZ /d 1 /f
Summary
Changing your primary mouse button in Windows 11 is simple. You have three options: use the Settings app, use Control Panel, or edit the Windows Registry. The Settings method is the easiest for most people. Just open Settings, go to Bluetooth & devices, click Mouse, and select your preferred primary button from the drop-down menu. All three methods work equally well. Choose whichever one feels most comfortable for you.
Was this guide helpful?


Leave a Reply