
This article explains how to change the mouse double-click speed in Windows 11.
There are many mouse settings one can choose in Windows. For example, one can turn on or off a mouse ClickLock, change their primary mouse button, show the mouse pointer location, change the mouse pointer size, and many more.
By default, Windows allows users to open an item by double-clicking using the primary mouse button. However, a mouse’s double-click speed settings change how quickly one can double-click to open an item.
If you struggle to click quickly or your mouse double-clicks when you only click once, you may need to adjust your mouse’s double-click speed settings.
You can adjust the double-click sensitivity level to suit your preferences. For instance, setting the sensitivity very low may cause a double-click to be registered when clicking twice.
How to change a Mouse double-click setting in Windows 11
As mentioned, Windows allows users to open an item by double-clicking with the Mouse. Mouse speed settings change how quickly one can double-click the primary button to open an item.
Below is how to change mouse double-click settings in Windows 11.
Windows 11 has a centralized location for the majority of its settings app. From system configurations to creating new users and updating Windows, all can be done from the System Settings pane.
To get to System Settings, you can use the Windows key + I shortcut or click on Start ==> Settings, as shown in the image below:

Alternatively, you can use the search box on the taskbar to search for Settings. Then select to open it.
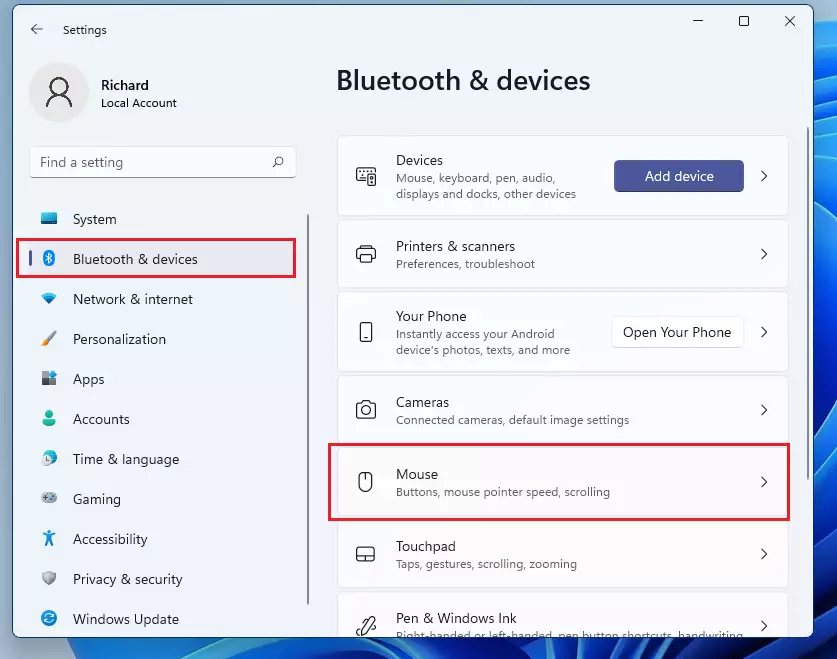
Windows Settings pane should look similar to the image below. For example, in Windows Settings, click Bluetooth & devices, and select Mouse on the right pane of your screen, as shown in the image below.
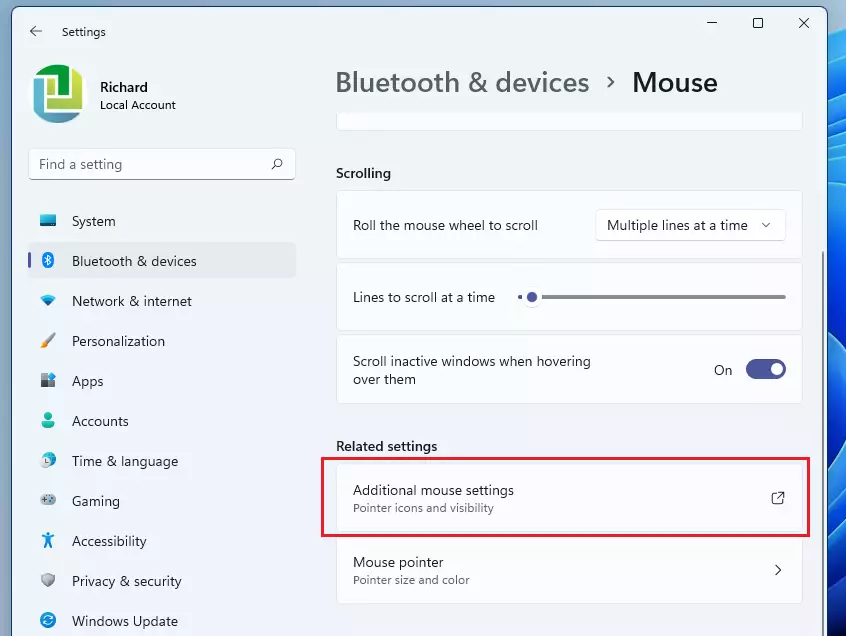
On the Bluetooth & device > Mouse settings pane, under Related settings, select Additional mouse settings.
Then on the pop-up window, under Double-click speed, adjust the slider to the best position that works for you to change the Speed of the double-click settings.
Click OK to apply your changes and exit.
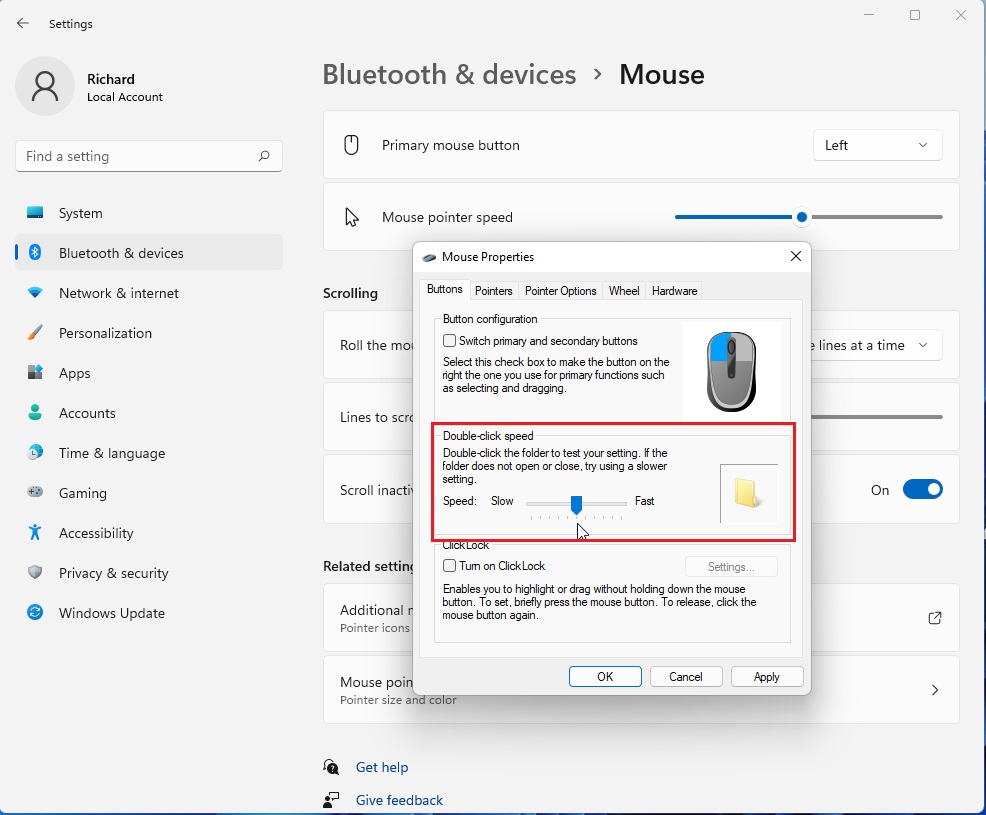
If you want to test the mouse double-click speed before closing, use the folder on the right to test. If the folder does not open or close, try using a slow speed.
That should do it!
Conclusion:
- Changing the mouse double-click settings in Windows 11 can help improve user experience and productivity.
- Adjusting the double-click speed and sensitivity to suit individual preferences can make using the Mouse more comfortable and efficient.
- The centralized location of mouse settings in Windows 11’s System Settings makes it easy to customize the double-click speed according to personal needs.
Leave a Reply