How to Change Video Frame Rate and Quality in Windows 11
You can change the video frame rate and quality for screen recordings in Windows 11 to achieve smoother and clearer game clips.
Frame rate, measured in frames per second (FPS), determines the smoothness of your video, while quality settings impact clarity and file size.
In Windows 11, the built-in Xbox Game Bar allows you to adjust these settings directly. For example, you can typically set your frame rate to 30 FPS or 60 FPS, and choose between medium or high video quality presets.
Optimizing these settings ensures your recordings meet your needs, whether for casual sharing or more professional content creation.
Change video frame rate and quality in Windows 11 by opening Settings, navigating to Gaming, then Captures. Adjust the Video frame rate and Video quality options to your preference, choosing between presets like 30 or 60 FPS and Standard or High quality.
What Are Frame Rate and Video Quality?
Frame rate is how many pictures, or frames, your video shows each second, making it look smooth or choppy.
Video quality is about how clear and sharp your video looks. Higher quality videos look better but take more space on your computer. Lower quality videos save space but might look blurry or pixelated.
Where Are Your Game Videos Saved?
When you capture a game moment, Windows saves it in your Videos folder. You can also change this save location if you want to save your videos somewhere else, like a different drive.
How to Capture Game Clips
To capture a cool moment while gaming, press:
This will save a short video of the last few seconds of your gameplay.
Steps to Change Frame Rate and Video Quality
Changing your Windows 11 video frame rate and quality settings is simple and can be done through the Settings app.
- Open Settings: Click the Start menu button and select Settings. Or just press
Windows key + Ion your keyboard. - Click Gaming: In the Settings window, click on Gaming on the left side.
Windows Settings app showing Gaming button - Click Captures: Click on Captures on the right side to open capture settings.

Windows Captures settings - Find Video Settings: Find the options for Video frame rate and Video quality.
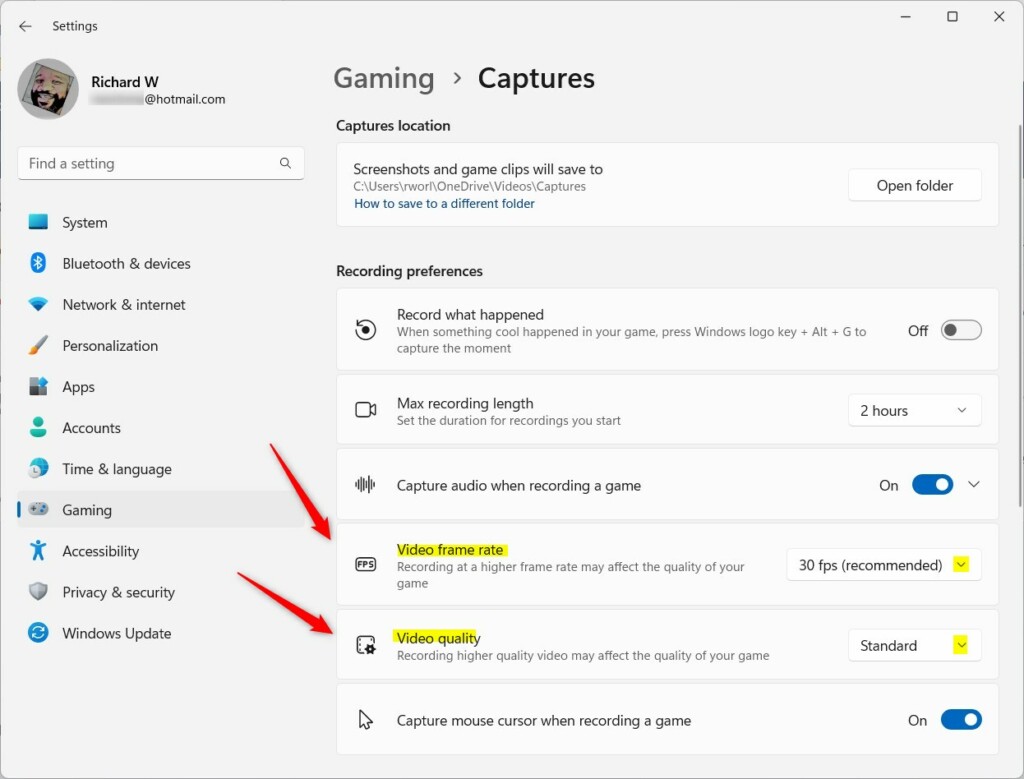
Video frame rate and quality settings - Click the Arrow: Click the small arrow next to each setting to see more options.
- Choose Your Frame Rate: Pick the frame rate you want. Usually:
- 30 fps – Good for most computers and saves space.
- 60 fps – Smoother video but uses more space and needs a stronger PC.
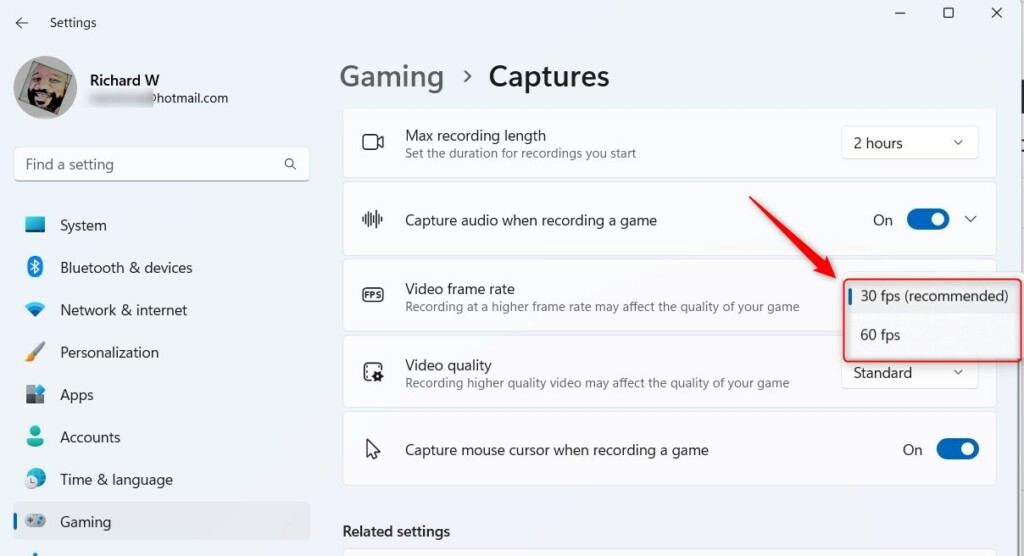
Frame rate options in Windows 11 - Choose Your Video Quality: Pick your video quality:
- Standard – Smaller file size, good for casual use.
- High – Sharper and clearer, but bigger file size.
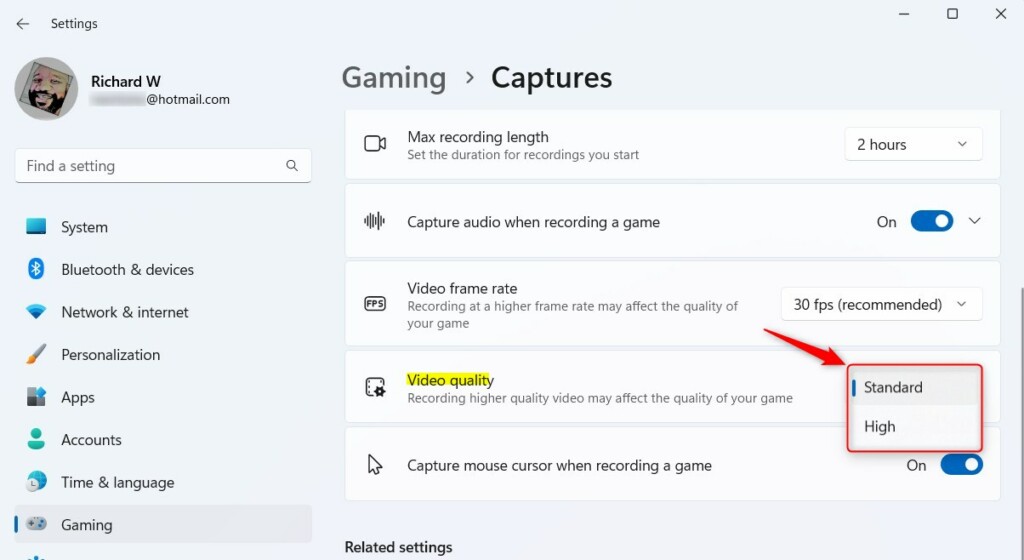
Video quality options in Windows 11 - Close Settings: When you’re done, just close the Settings window.
Summary
- Adjusting frame rate and quality helps your game videos look better and smoother.
- Windows 11 lets you pick settings that work best with your computer.
- Try different options to see what looks best and saves enough space.
- If you have questions or tips, feel free to leave a comment below!
How to check video FPS on 🪟 Windows 11?
In Windows 11*, you can use the Xbox* Game Bar. Press ⊞ Win+G to launch the Xbox* Game Bar. You will see the FPS in the Performance section of the Game Bar.
Is refresh rate 40 or 60 better?
For the best viewing experience, you should aim for the highest refresh rate your monitor can handle, as 60Hz is standard and higher rates offer smoother visuals.
How do I force 120Hz on 🪟 Windows 11?
To force 120Hz on Windows 11, you need to go into your display settings and select a fixed high refresh rate.
Was this guide helpful?
0% of readers found this helpful (1 votes)

About the Author
Richard
Tech Writer, IT Professional
Richard, a writer for Geek Rewind, is a tech enthusiast who loves breaking down complex IT topics into simple, easy-to-understand ideas. With years of hands-on experience in system administration and enterprise IT operations, he’s developed a knack for offering practical tips and solutions. Richard aims to make technology more accessible and actionable. He's deeply committed to the Geek Rewind community, always ready to answer questions and engage in discussions.

No comments yet — be the first to share your thoughts!