Install NetBox IPAM on Ubuntu: Step-by-Step Guide


NetBox IPAM is a free, open-source tool for tracking IP addresses, network cables, and data center hardware from one web interface. This guide installs NetBox on Ubuntu 22.04 LTS and serves it through a local web server, so you end up with a setup you can rely on for managing your network layout.
The steps target NetBox version 3.7.x and use standard terminal commands. You need sudo or root access on the Ubuntu machine and a working internet connection to download the packages. Newer NetBox releases may change some requirements or file contents, so check the release notes if you install a version other than 3.7.x.
To install NetBox IPAM on Ubuntu 22.04, update your system with sudo apt update and sudo apt upgrade, then install dependencies including Python 3, PostgreSQL, and Redis with sudo apt install python3 python3-pip python3-venv python3-dev build-essential libxml2-dev libxslt1-dev libffi-dev libpq-dev libssl-dev zlib1g-dev git postgresql postgresql-contrib redis-server.
Prerequisites
Before you start, make sure you have the following:
- A server running Ubuntu Linux. This guide was written for Ubuntu 22.04 LTS.
- Sudo privileges on the server. Every command that changes the system needs them.
- Basic knowledge of command-line operations and the Linux environment, including how to edit a file in a terminal editor such as nano.
Update and Upgrade the System
Start by refreshing the package list and upgrading the installed packages. This avoids version conflicts later, when you install PostgreSQL, Redis, and Python packages on top of the base system.
sudo apt update
sudo apt upgrade
Restart your server if required. Ubuntu usually tells you at the end of the upgrade when a restart is needed, for example after a kernel update. If you see no such message, you can carry on.
Install Required Dependencies
NetBox needs a few dependencies before it can run, including PostgreSQL (the database), Redis (used for caching and queuing), and the supporting build tools and Python packages. Run the commands below to install them.
sudo apt install python3 python3-pip python3-venv python3-dev build-essential libxml2-dev libxslt1-dev libffi-dev libpq-dev libssl-dev zlib1g-dev git postgresql postgresql-contrib redis-server
Create PostgreSQL Database and User
NetBox needs its own PostgreSQL database and a dedicated database user. Open the database prompt with the sudo -u postgres psql command. You should see the prompt change to the PostgreSQL one. Then run the SQL commands that create the netbox database and give your new user full access to it.
sudo -u postgres psql
From the PostgreSQL prompt, execute the following:
CREATE DATABASE netbox;
CREATE USER netbox WITH PASSWORD 'netbox_user_password';
GRANT ALL PRIVILEGES ON DATABASE netbox TO netbox;
ALTER DATABASE netbox OWNER TO netbox;
q
netbox_user_password with a strong password, and write it down.You will enter the same password in the NetBox configuration file later. When the commands finish, exit the PostgreSQL prompt.
Clone NetBox Repository
Clone the NetBox repository into the directory of your choice. The rest of this guide assumes you use /opt/netbox, so the paths later on match. If you pick a different directory, adjust every path accordingly.
sudo mkdir -p /opt/netbox/
cd /opt/netbox/
sudo git clone -b master --depth 1 https://github.com/netbox-community/netbox.git .
Create a NetBox non-login account
Next, create a dedicated system user to run NetBox. Running the application under its own unprivileged account is safer than using root or your login account. Execute the command below to create a new netbox user.
sudo adduser --system --group netbox
sudo chown --recursive netbox /opt/netbox/netbox/media/
Configure NetBox
NetBox ships with a template settings file named configuration_example.py. Copy it to a new file called configuration.py in the /opt/netbox/netbox/netbox/ directory. NetBox only reads configuration.py, so it will not start until this file exists. Open the new file in a text editor to set your database credentials and allowed hosts before you run the application.
cd /opt/netbox/netbox/netbox/
sudo cp configuration_example.py configuration.py
Next, open configuration.py with your preferred editor to begin configuring NetBox. nano is installed on Ubuntu by default and works fine for this.
sudo nano /opt/netbox/netbox/netbox/configuration.py
ALLOWED_HOSTS, DATABASE, and SECRET_KEY settings to match your environment.Use the database name, user, and password you created earlier, and list the hostname or IP address you will use to reach NetBox. A wrong value here is the most common reason the later steps fail, so check it carefully.
# Example: ALLOWED_HOSTS = ['netbox.example.com', 'netbox.internal.local']
ALLOWED_HOSTS = []

# PostgreSQL database configuration. See the Django documentation for a complete list of available>
#   https://docs.djangoproject.com/en/stable/ref/settings/#databases
DATABASE = {
    'ENGINE': 'django.db.backends.postgresql',  # Database engine
    'NAME': 'netbox',         # Database name
    'USER': 'netbox',               # PostgreSQL username
    'PASSWORD': 'netbox_user_password',           # PostgreSQL password
    'HOST': 'localhost',      # Database server
    'PORT': '',               # Database port (leave blank for default)
    'CONN_MAX_AGE': 300,      # Max database connection age
}
NetBox needs a long random secret key to sign sessions and protect passwords. A simple Python script, generate_secret_key.py, is provided in the parent directory to generate a suitable one:
python3 ../generate_secret_key.py
Copy the generated string and paste it into the SECRET_KEY section of the config file above, then save the file. Keep this key private. If you change it later, existing logins stop working.
SECRET_KEY = 'mnY(fx7RFfpV3yD#yEJ^Z8FOg&(hab7#KbYW+!u=J2HnL8ujk1'
Install Required Python Packages
If you need optional Python packages, such as napalm for device automation features, list them in a file named local_requirements.txt in the NetBox directory. The upgrade script reads this file automatically and installs everything in it along with the standard NetBox requirements. If you need no extras, you can skip this step.
sudo sh -c "echo 'napalm' >> /opt/netbox/local_requirements.txt"
By default, NetBox stores uploaded files on the local filesystem. If you want a remote filesystem instead, install the django-storages library and configure your desired storage backend in configuration.py. For a single-server setup, the default is fine.
sudo sh -c "echo 'django-storages' >> /opt/netbox/local_requirements.txt"
Run the Upgrade Script
Once NetBox is configured, run the packaged upgrade script (upgrade.sh). It does the following:
- Creates a Python virtual environment
- Installs all required Python packages
- Runs database schema migrations
- Builds the documentation locally (for offline use)
- Aggregates static resource files on disk
The script can take several minutes, because it downloads and builds packages. If it stops with an error, read the last lines of output. Database connection errors usually mean a typo in the database settings in configuration.py. Fix the problem and run the script again.
sudo /opt/netbox/upgrade.sh
Create Super User
The superuser is the administrator account you use to log in to NetBox. To create it, first activate the Python virtual environment with the source /opt/netbox/venv/bin/activate command. Then run the management script to set the administrator username, email address, and password.
First, enter the Python virtual environment created by the upgrade script:
source /opt/netbox/venv/bin/activate
Once the virtual environment is active, the string (venv) appears at the start of your console prompt. If you do not see it, the environment is not active and the next command will fail.
Next, create the superuser account with the createsuperuser Django management command (run via manage.py).
An email address is optional, but use a strong password.
cd /opt/netbox/netbox
python3 manage.py createsuperuser
Follow the prompts to set up your superuser login. The password does not show on screen as you type, which is normal.
Once that is done, run the command below to start NetBox's built-in development server and test your configuration.
python3 manage.py runserver 0.0.0.0:8000 --insecure
Open your browser and go to the server hostname or IP address followed by port 8000. You should see the NetBox login page. If the page does not load and the server runs a firewall such as UFW, check that port 8000 is allowed.
http://localhost:8000

The server is up and running. However, it is only a test server. When you type Ctrl+c in the terminal, the server stops.
For production use, run NetBox behind a reverse proxy. A reverse proxy such as Nginx handles incoming requests, serves static files, and passes the rest to the application. That improves both performance and security compared with the development server.
Continue with the steps below to set this up.
Collect Static Files
Collect the static files the web interface needs to display correctly. The upgrade script already did this once, so running it again is harmless. Do it now in case anything changed.
python3 manage.py collectstatic --no-input
Configuration of Gunicorn
Gunicorn is the application server that runs NetBox behind Nginx. Install it with pip3, then create a systemd service file at /etc/systemd/system/netbox.service. That file tells Ubuntu how to start, stop, and supervise the Gunicorn process in the background, including starting it at boot.
pip3 install gunicorn
Then create the Gunicorn systemd service file:
sudo nano /etc/systemd/system/netbox.service
Add the following configuration to the netbox.service file:
[Unit]
Description=NetBox WSGI Service
After=network.target

[Service]
Type=simple
User=netbox
Group=netbox
Environment="PATH=/opt/netbox/venv/bin"
ExecStart=/opt/netbox/venv/bin/gunicorn -c /opt/netbox/gunicorn_config.py netbox.wsgi

[Install]
WantedBy=multi-user.target
Adjust the paths if you installed NetBox in a different directory. The user the service runs as should also be the netbox user you created earlier.
Configure Gunicorn
Next, create a Gunicorn configuration file at /opt/netbox/gunicorn_config.py.
sudo nano /opt/netbox/gunicorn_config.py
Add your Gunicorn settings. They may look something like this:
command = '/opt/netbox/venv/bin/gunicorn'
pythonpath = '/opt/netbox/netbox'
bind = '0.0.0.0:8000'
workers = 3
Configure Nginx
To use Nginx as the reverse proxy, install it with sudo apt install nginx and create a site configuration file at /etc/nginx/sites-available/netbox. This file sends incoming web traffic for your domain name to the Gunicorn socket that runs the application.
sudo apt install nginx
sudo nano /etc/nginx/sites-available/netbox
Set up the server block:
server {
    listen 80;

    server_name netbox.example.com;

    client_max_body_size 25m;

    location /static/ {
        alias /opt/netbox/netbox/static/;
    }

    location / {
        proxy_pass http://127.0.0.1:8000;
        proxy_set_header Host $http_host;
        proxy_set_header X-Real-IP $remote_addr;
        proxy_set_header X-Forwarded-For $proxy_add_x_forwarded_for;
        proxy_set_header X-Forwarded-Proto $scheme;
    }
}
Replace netbox.example.com with your domain name or server IP address. Use the same name you listed in the allowed hosts setting in configuration.py, or NetBox will reject the requests.
Enable the NetBox site by linking its configuration file into the sites-enabled directory, then restart Nginx. If you later see the default Nginx welcome page instead of NetBox, the default site is probably still enabled. Disable it so your NetBox site takes over.
sudo ln -s /etc/nginx/sites-available/netbox /etc/nginx/sites-enabled/netbox
sudo systemctl restart nginx
Start NetBox and Gunicorn
Enable and start the NetBox service. Enabling it makes NetBox start automatically after a reboot. If systemd reports that it cannot find the service, check the file name and location of netbox.service, and make sure systemd has reloaded its unit files since you created it.
sudo systemctl daemon-reload
sudo systemctl enable netbox
sudo systemctl start netbox
Access NetBox
To access NetBox, open your web browser and go to your server address or domain name, for example http://netbox.example.com. You no longer need port 8000, because Nginx now listens on the standard web port. Log in with the administrator username and password you created in the superuser step, and you can start adding your IP addresses. If you see a 502 error, Gunicorn is not running, so check the status of the NetBox service.
http://netbox.example.com
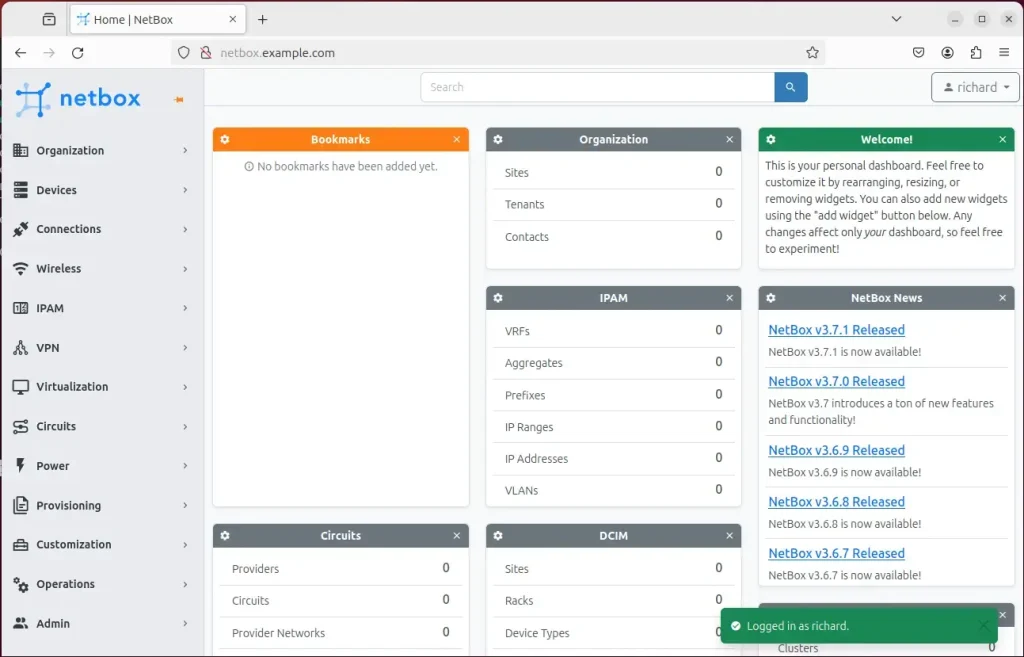
That should do it!
Conclusion:
- Installing NetBox IPAM on Ubuntu Linux gives you a secure, reliable platform for managing IP addresses, devices, and racks in one place across a data center infrastructure.
- Ubuntu is widely used and well documented, so help is easy to find if a step goes wrong.
- Because NetBox is open source, it costs less and gives you more flexibility than proprietary IPAM products.
- This guide covered the prerequisites, installing the dependencies, creating the database and user, cloning the repository, configuring NetBox, installing Python packages, running the upgrade script, creating the superuser, collecting static files, configuring Gunicorn and Nginx, and starting the NetBox service.
- Once everything is running, you can open NetBox in a web browser and manage the instance with the superuser account you created.
Was this guide helpful?

About the Author
Richard
Tech Writer, IT Professional
Richard is a writer at Geek Rewind who turns complex IT tasks into clear, step-by-step guides. He draws on years of hands-on experience in system administration and enterprise IT operations, focusing on Windows, Linux and WordPress: the problems people actually run into, and the fixes that work. His server and WordPress guides come from systems he runs himself. Richard builds and maintains the platform behind Geek Rewind, from its Ubuntu servers and Nginx configuration to its custom WordPress plugins. Many new tutorials start with readers' questions, and he's always glad to answer them in the comments.


No comments yet — be the first to share your thoughts!