This article explains how to change the size and color of the mouse pointer in Windows 11.
Changing the mouse pointer’s color may help, as both settings can be adjusted from a single Windows pane. Windows 11 features a standard mouse pointer that is small and white. This default small size may not be helpful for individuals with poor vision.
With wide screens and higher resolutions, it can be difficult to locate the mouse pointer across larger areas of the display, especially on dual screens. Fortunately, Windows offers the option to change the size of the mouse pointer, making it easier to see clearly on the screen.
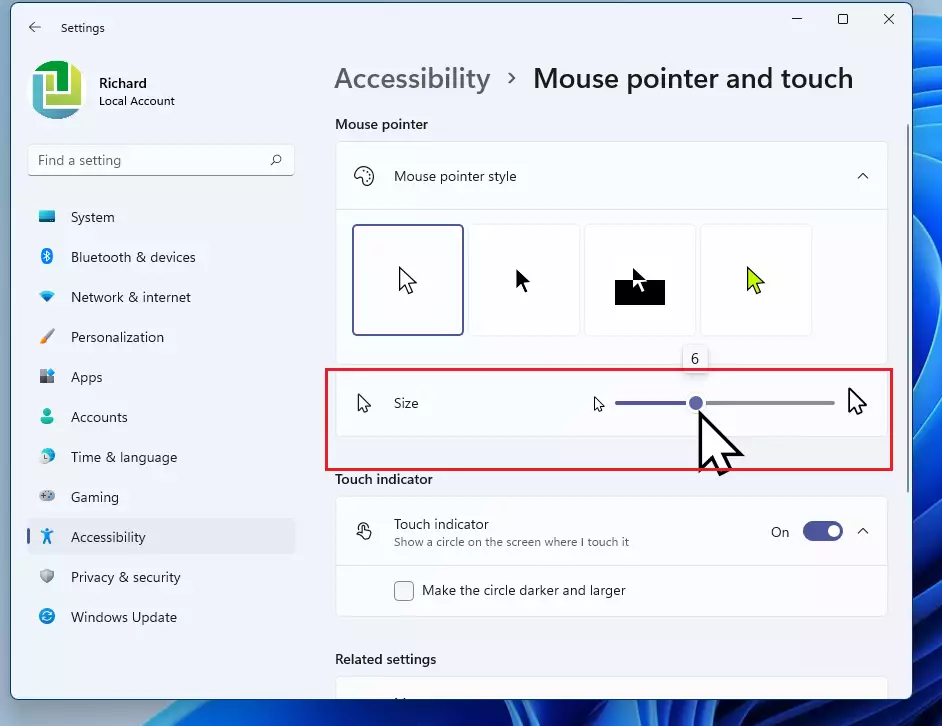
In the mouse settings pane, you can drag the slider under “Mouse pointer style.” The mouse pointer is default set to 1—the smallest size. You can choose a size from 1 to 15, which is very large.
How to change your mouse pointer size in Windows 11
It is easy to change the mouse pointer size and color in Windows 11. This adjustment can assist individuals with poor vision and those who have difficulty seeing small items on the screen.
Follow the steps below to change the pointer.
Windows 11 has a centralized location for the majority of its settings. Everything can be done, from system configurations to creating new users and updating Windows from its System Settings pane.
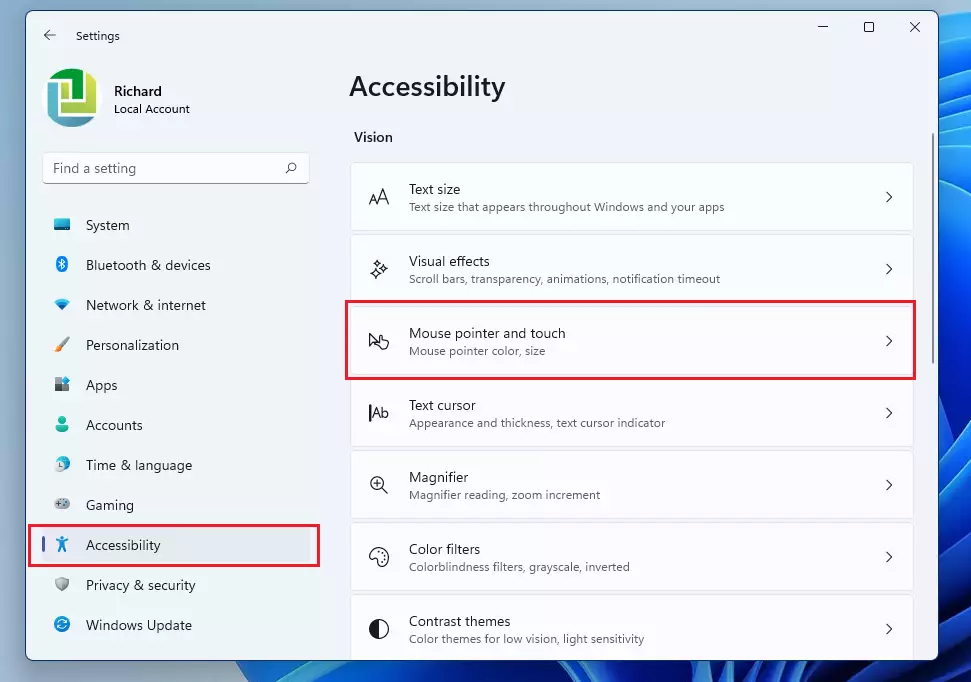
To get to System Settings, you can use the Windows key + I shortcut or click on Start ==> Settings, as shown in the image below:

Alternatively, you can use the search box on the taskbar to search for Settings. Then select to open it.
In Windows Settings, click on Accessibility, select Mouse pointer, and tap on the right pane of your screen as shown in the image below.
You can not only change the size of the pointer but also adjust its color if it is too small to see on the screen. Increasing its size and adding color can significantly assist individuals with poor vision.
Drag the slider under “Mouse pointer style.” The mouse pointer is default set to 1—the smallest size. You can choose a size from 1 to 15, being very large.
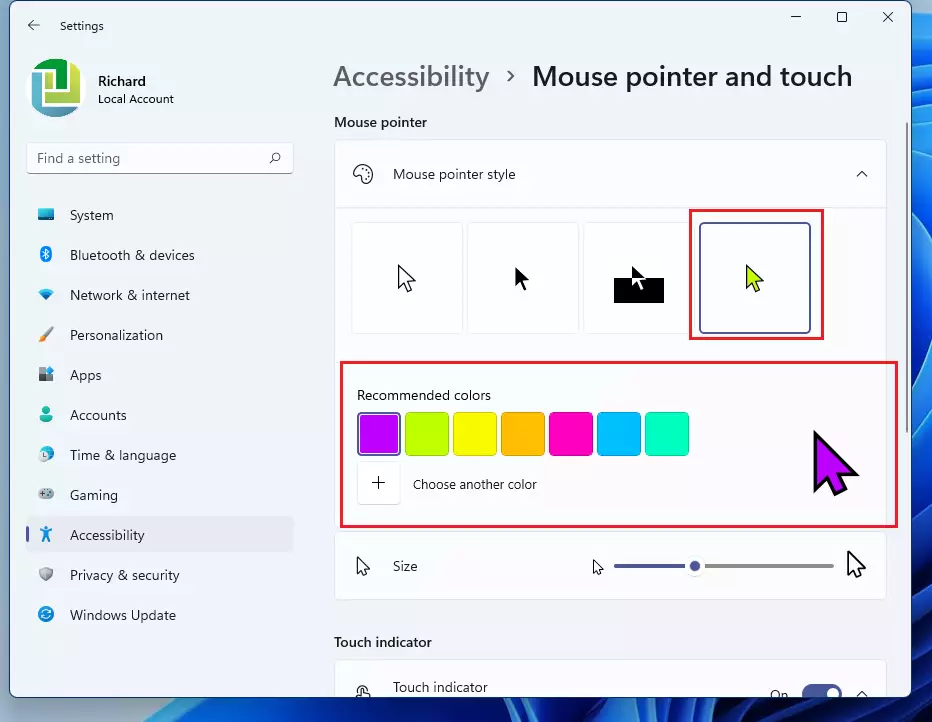
You can also change the color of the mouse pointer to make it easy to see. On the Mouse pointer and touch settings pane, select the Custom color from the selection provider. Then, choose a color for the pointer that better matches your situation.
- The first tile is the default white mouse pointer with a black border.
- The second tile is a black pointer with a white border.
- The third tile is an inverted pointer, which changes to white on a black background and vice verse.
- The fourth is a Custom color tile that allows you to change the pointer to any color.
Changes you make here are automatically applied in real time. Simply exit from the settings pane when you’re done.
That’s it!
Conclusion:
- Changing the mouse pointer size and color in Windows 11 can significantly enhance visibility for users with vision impairments.
- The process is straightforward and can be accomplished through the System Settings pane.
- Users can choose from various sizes (1 to 15) to suit their preferences and needs.
- The option to customize the pointer’s color provides additional assistance in making the pointer more noticeable.
- Real-time changes allow users to preview their adjustments immediately.
- Enhancing mouse pointer visibility is a simple yet effective way to improve user experience and accessibility in Windows 11.

Leave a Reply