How to Apply a Restore Point from Within Windows 11 PC
You can apply a Windows 11 restore point directly from within the operating system to revert your PC to a previous stable state.
System Restore acts like a time machine for your computer, capturing snapshots of your system files, installed applications, Windows Registry, and system settings. These snapshots are called restore points.
If a recent software installation, driver update, or system setting change causes problems on your PC, you can use a restore point created before these changes occurred to undo them. This can often fix issues without affecting your personal files like photos and documents.
For example, if a new driver update in Windows 11 causes your graphics card to malfunction, applying a restore point from before the update can resolve the issue.
Open System Restore by typing “Control Panel,” then “Recovery,” or by running “rstrui.exe.” Choose “Restore system files and settings,” select a restore point by date, scan for affected programs, and click “Finish” to restart your PC.
Applying a Restore Point from Within Windows
When your computer can still start up and you can get into Windows, this is the usual way to use System Restore. It’s like having an “undo” button for your computer.
Step 1Getting to System Restore
You can open System Restore in Windows 11 using either the Control Panel or a quick Run command shortcut.
- The Control Panel Way: Click the Start button (the Windows logo in the corner). Type “ Control Panel” and select it when it appears. In the Control Panel, look for “Recovery” and click it. Then, you’ll see an option to “Open System Restore.” Click that.
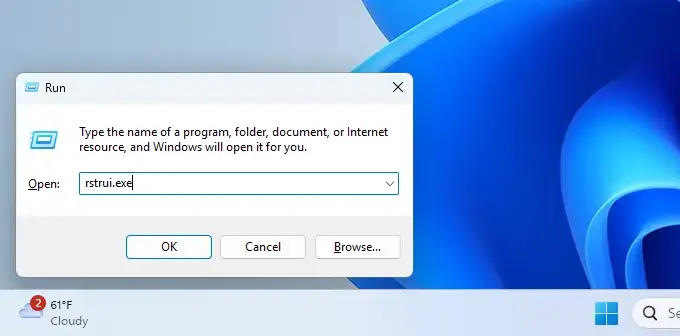
- The Run Command Shortcut: This is a fast one! Press the Windows key and the R key on your keyboard together. This opens a small box called “Run.” In the box, type
rstrui.exeand press Enter or click “OK.”
Step 2Starting the Restore
When the System Restore window opens, you’ll see a welcome message. Look for the option that says “restore your system files and settings.” Click the “Next” button to continue.
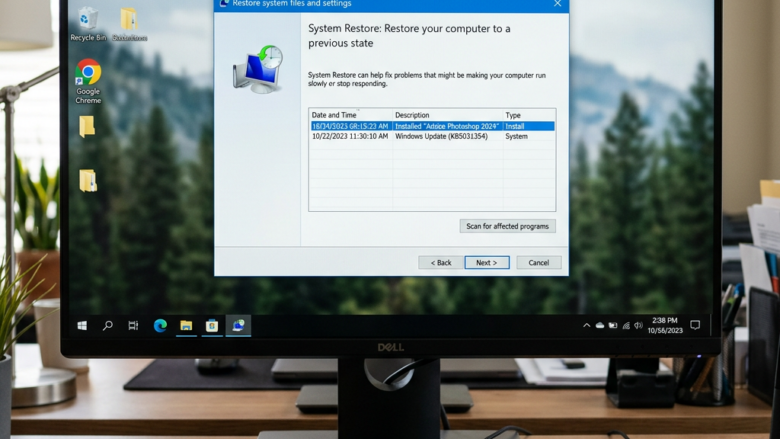
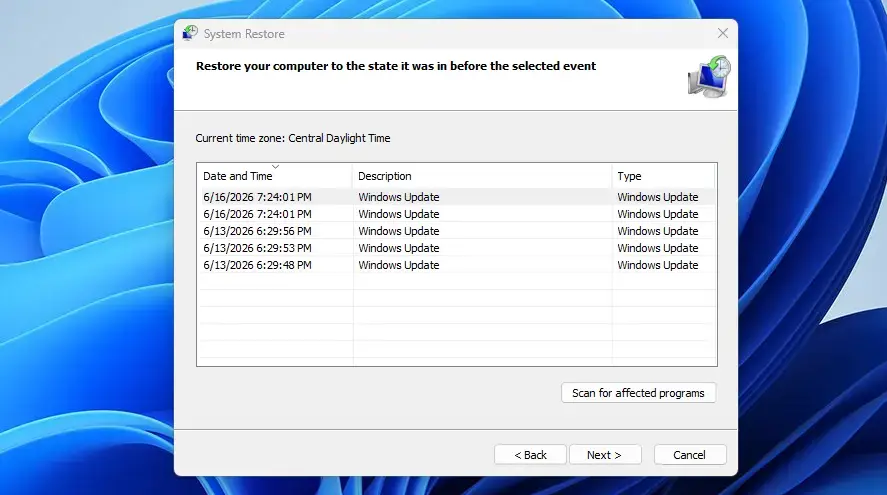
Step 3Picking Your Restore Point
You’ll choose your restore point from a list showing dates, times, and notes about what happened when it was saved.
- Check for Affected Programs: Before you decide, there’s a very helpful option called “Scan for affected programs.” We really suggest clicking this! It will show you which programs and drivers will be removed and which ones might be put back because they were installed after the restore point you’re thinking of using. This helps you avoid losing something important you installed recently.
- See More Options: If you don’t see a restore point that looks right, check the box that says “Show more restore points.” Sometimes Windows hides older ones, but they might be exactly what you need.
Warning: System Restore removes programs, drivers, and updates installed after your chosen restore point. Your personal files like documents, music, or pictures remain untouched. Still, it’s wise to back up your important data before making major system changes, just in case.
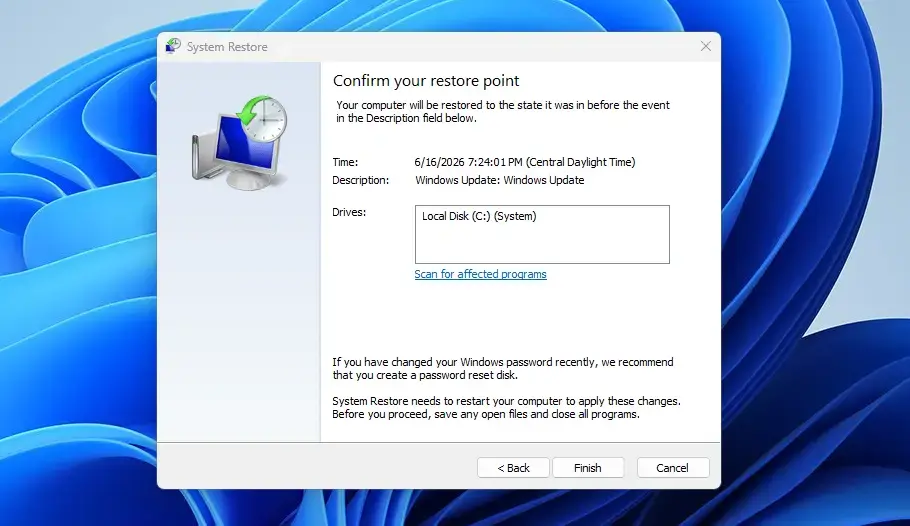
Step 4Confirming and Finishing
After you find the best restore point and check the affected programs, click on the restore point you want to use. Then, click “Next.”
You’ll see a final screen showing your choice. Make sure it’s the correct restore point. When you’re ready, click the “Finish” button.
Step 5The Restart
Windows will restart your computer to apply the restore point, which can take some time, so don’t turn it off.
When it’s done, Windows will start up, and you should see a message saying if System Restore worked. If it did, your PC should be back to how it was when that restore point was created, and hopefully, the problem you had will be fixed!
Reference:
https://support.microsoft.com/en-us/windows/system-restore-a5ae3ed9-07c4-fd56-45ee-096777ecd14e
Summary
System Restore in Windows 11 lets you go back to an earlier time to fix problems caused by new software or updates, without losing your personal files.
How do I go to the restore point in 🪟 Windows 11?
To access restore points in Windows 11, open System Restore via the Control Panel or by typing 'rstrui.exe' into the Run command. This tool allows you to select a previously created restore point to revert your system to an earlier state.
How do I restore my 🪟 Windows 11 computer to an earlier date?
To restore your Windows 11 computer to an earlier date, open System Restore. Select 'Choose a different restore point' and click 'Next'. Choose a restore point dated before the issue occurred, then follow the on-screen prompts to complete the restoration process.
Does 🪟 Windows 11 still have restore points?
Yes, Windows 11 still features restore points through the System Restore utility. This feature allows you to revert your PC's system files, installed applications, and registry to a previous state, effectively acting as a time machine for your computer.
Can you restore 🪟 Windows 11 to a previous point?
Absolutely. Windows 11 allows you to restore your computer to a previous point using the System Restore feature. This is ideal for undoing recent changes like software installations or driver updates that may have caused system instability or problems.
Was this guide helpful?

About the Author
Richard
Tech Writer, IT Professional
Richard, a writer for Geek Rewind, is a tech enthusiast who loves breaking down complex IT topics into simple, easy-to-understand ideas. With years of hands-on experience in system administration and enterprise IT operations, he’s developed a knack for offering practical tips and solutions. Richard aims to make technology more accessible and actionable. He's deeply committed to the Geek Rewind community, always ready to answer questions and engage in discussions.


No comments yet — be the first to share your thoughts!