Windows 11 Taskbar: What is the Start Feature

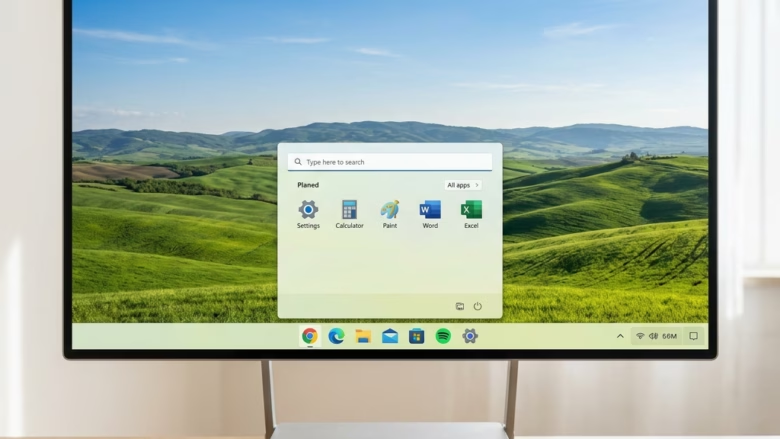
The Windows 11 Taskbar Start feature is a core component that launches your applications, settings, and files.
This central hub, easily recognizable by its prominent Windows logo icon on the taskbar, acts as your primary gateway to interacting with your PC. It consolidates access to your most used apps, documents, and system settings.
For instance, when you press the Windows key or click the Start icon, you activate this feature, presenting you with a dynamic menu. Windows 11 redesigned this feature, moving the icon to the center by default, a change from earlier versions like Windows 10.
Understanding the 🪟 Windows 11 Start Feature
So, what is this “Start” thing on your taskbar? In Windows 11, the Start button is your gateway to apps, settings, and files – think of it as your computer’s main menu. Clicking that Windows logo reveals a panel that offers quick access to whatever you need. It’s designed for speed, helping you find things in a flash.
This isn’t just a button; it’s a smart space that adapts to how you use your PC. Microsoft put a lot of thought into making it your central spot. This means you spend less time searching and more time doing. We’ll show you how to use it and make it work for you.

| 1. Widgets | 2. Start | 3. Search | 4. Task view | 5. Applications | 6. System tray |
Step 1Finding and Opening the Start Menu
First, let’s find the Start button. It’s usually in the middle of your taskbar. You can move it if you prefer the old left-aligned look, but we’ll cover that later.
- Action: Look for the Windows logo icon on your taskbar. By default, it’s in the middle, between the search bar and task view icons.
- Action: Click the Windows logo.
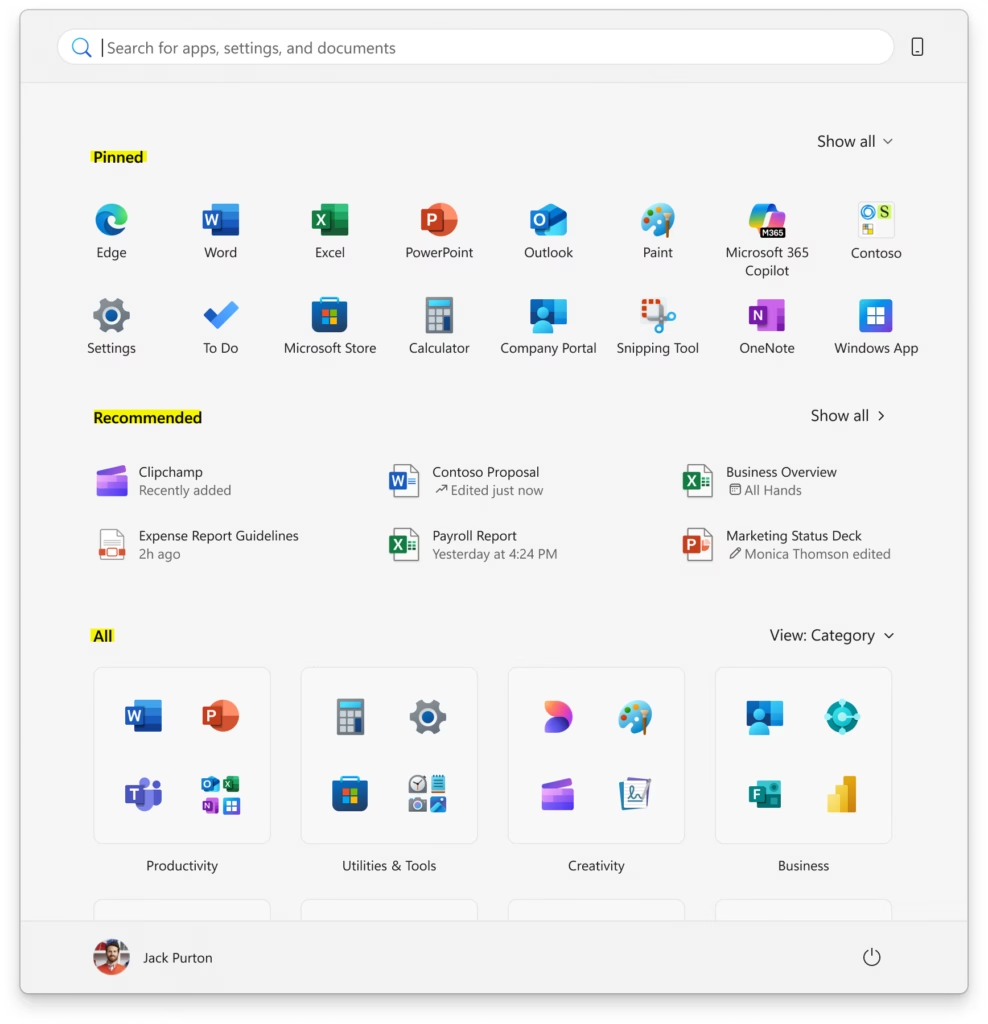
Explanation: The Start menu appears! You’ll see a few main areas: “Pinned” apps at the top, then “All apps,” and a “Recommended” section for recent items.
Step 2Looking at Pinned Apps
At the top of your Start menu is the “Pinned” section. This is where your most-used apps live, ready to go.
- Action: Look at the top part of the Start menu.
Explanation: These are the apps you chose to keep front and center. Think of it as your app speed dial. You might see icons for web browsers, File Explorer, or your email.
- Action: Click on any app icon in the Pinned section. Explanation: The app will open right away. No need to search through menus – it’s right there.
Step 3Managing Your Pinned Apps
The best part of the Pinned section? You’re in control. You can add your go-to apps and ditch the ones you rarely use.
- Action: To pin a new app, open the “All apps” list or find the app using the search bar.
Explanation: Once you find the app, right-click its name or icon.
- Action: From the menu that appears, select “ Pin to Start.”
Explanation: That app will now show up in your Pinned section the next time you open the Start menu. It’s that simple!
- Action: To move your pinned apps around, click and hold an app icon in the Pinned section.
Explanation: Drag it where you want it in the Pinned area, then let go of the mouse button. Your apps will rearrange.
- Action: To remove an app, right-click its icon in the Pinned section of the Start menu.
Explanation: A menu will pop up. Look for the option that says “ Unpin from Start.” Click it.
Step 4Looking Through the “All Apps” List
Need to find an app that isn’t pinned? Use the “All apps” list. It shows every program installed on your computer.
- Action: Below the Pinned apps and Recommended section, click the button that says “All apps.” Explanation: This makes the Start menu show a complete list of all your installed programs. It’s organized from A to Z.
- Action: Scroll through the list or use the alphabet index on the right side.
Explanation: You can jump to a specific letter by clicking it in the alphabet index. For example, clicking “P” takes you to apps starting with P.
- Action: When you find the app you want, click on it.
Explanation: Just like with pinned apps, clicking an app in the “All apps” list will open it right away.
Step 5Using the Recommended Section
Windows 11 tries to be helpful, showing recently opened files and apps in the “Recommended” section, right below your Pinned items.
- Action: Look at the area below your Pinned apps.
Explanation: This section shows shortcuts to files you recently worked on and apps you recently opened. It’s designed to save you time by showing you what you were just using.
- Action: Click on a file or app in the Recommended section.
Explanation: If it’s a file, it will open in its usual program. If it’s an app, it will start. It’s a direct link to your recent computer activity.
- Action: To clear items from the Recommended section, right-click on a specific item.
Explanation: You’ll see an option to “Remove from list.” This clears that one item. If you want to clear everything, you can change settings for recent items. You can find this in Settings > Personalization > Start.
Step 6Accessing User Account Options
The Start menu is also for your user account. It’s like your personal control panel.
- Action: Look at the bottom-left corner of the Start menu panel.
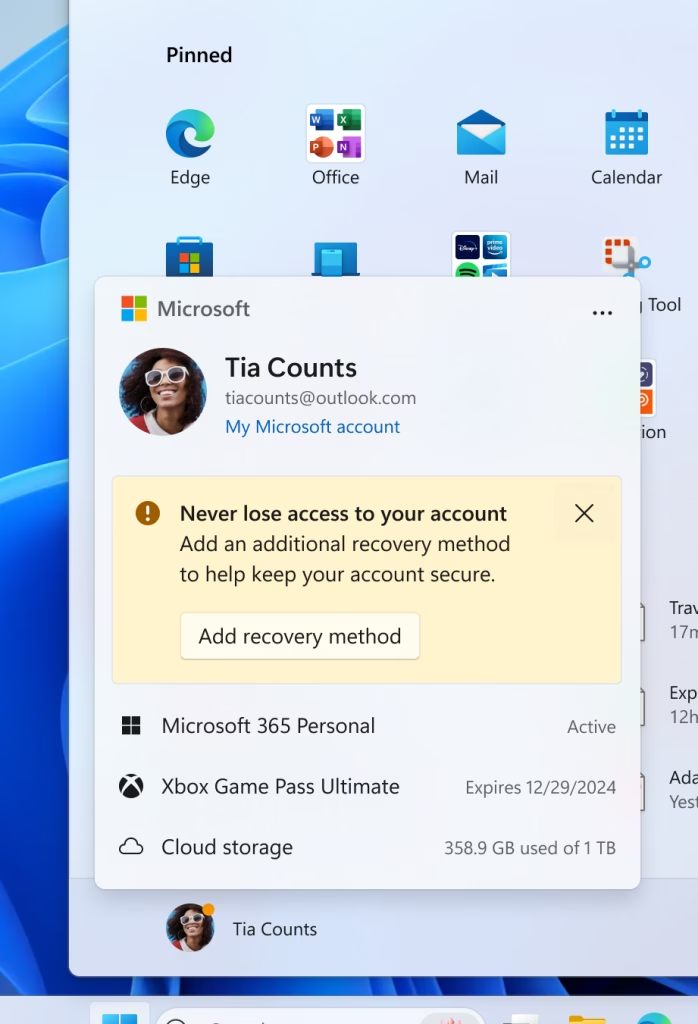
Explanation: You’ll see your user account picture or icon here. Clicking it opens a small menu with options for your user profile.
- Action: Click on your user account icon.
Explanation: A menu will appear. It usually has options like “Change account settings,” “Lock,” and “Sign out.”
Reference:
Summary
The Windows 11 Start feature is your main hub for accessing apps, files, and settings. You can pin your favorite apps for quick access, browse all installed programs in the “All apps” list, and quickly reopen recent items from the “Recommended” section. You can also manage your user account options from the Start menu. It’s designed to make using your computer more efficient and faster.
Was this guide helpful?

About the Author
Richard
Tech Writer, IT Professional
Richard, a writer for Geek Rewind, is a tech enthusiast who loves breaking down complex IT topics into simple, easy-to-understand ideas. With years of hands-on experience in system administration and enterprise IT operations, he’s developed a knack for offering practical tips and solutions. Richard aims to make technology more accessible and actionable. He's deeply committed to the Geek Rewind community, always ready to answer questions and engage in discussions.



No comments yet — be the first to share your thoughts!