How to Create Storage Spaces and Volumes in Windows 11
Creating Storage Spaces and volumes in Windows 11 allows you to combine multiple physical hard drives into a single, larger storage pool from which you can create virtual drives.
Storage Spaces is a native Windows feature designed to protect your data by pooling drives together, offering resilience against drive failure.
This pooling method means if one of the drives in your Storage Space fails, your data remains safe and accessible on the remaining drives.
You can set up Storage Spaces with as few as two physical disks to leverage its redundancy features.
What Is Storage Spaces?
Storage Spaces groups two or more drives into a single storage pool. You can then create virtual drives from that pool. These virtual drives spread your data across several disks. If one drive breaks, your data remains safe on the other drives.
Steps to Create Storage Spaces and Volumes in 🪟 Windows 11
Before you start: You need at least two separate drives. They can be internal or external, but they must be separate disks.
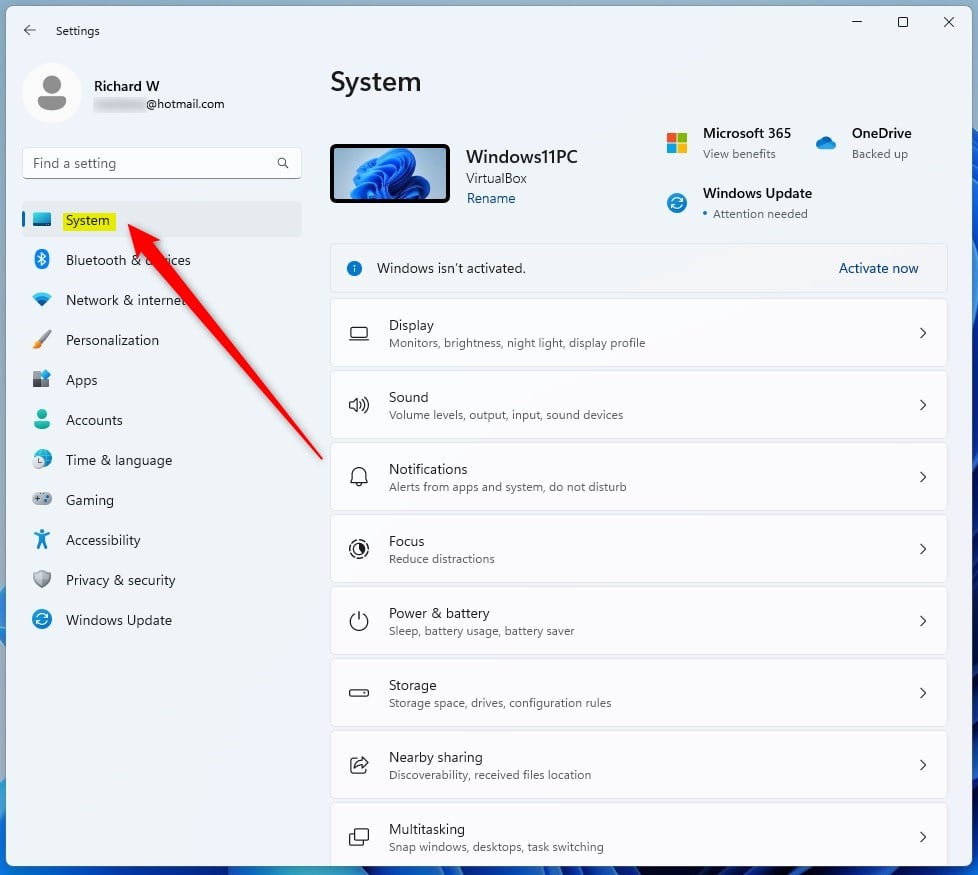
Step 1Open Windows Settings
Click the Start button. Then select Settings.

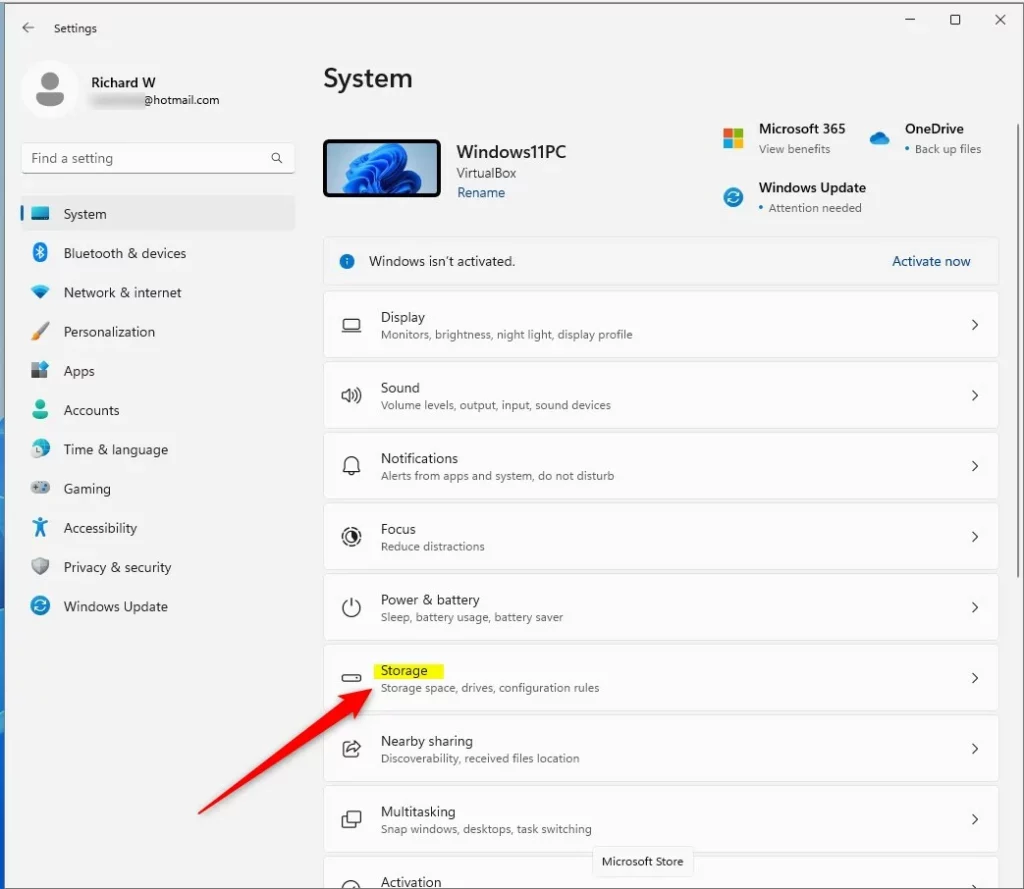
Step 2Go to System > Storage
In the Settings window, click System on the left side. Then click Storage on the right.
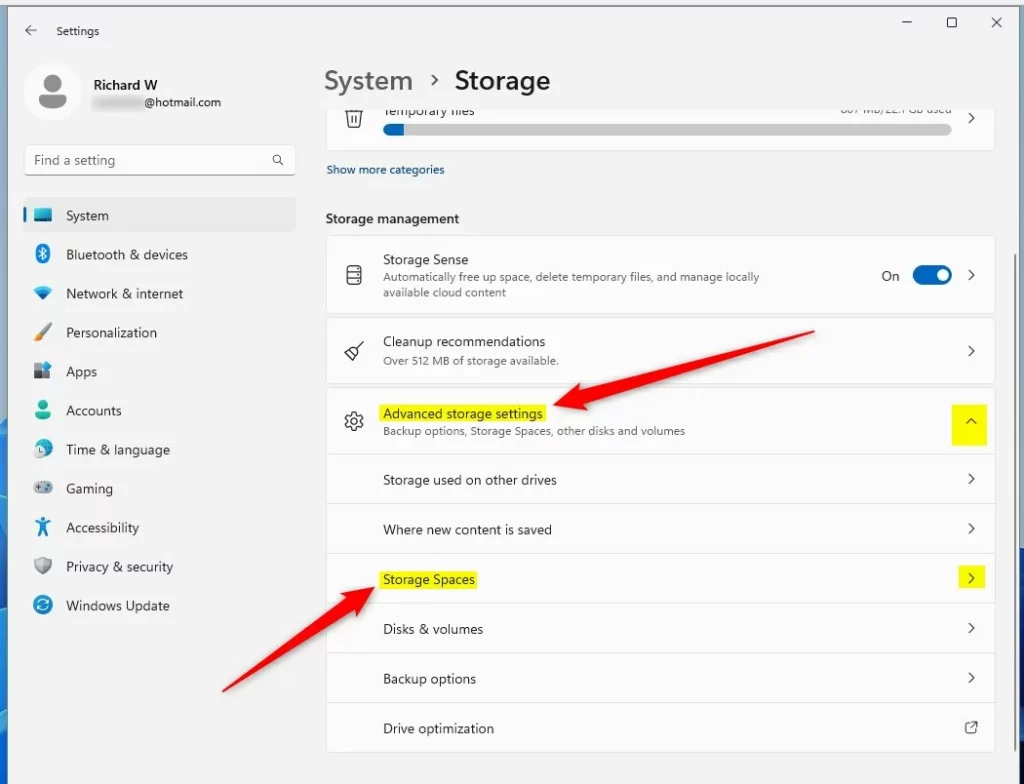
Step 3Open Advanced Storage Settings
Scroll down and click Advanced storage settings. Then select Storage Spaces.
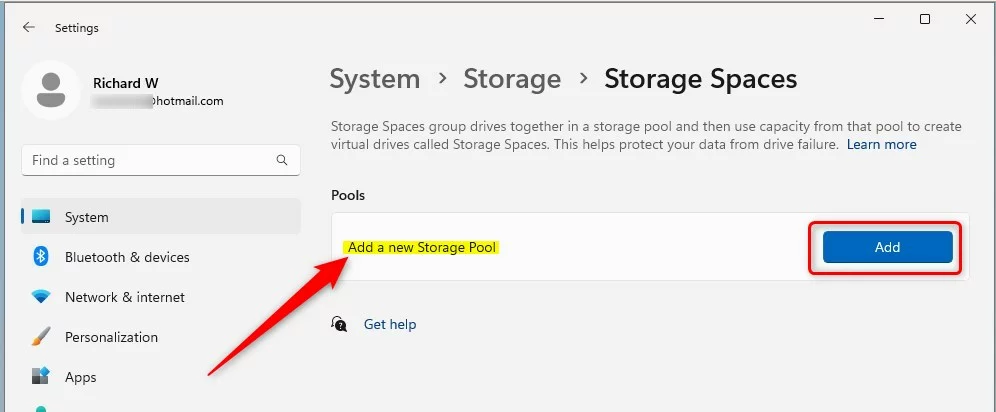
Step 4Create a New Storage Pool
Click the Add button under “Add a new Storage Pool”.
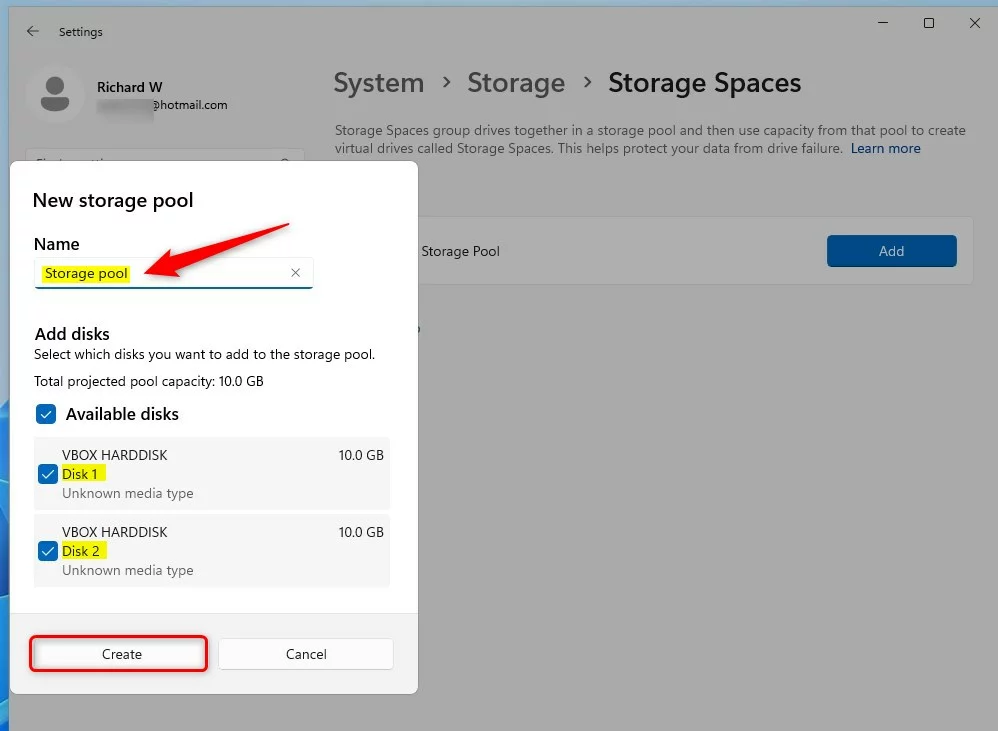
Step 5Name Your Storage Pool and Select Drives
Type a name for your storage pool (like “MyStoragePool”). Then select the drives you want to include. Click Create when done.
Step 6Choose Storage Space Size and Protection Type
Pick how big you want your virtual drive to be. Then choose a resiliency option. This decides how your data is protected:
- Simple: No protection. Just combines space. Needs at least 2 drives.
- Two-way mirror: Keeps a copy of your data on two drives. Protects if 1 drive fails. Needs at least 2 drives.
- Three-way mirror: Keeps 3 copies of your data. Protects if 2 drives fail. Needs 5 or more drives.
- Parity: Balances protection and storage space. Needs 3 or more drives.
- Dual parity: Better protection. Can handle 2 drive failures. Needs 7 or more drives.

Click Create to continue.
Step 7Set Volume Name, Drive Letter, and Format ⚠️ Requires Admin
Give your new virtual drive a name (Label). Pick a drive letter. Choose the format:
- NTFS: Best for Windows drives.
- FAT32: Compatible with many devices but limited file size.
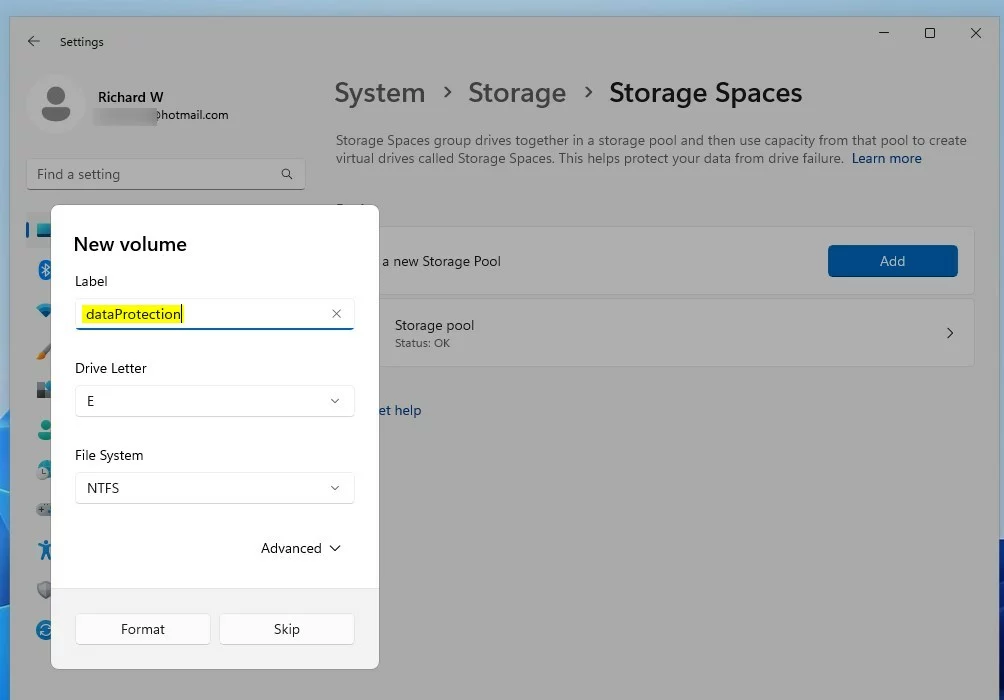
Click Format to finish creating the volume.
Step 8Access Your New Drive
After formatting, your new virtual drive will appear in File Explorer like any other drive.

Summary
- Storage Spaces lets you combine multiple drives into one big storage pool.
- You can create virtual drives (volumes) that keep your data safe even if a drive fails.
- Different protection (resiliency) options let you choose how your data is backed up.
- Follow the steps above to create your own Storage Spaces and keep your data safer.
If you have questions or tips about Storage Spaces, feel free to leave a comment below!
Was this guide helpful?

About the Author
Richard
Tech Writer, IT Professional
Richard, a writer for Geek Rewind, is a tech enthusiast who loves breaking down complex IT topics into simple, easy-to-understand ideas. With years of hands-on experience in system administration and enterprise IT operations, he’s developed a knack for offering practical tips and solutions. Richard aims to make technology more accessible and actionable. He's deeply committed to the Geek Rewind community, always ready to answer questions and engage in discussions.


No comments yet — be the first to share your thoughts!